Assembling the Stand 

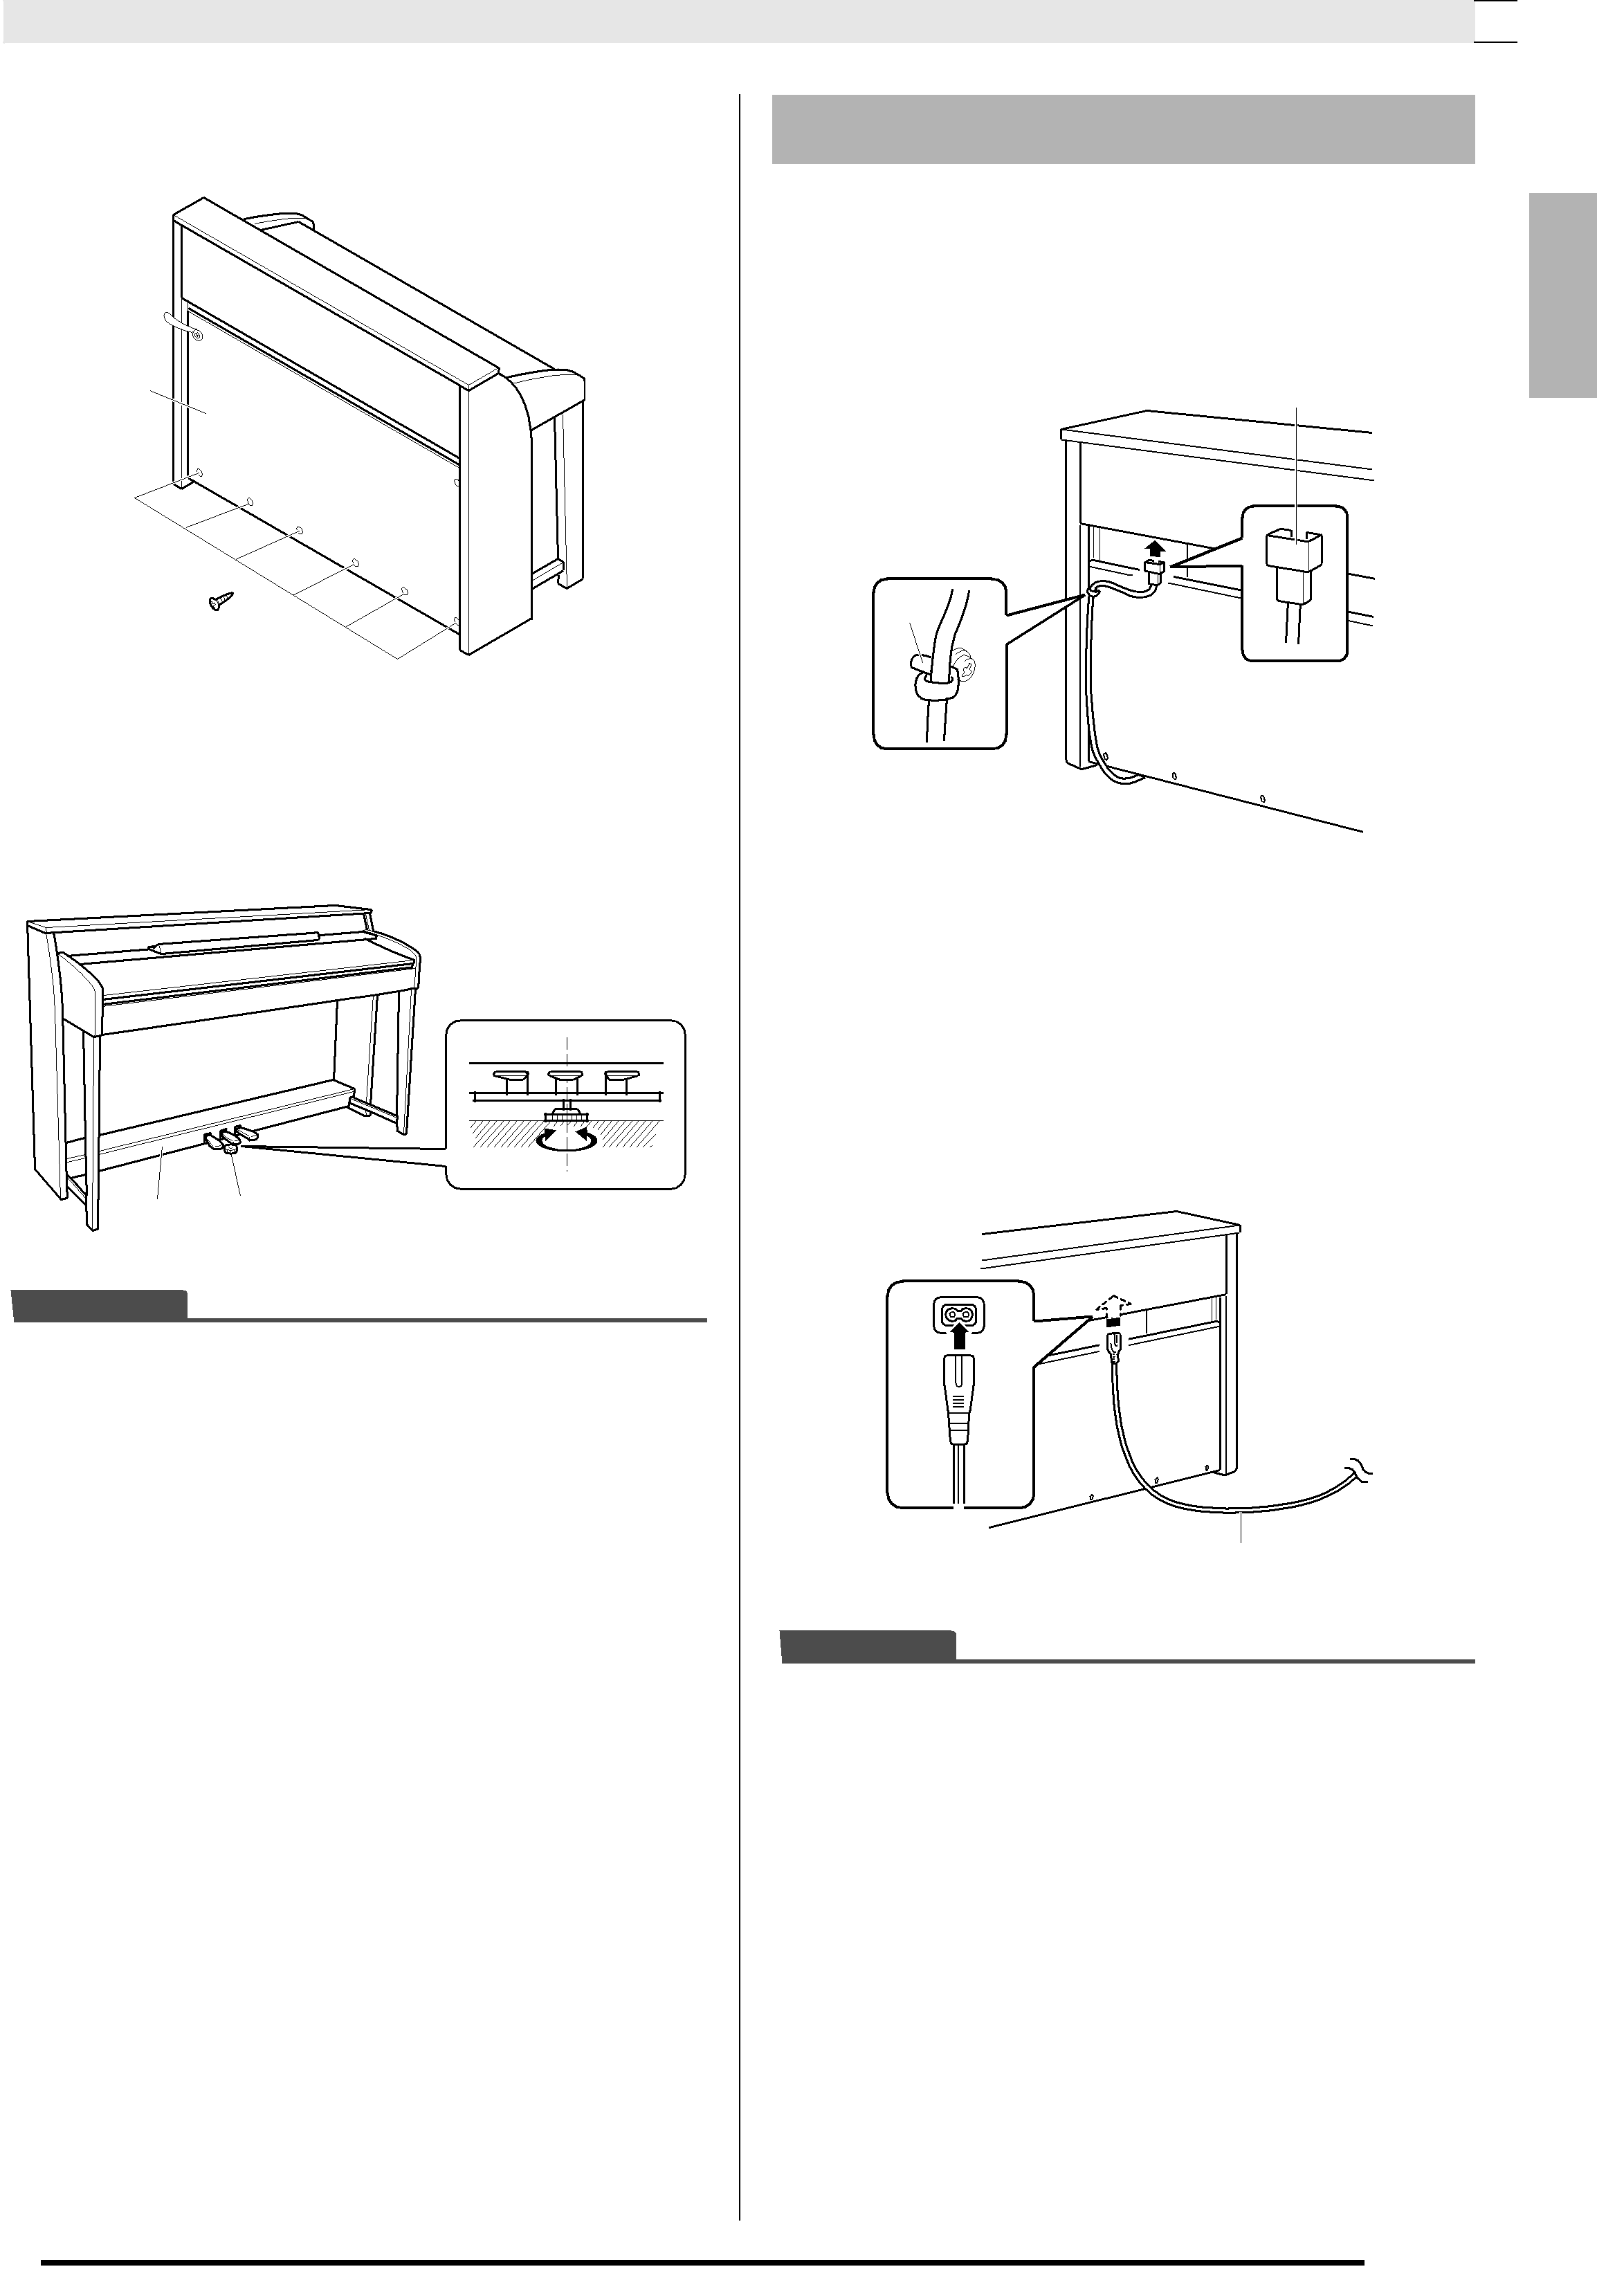
9. Next, secure the bottom of the back panel with the six screws .
C
F

10. Adjust the height adjustment screw to provide support so the crosspiece does not bow downwards when the pedals are pressed.
D9
 IMPORTANT!
•Pressing the pedals without adjusting the height adjustment screw can result in damage to the
crosspiece . Always make sure you adjust the height adjustment screw before operating the pedals.
To connect cables
1. Orienting the pedal plug as shown in the illustration, plug it into the pedal connector on the bottom of the piano.
•Secure the pedal cord with the clip .
Pedal plug
G
2. Check to make sure that the POWER button is in the OFF position (raised). If power is on, press the POWER button to turn it off.
3. Plug the power cord that comes with the Digital Piano into the AC power jack on the bottom of the Digital Piano.*
*applies to the
Power Cord
 IMPORTANT!
•The shape of the power cord plug and household power outlet receptacle differ according to country and geographical area. The illustration shows just one example of the shapes that are available.
•With the
English
B | |
|