| SETUP |
|
|
| SCHEDULE |
| Language |
|
|
|
|
|
|
|
| PROG LIST | |
| Video Setup |
|
|
|
|
| Audio Setup |
|
|
|
|
| System Setup |
|
|
|
|
| Disc Media |
|
|
|
|
| Record Setup |
|
|
|
|
| Schedule |
|
|
|
|
| <SETUP> Exit | <UP/DOWN> Select | |||
<LEFT> Return <ENTER> Confirm selection
Entry | Freq | Start | Length | Source | Quality |
01 | __/__/__ | __:__ | __:__ | ______ | __ |
02 | __/__/__ | __:__ | __:__ | ______ | __ |
03 | __/__/__ | __:__ | __:__ | ______ | __ |
04 | __/__/__ | __:__ | __:__ | ______ | __ |
05 | __/__/__ | __:__ | __:__ | ______ | __ |
06 | __/__/__ | __:__ | __:__ | ______ | __ |
07 | __/__/__ | __:__ | __:__ | ______ | __ |
08 | __/__/__ | __:__ | __:__ | ______ | __ |
|
|
|
|
|
|
Entry | Freq | Start | Length | Source | Quality |
01 | 01/01/00 | 13:15 | 14:00 | AV1 | HQ |
|
|
|
|
|
|
-Press STOP to quit recording. Wait until the recording is completed successfully when the WAIT icon disappears on screen.
-Switch the unit to DVD mode, use active navigation keys to highlight the title you desire and press ENTER or PLAY to start playing the title you selected.
Scheduled Recording
Scheduled Record
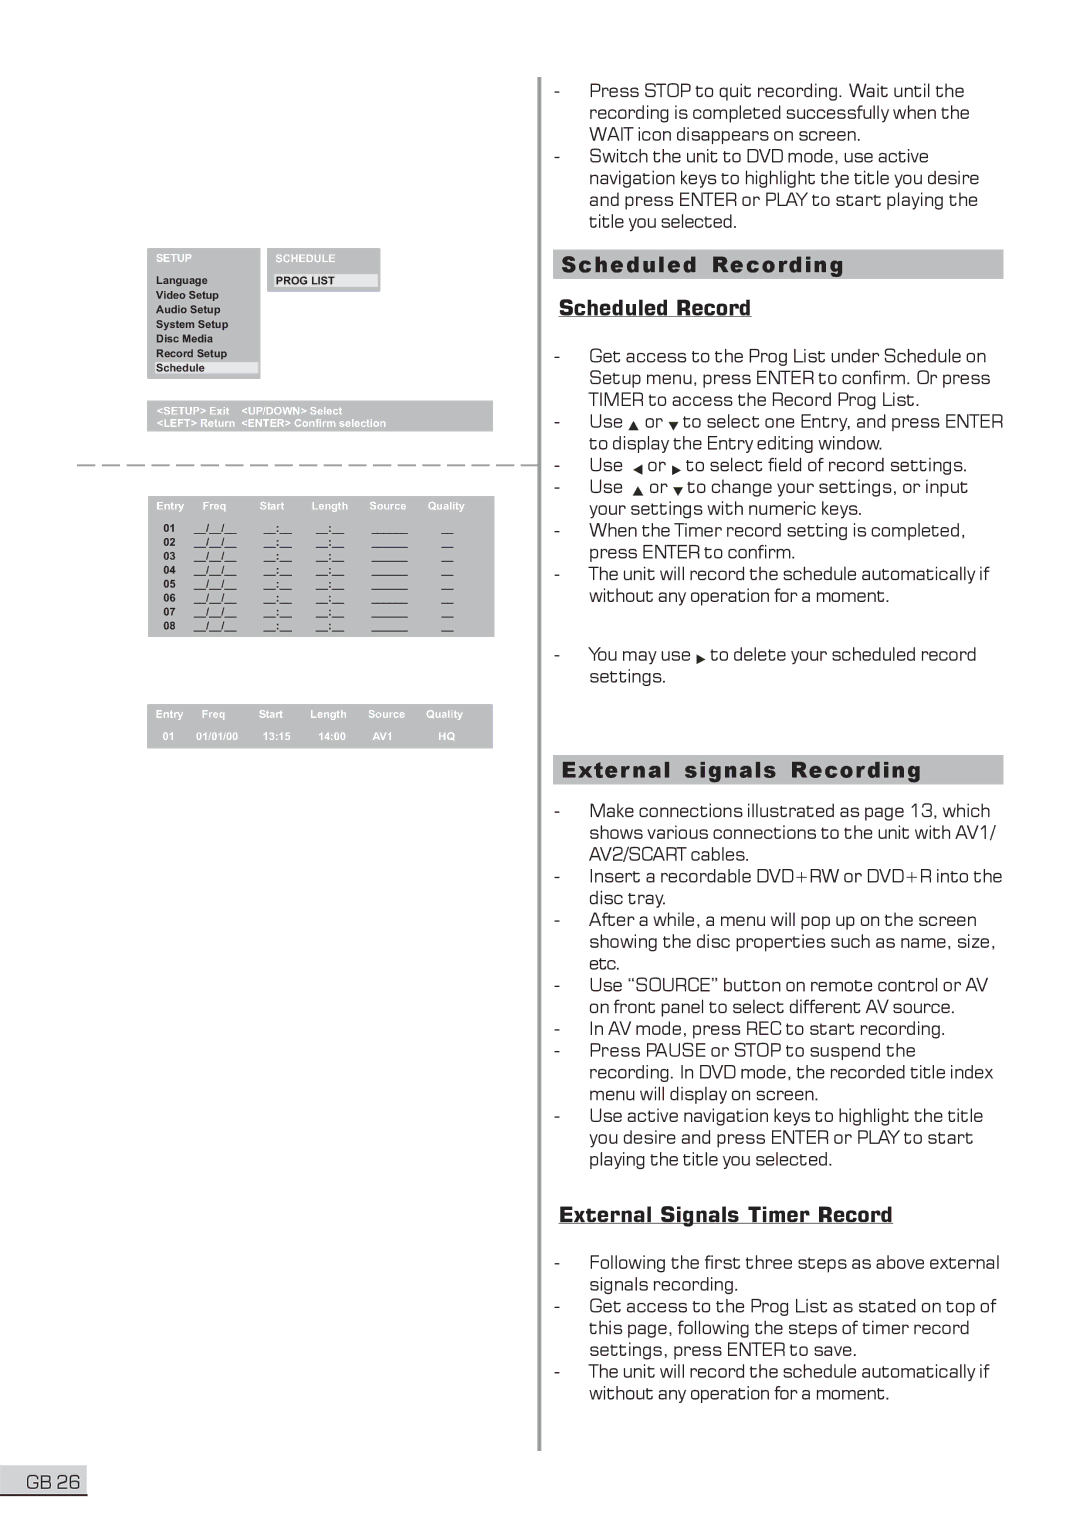
-Get access to the Prog List under Schedule on Setup menu, press ENTER to confirm. Or press TIMER to access the Record Prog List.
-Use ![]() or
or ![]() to select one Entry, and press ENTER to display the Entry editing window.
to select one Entry, and press ENTER to display the Entry editing window.
-Use ![]() or
or ![]() to select field of record settings.
to select field of record settings.
-Use ![]() or
or ![]() to change your settings, or input your settings with numeric keys.
to change your settings, or input your settings with numeric keys.
-When the Timer record setting is completed, press ENTER to confirm.
-The unit will record the schedule automatically if without any operation for a moment.
-You may use ![]() to delete your scheduled record settings.
to delete your scheduled record settings.
External signals Recording
-Make connections illustrated as page 13, which shows various connections to the unit with AV1/ AV2/SCART cables.
-Insert a recordable DVD+RW or DVD+R into the disc tray.
-After a while, a menu will pop up on the screen showing the disc properties such as name, size, etc.
-Use “SOURCE” button on remote control or AV on front panel to select different AV source.
-In AV mode, press REC to start recording.
-Press PAUSE or STOP to suspend the recording. In DVD mode, the recorded title index menu will display on screen.
-Use active navigation keys to highlight the title you desire and press ENTER or PLAY to start playing the title you selected.
External Signals Timer Record
-Following the first three steps as above external signals recording.
-Get access to the Prog List as stated on top of this page, following the steps of timer record settings, press ENTER to save.
-The unit will record the schedule automatically if without any operation for a moment.
GB 26
