Replacing the Fan Tray
Removing the Fan Tray
Warning When removing the fan tray, keep your hands and fingers away from the spinning fan blades. Let the fan blades completely stop before you remove the fan tray. Statement 258
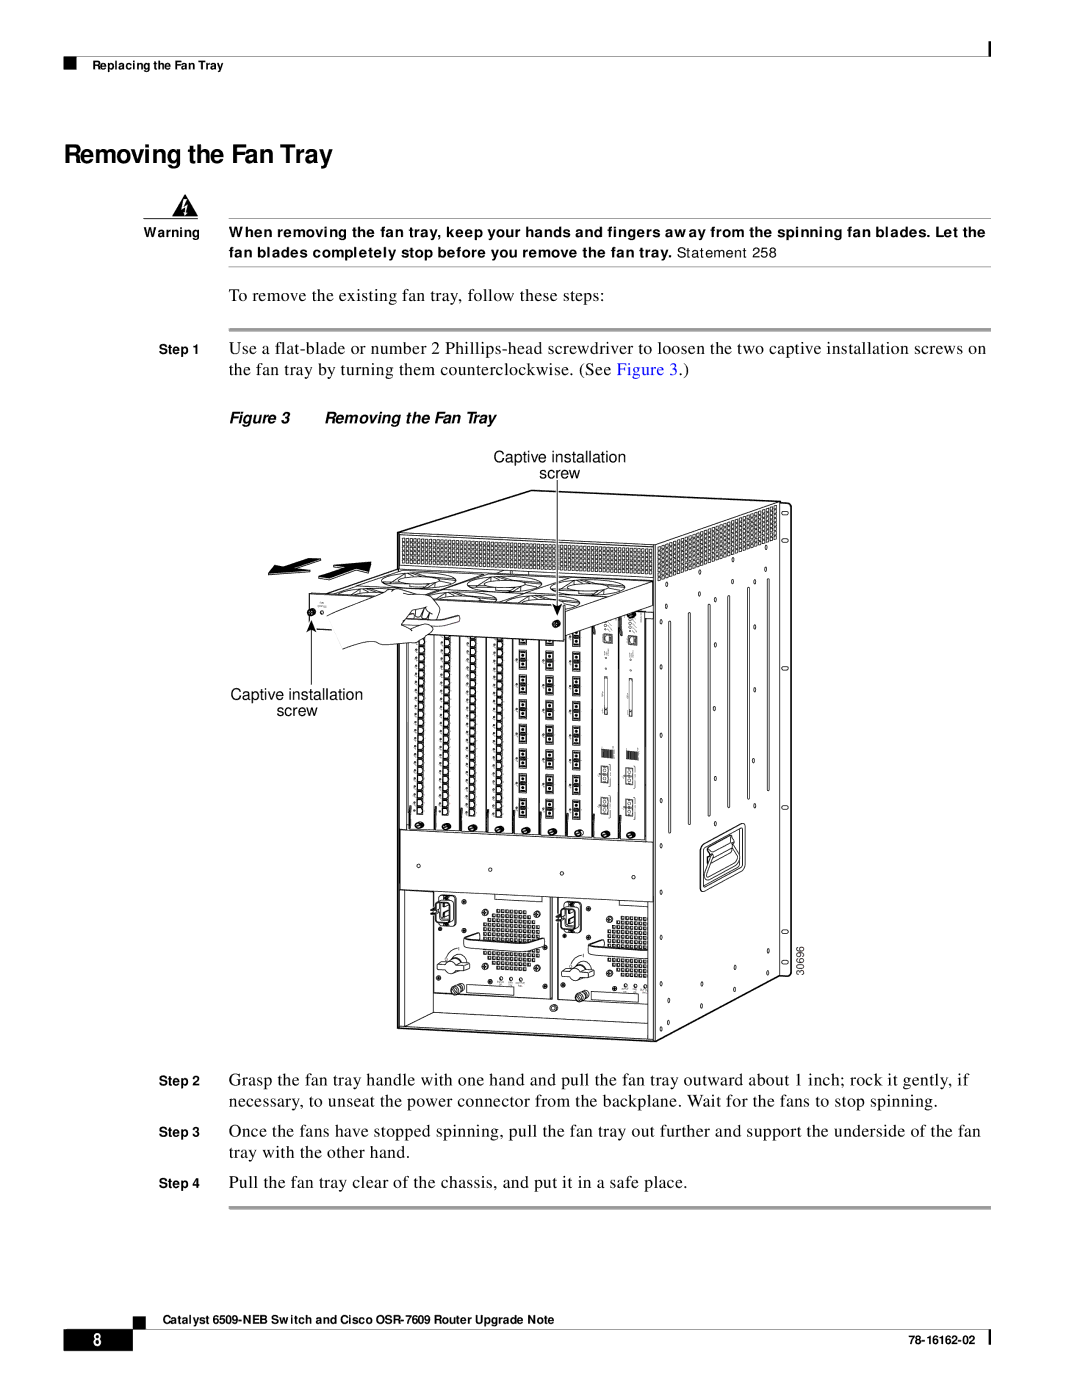
To remove the existing fan tray, follow these steps:
Step 1 Use a
Figure 3 Removing the Fan Tray
Captive installation
screw
FAN
STATUS
Captive installation
screw
- - | SYSTEM | |
| STATUS |
|
CONSOLE | CONSOLE |
|
PWR |
| |
MGMT | PWR |
|
RESET | MGMT |
|
| RESET |
|
| LINK | LINK | LINK | LINK |
|
| LINK |
|
|
|
|
| |||
| LINK | LINK | LINK | LINK |
|
|
|
|
|
|
|
|
| ||
| LINK | LINK | LINK | LINK |
|
|
|
|
|
|
|
|
| ||
| LINK | LINK | LINK |
| LINK | LINK |
|
|
|
|
| LINK |
| LINK | |
| LINK | LINK | LINK | LINK |
|
|
|
| LINK | LINK | LINK | LINK |
|
|
|
| LINK | LINK | LINK |
| LINK |
|
|
|
| LINK | LINK | LINK | |||
| LINK | LINK | LINK | LINK |
|
|
|
| LINK | LINK | LINK | LINK |
|
|
|
|
|
|
|
|
| ||
| LINK | LINK | LINK | LINK | LINK | LINK |
|
|
|
| LINK | ||||
| LINK | LINK | LINK | LINK |
|
|
|
|
|
|
|
|
| ||
| LINK | LINK | LINK | LINK |
|
|
|
|
|
|
|
|
| ||
| LINK | LINK | LINK |
|
|
|
|
|
|
|
| LINK | LINK | LINK | LINK |
| LINK |
|
|
|
| ||
| LINK | LINK | LINK |
|
|
| |
|
|
|
|
|
| ||
| LINK | LINK | LINK | LINK |
|
|
|
|
|
|
|
|
| ||
| LINK | LINK | LINK |
|
|
|
|
|
|
|
| LINK | LINK | LINK | LINK |
| LINK | LINK | LINK | LINK |
|
|
|
| LINK | LINK | LINK | LINK |
|
|
|
| LINK | LINK | LINK |
|
|
|
|
|
|
|
| LINK | LINK | LINK | LINK |
| LINK | LINK | LINK | LINK |
|
|
|
| LINK | LINK | LINK | LINK |
|
|
|
|
|
|
|
|
| ||
| LINK | LINK | LINK | LINK |
|
|
|
|
|
| LINK | LINK |
| ||
LINK | LINK |
| LINK |
|
| LINK | |
|
| LINK |
|
|
|
o
o![]()
INPUT | FAN OUTPUT |
OK | FAIL |
INPUT | FAN OUTPUT |
OK | FAIL |
30696
Step 2 Grasp the fan tray handle with one hand and pull the fan tray outward about 1 inch; rock it gently, if necessary, to unseat the power connector from the backplane. Wait for the fans to stop spinning.
Step 3 Once the fans have stopped spinning, pull the fan tray out further and support the underside of the fan tray with the other hand.
Step 4 Pull the fan tray clear of the chassis, and put it in a safe place.
Catalyst
8 |
| |
|
