Connect the Router to the Network (continued)
5
I
EN | RX |
| CEL CAR |
![]() E3
E3
ALM
TX
RX
ACT
FE | 0 / 0 | FE | 0 | / 1 |
|
|
|
| E3 |
EN |
| RX |
|
|
| CEL CAR ALM |
|
| |
TX
|
|
|
| AC OK |
|
|
|
| DC OK |
|
|
|
| OTF |
SLOT 0 | SLOT 1 |
|
|
|
|
|
| PWR |
|
|
|
|
| 0 |
| CONS |
| SYS | AC OK |
RX | AUX | RDY | DC OK | |
|
|
|
| OTF |
|
|
|
| 2 |
| 7140 | - 2AE3 | 100- | |
|
|
|
| 240Vac 50/60Hz |
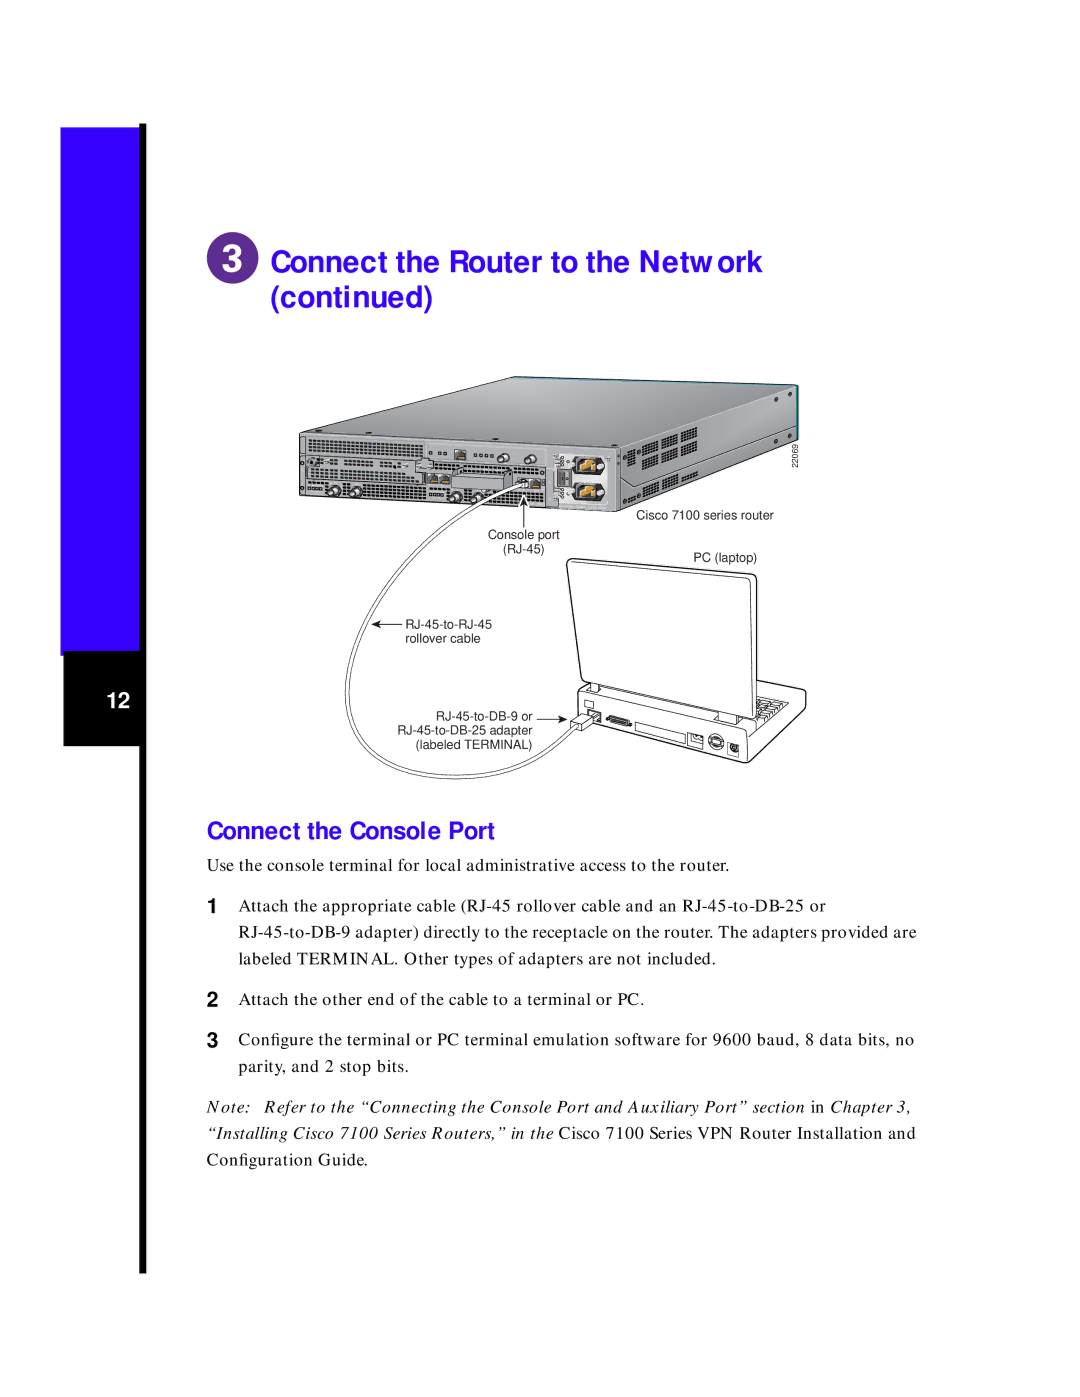
Console port
22069
Cisco 7100 series router
PC (laptop)
12
![]()
![]()
![]()
![]()
![]()
![]()
(labeled TERMINAL)
Connect the Console Port
Use the console terminal for local administrative access to the router.
1 | Attach the appropriate cable |
| |
| labeled TERMINAL. Other types of adapters are not included. |
2 | Attach the other end of the cable to a terminal or PC. |
3 | Configure the terminal or PC terminal emulation software for 9600 baud, 8 data bits, no |
| parity, and 2 stop bits. |
Note: Refer to the “Connecting the Console Port and Auxiliary Port” section in Chapter 3, “Installing Cisco 7100 Series Routers,” in the Cisco 7100 Series VPN Router Installation and Configuration Guide.