Exchanging the EEPROM Devices
Caution The new EEPROM device(s) that shipped on your new card cage are blank.
Note Do not perform these steps if you are upgrading a Cisco 7513 to a Cisco 7576. These instructions apply only to the replacement of an equivalent card cage.
The following procedure requires you to first exchange the blank EEPROM device(s) on your new card cage for the old EEPROM device(s) from your old card cage, and then place the blank EEPROM device(s) on your old card cage for return to Cisco. For this procedure, you need a small piece of masking or cellophane tape to mark the new EEPROM device(s) as blank. The old card cage is assumed to have already been removed from your Cisco 7513, Cisco
To exchange the EEPROM device(s), follow these steps:
Step 1 Attach an ESD preventive wrist strap between you and an unpainted surface of the Cisco 7513, Cisco
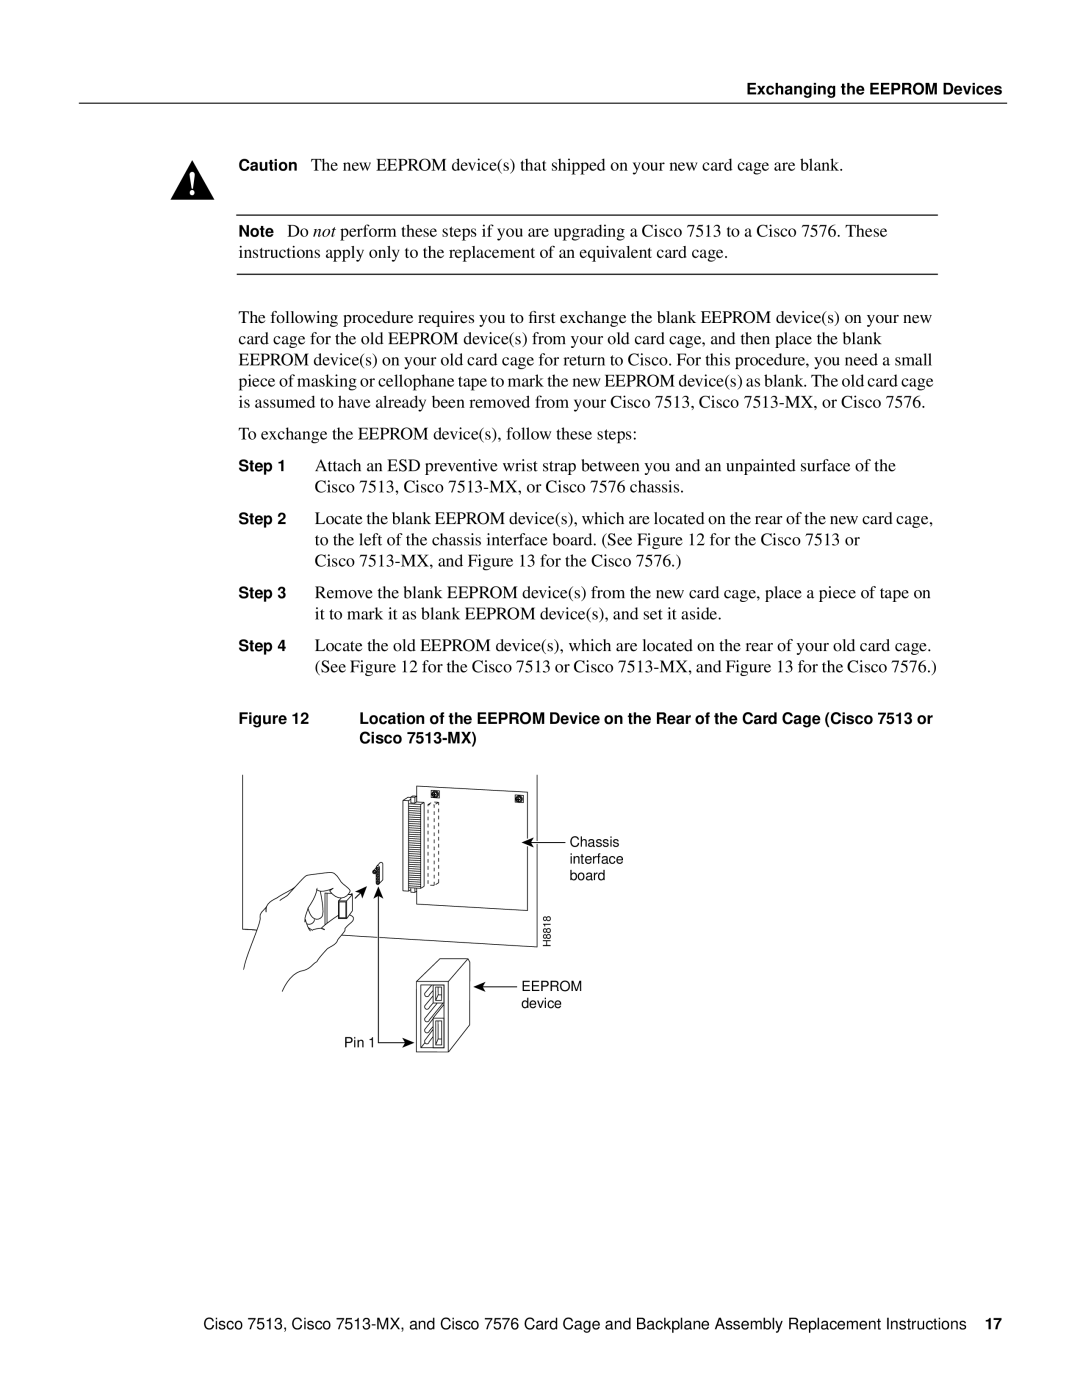
Step 2 Locate the blank EEPROM device(s), which are located on the rear of the new card cage,
to the left of the chassis interface board. (See Figure 12 for the Cisco 7513 or Cisco
Step 3 Remove the blank EEPROM device(s) from the new card cage, place a piece of tape on it to mark it as blank EEPROM device(s), and set it aside.
Step 4 Locate the old EEPROM device(s), which are located on the rear of your old card cage. (See Figure 12 for the Cisco 7513 or Cisco
Figure 12 Location of the EEPROM Device on the Rear of the Card Cage (Cisco 7513 or Cisco 7513-MX)
Pin 1 |
![]() Chassis interface board
Chassis interface board
H8818
![]() EEPROM device
EEPROM device
Cisco 7513, Cisco