Chapter
3 | Getting Sarted Guide |
|
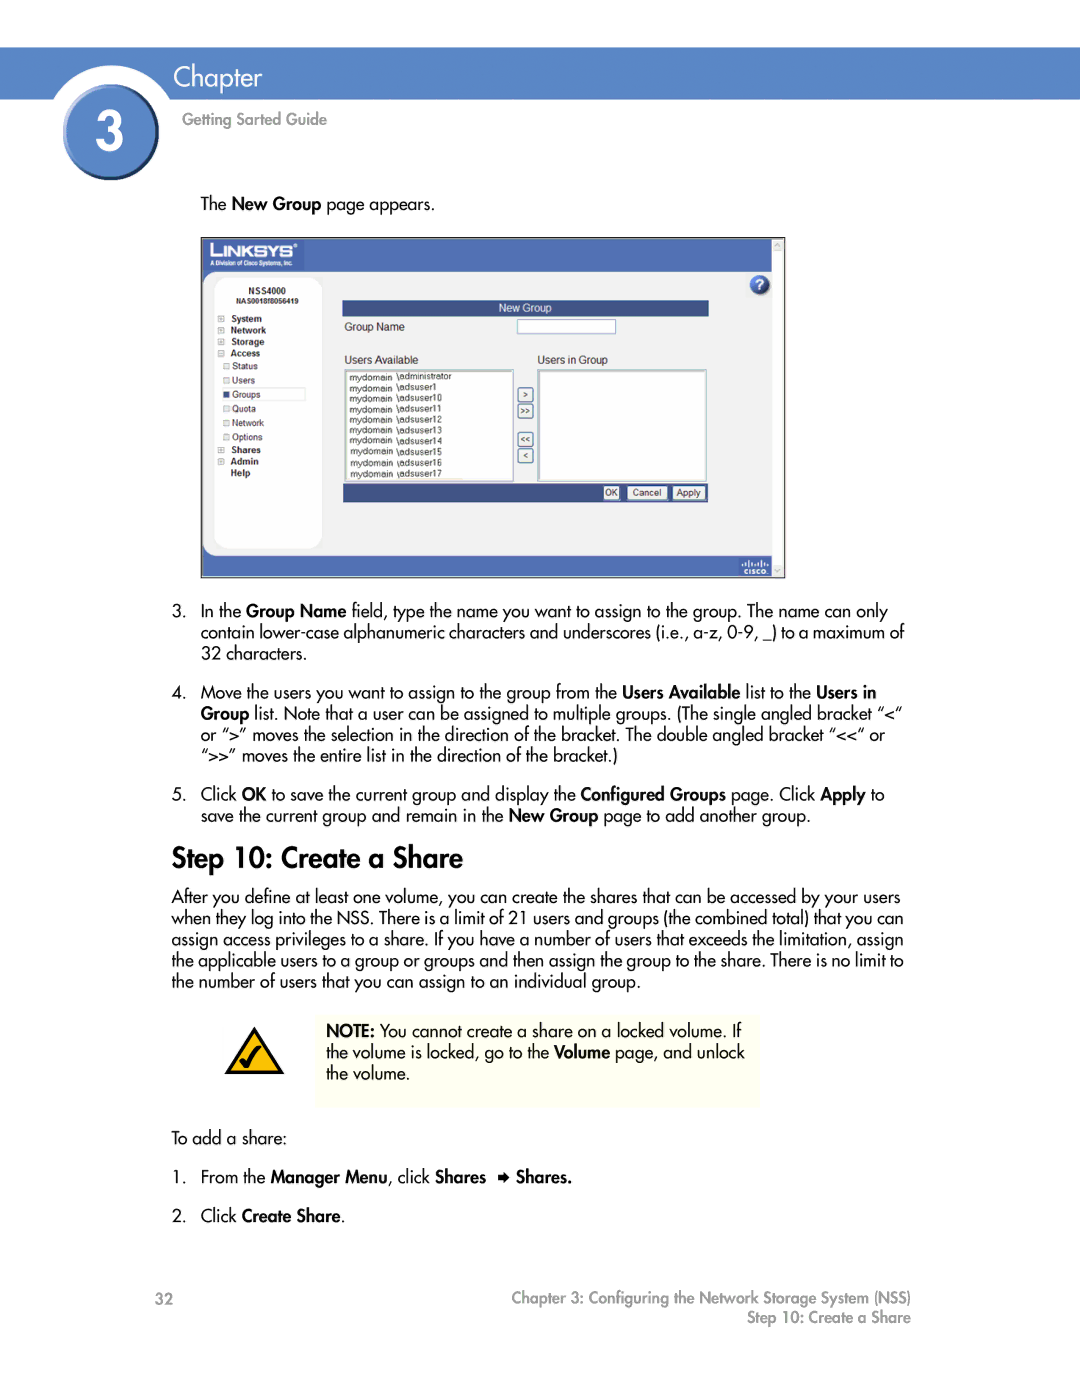
The New Group page appears.
3.In the Group Name field, type the name you want to assign to the group. The name can only contain
4.Move the users you want to assign to the group from the Users Available list to the Users in Group list. Note that a user can be assigned to multiple groups. (The single angled bracket “<“ or “>” moves the selection in the direction of the bracket. The double angled bracket “<<“ or “>>” moves the entire list in the direction of the bracket.)
5.Click OK to save the current group and display the Configured Groups page. Click Apply to save the current group and remain in the New Group page to add another group.
Step 10: Create a Share
After you define at least one volume, you can create the shares that can be accessed by your users when they log into the NSS. There is a limit of 21 users and groups (the combined total) that you can assign access privileges to a share. If you have a number of users that exceeds the limitation, assign the applicable users to a group or groups and then assign the group to the share. There is no limit to the number of users that you can assign to an individual group.
NOTE: You cannot create a share on a locked volume. If the volume is locked, go to the Volume page, and unlock the volume.
To add a share:
1. From the Manager Menu, click Shares Shares.
2.Click Create Share.
32 | Chapter 3: Configuring the Network Storage System (NSS) |
| Step 10: Create a Share |