Chapter
Getting Started Guide | 3 |
|
Step 6: Virtualize Storage within your Network
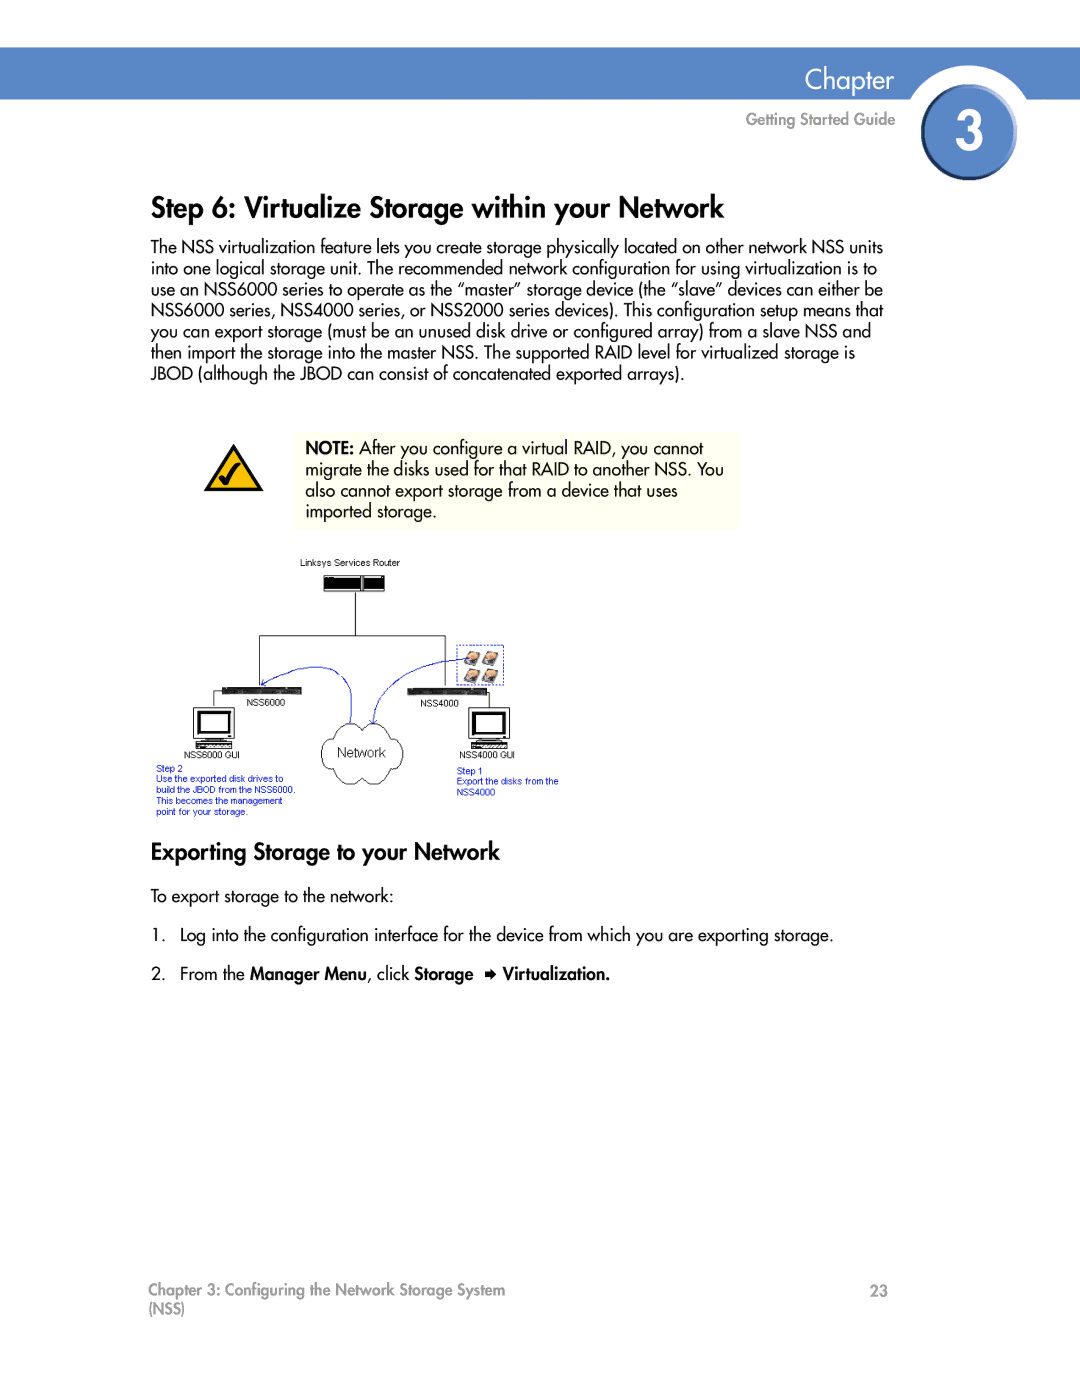
The NSS virtualization feature lets you create storage physically located on other network NSS units into one logical storage unit. The recommended network configuration for using virtualization is to use an NSS6000 series to operate as the “master” storage device (the “slave” devices can either be NSS6000 series, NSS4000 series, or NSS2000 series devices). This configuration setup means that you can export storage (must be an unused disk drive or configured array) from a slave NSS and then import the storage into the master NSS. The supported RAID level for virtualized storage is JBOD (although the JBOD can consist of concatenated exported arrays).
NOTE: After you configure a virtual RAID, you cannot migrate the disks used for that RAID to another NSS. You also cannot export storage from a device that uses imported storage.
Exporting Storage to your Network
To export storage to the network:
1. Log into the configuration interface for the device from which you are exporting storage.
2. From the Manager Menu, click Storage Virtualization.
Chapter 3: Configuring the Network Storage System | 23 |
(NSS) |
|
