Chapter
Getting Started Guide | 3 |
|
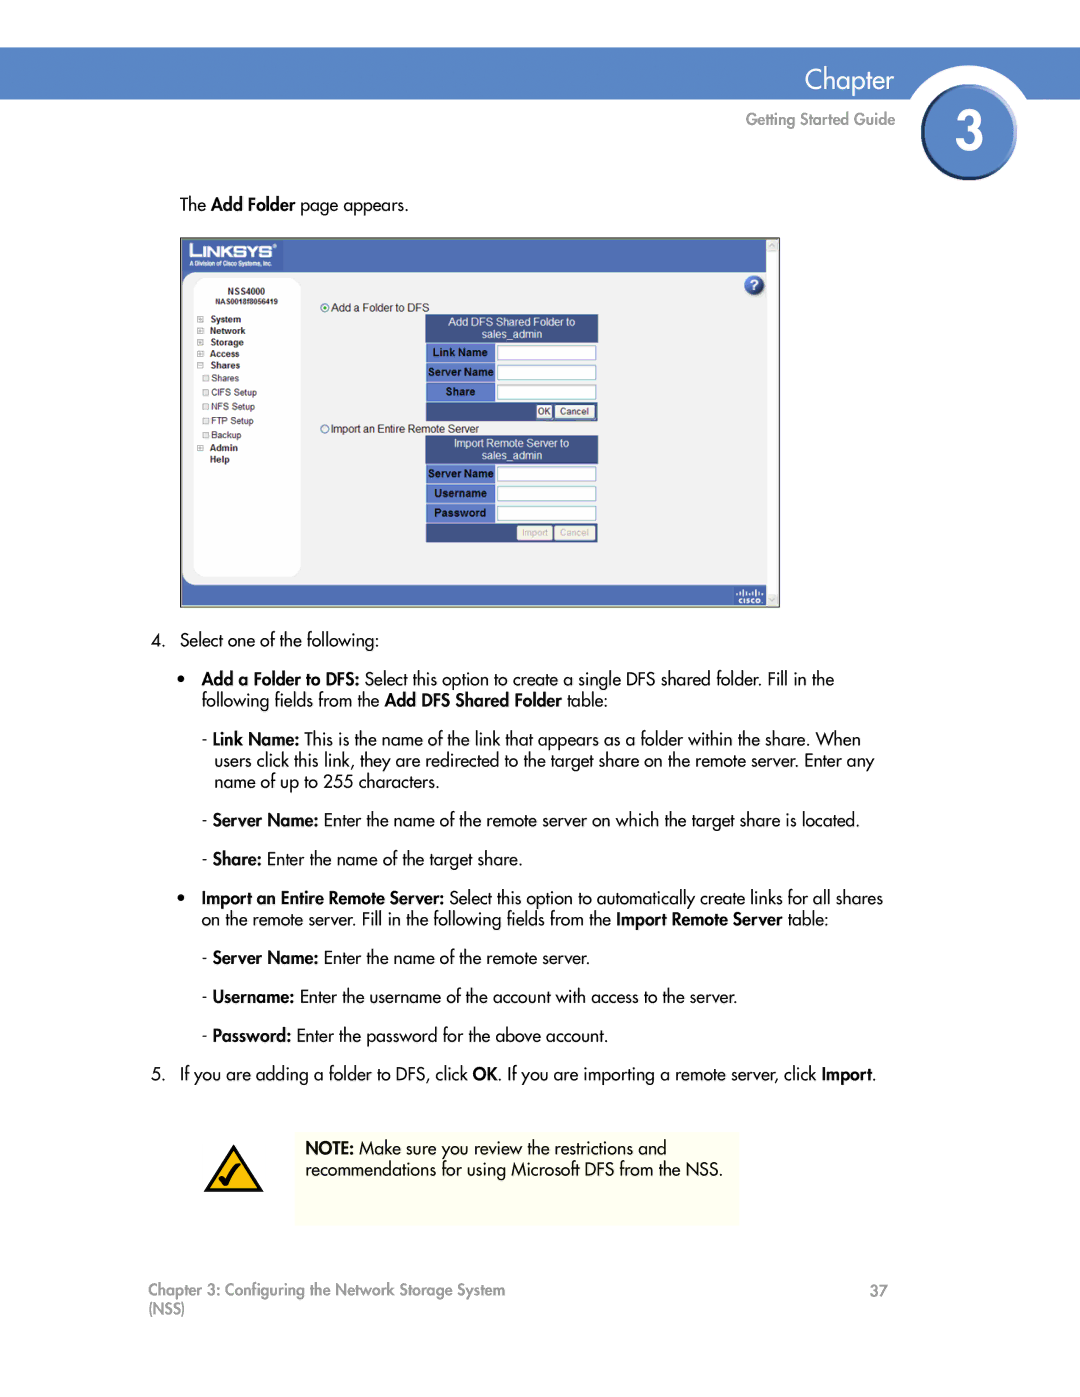
The Add Folder page appears.
4.Select one of the following:
•Add a Folder to DFS: Select this option to create a single DFS shared folder. Fill in the following fields from the Add DFS Shared Folder table:
-Link Name: This is the name of the link that appears as a folder within the share. When users click this link, they are redirected to the target share on the remote server. Enter any name of up to 255 characters.
-Server Name: Enter the name of the remote server on which the target share is located.
-Share: Enter the name of the target share.
•Import an Entire Remote Server: Select this option to automatically create links for all shares on the remote server. Fill in the following fields from the Import Remote Server table:
-Server Name: Enter the name of the remote server.
-Username: Enter the username of the account with access to the server.
-Password: Enter the password for the above account.
5.If you are adding a folder to DFS, click OK. If you are importing a remote server, click Import.
NOTE: Make sure you review the restrictions and recommendations for using Microsoft DFS from the NSS.
Chapter 3: Configuring the Network Storage System | 37 |
(NSS) |
|
