Installing Ribbon Cassette
This is the same procedure for installing a replacement ribbon cassette as for installing the ribbon for the first use. Removal of a used ribbon cassette is the reverse of the process detailed below.
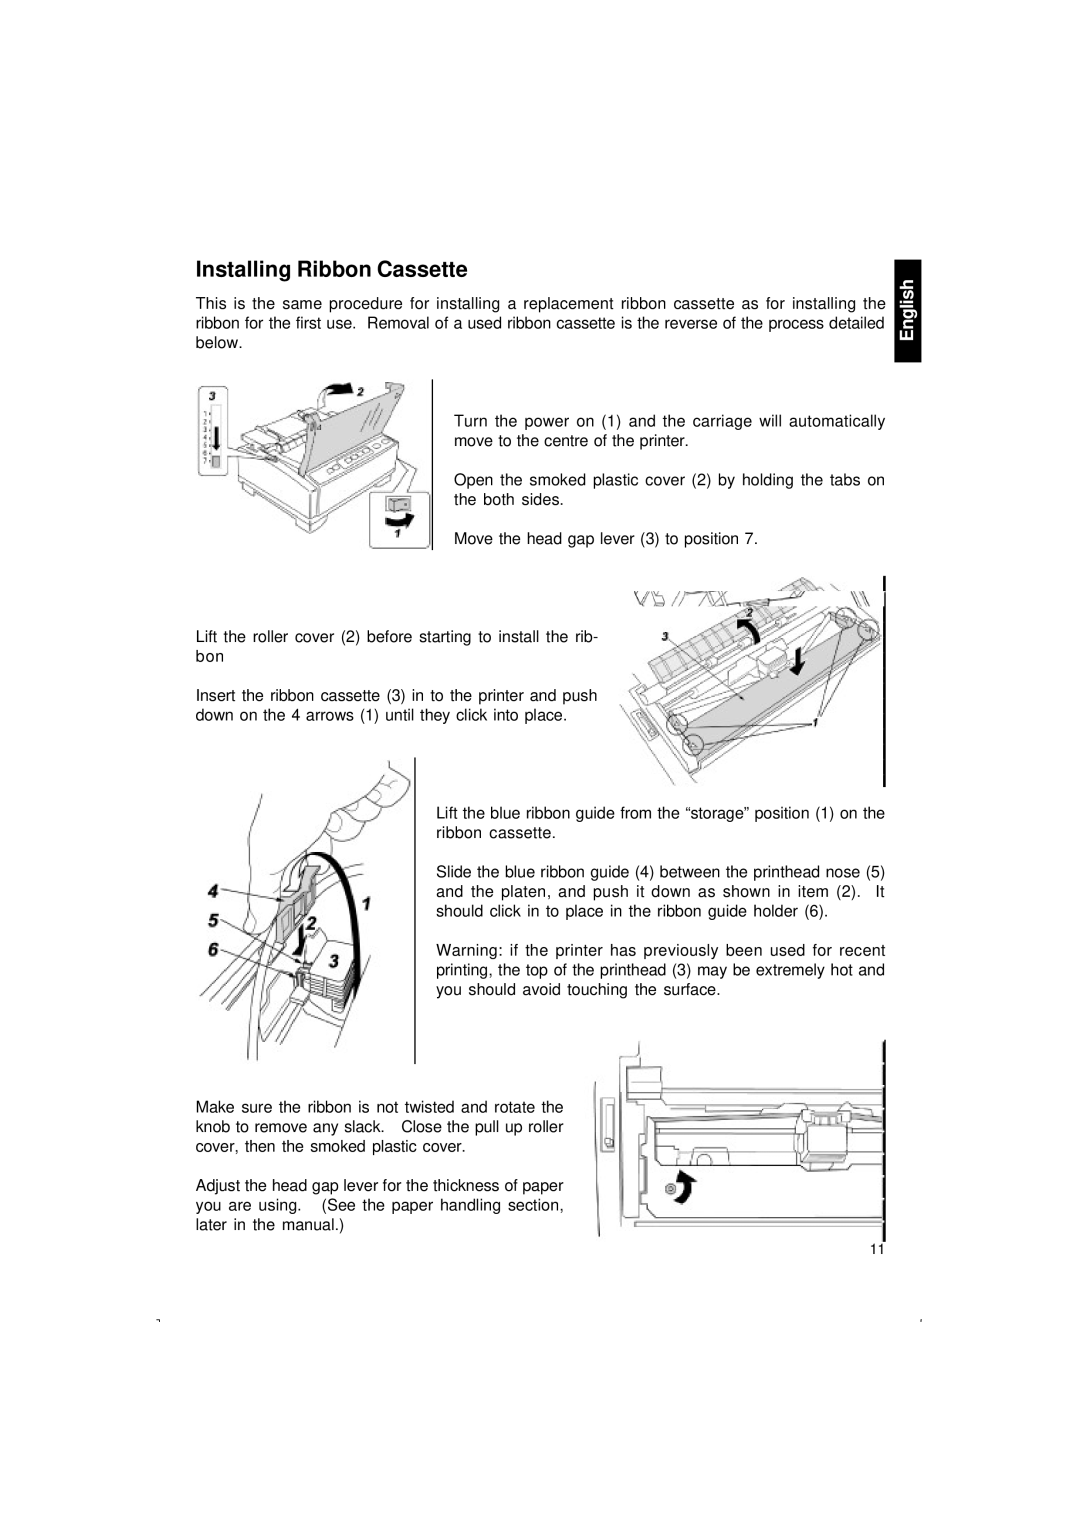
Turn the power on (1) and the carriage will automatically move to the centre of the printer.
Open the smoked plastic cover (2) by holding the tabs on the both sides.
Move the head gap lever (3) to position 7.
Lift the roller cover (2) before starting to install the rib- bon
Insert the ribbon cassette (3) in to the printer and push down on the 4 arrows (1) until they click into place.
Lift the blue ribbon guide from the “storage” position (1) on the ribbon cassette.
Slide the blue ribbon guide (4) between the printhead nose (5) and the platen, and push it down as shown in item (2). It should click in to place in the ribbon guide holder (6).
Warning: if the printer has previously been used for recent printing, the top of the printhead (3) may be extremely hot and you should avoid touching the surface.
Make sure the ribbon is not twisted and rotate the knob to remove any slack. Close the pull up roller cover, then the smoked plastic cover.
Adjust the head gap lever for the thickness of paper you are using. (See the paper handling section, later in the manual.)
English
11