6.4.4. Network
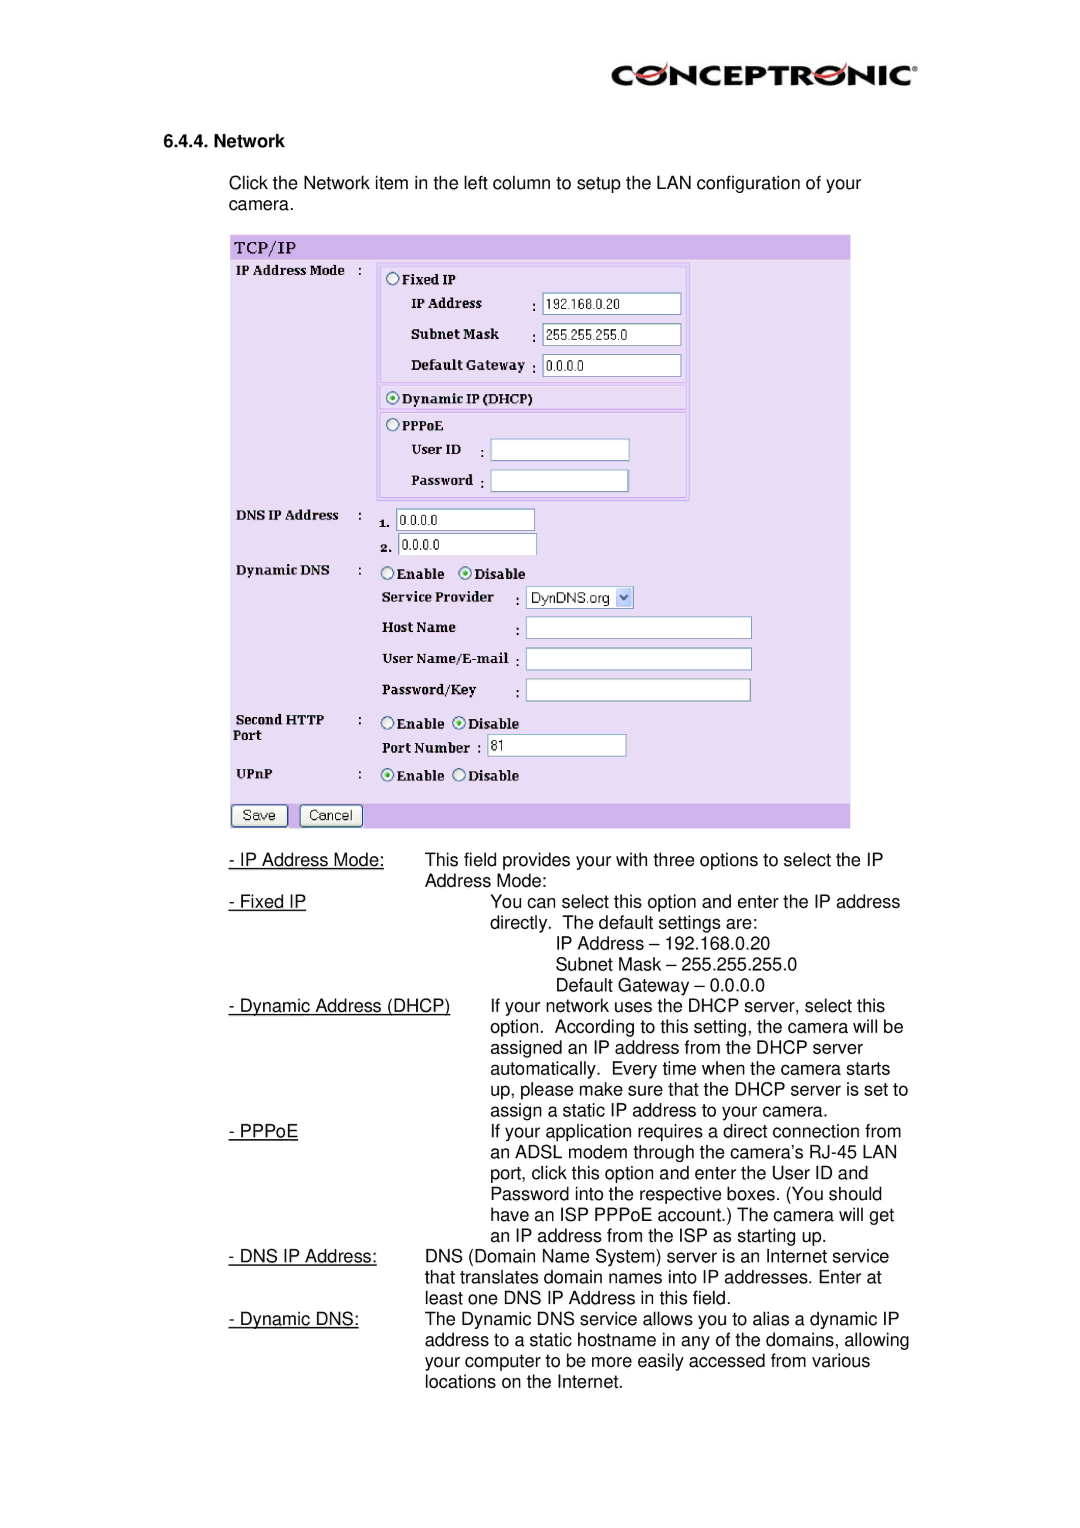
Click the Network item in the left column to setup the LAN configuration of your camera.
- IP Address Mode: | This field provides your with three options to select the IP | |
- Fixed IP | Address Mode: | |
| You can select this option and enter the IP address | |
|
| directly. The default settings are: |
|
| IP Address – 192.168.0.20 |
|
| Subnet Mask – 255.255.255.0 |
- Dynamic Address (DHCP) | Default Gateway – 0.0.0.0 | |
If your network uses the DHCP server, select this | ||
|
| option. According to this setting, the camera will be |
|
| assigned an IP address from the DHCP server |
|
| automatically. Every time when the camera starts |
|
| up, please make sure that the DHCP server is set to |
- PPPoE |
| assign a static IP address to your camera. |
| If your application requires a direct connection from | |
|
| an ADSL modem through the camera’s |
|
| port, click this option and enter the User ID and |
|
| Password into the respective boxes. (You should |
|
| have an ISP PPPoE account.) The camera will get |
- DNS IP Address: |
| an IP address from the ISP as starting up. |
DNS (Domain Name System) server is an Internet service | ||
| that translates domain names into IP addresses. Enter at | |
- Dynamic DNS: | least one DNS IP Address in this field. | |
The Dynamic DNS service allows you to alias a dynamic IP | ||
| address to a static hostname in any of the domains, allowing | |
| your computer to be more easily accessed from various | |
| locations on the Internet. | |
