Make sure to save any changes you have made to keep the information updated.
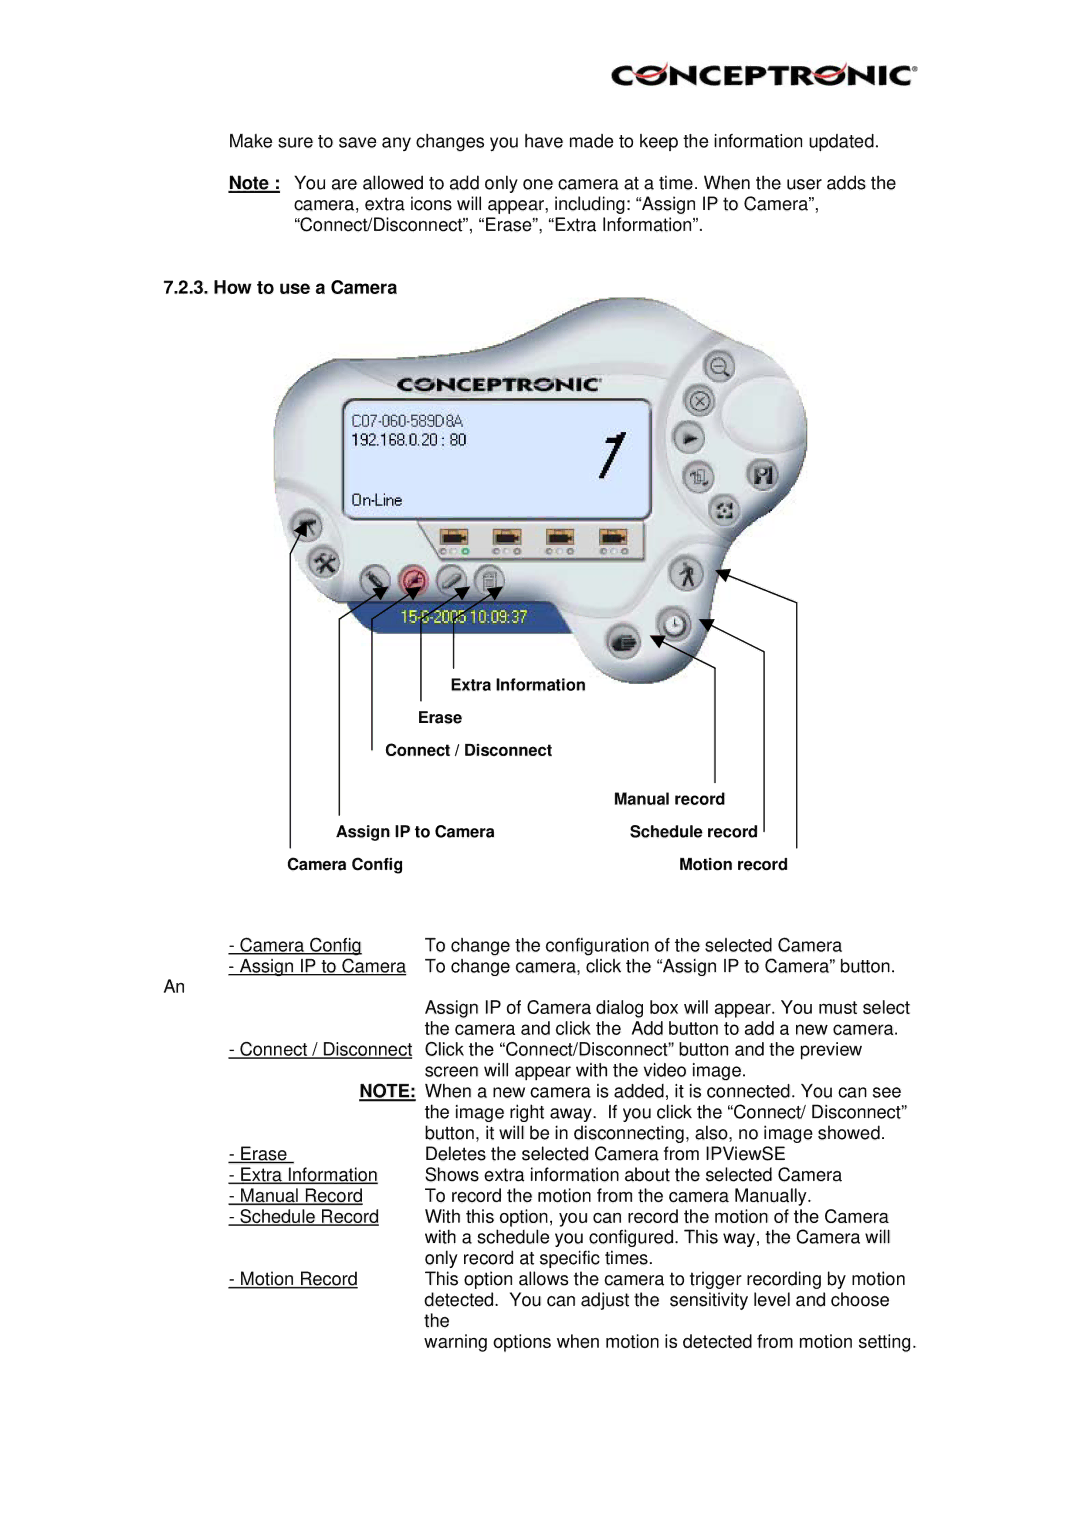
Note : You are allowed to add only one camera at a time. When the user adds the camera, extra icons will appear, including: “Assign IP to Camera”, “Connect/Disconnect”, “Erase”, “Extra Information”.
7.2.3. How to use a Camera
Extra Information
Erase
Connect / Disconnect
| Manual record |
Assign IP to Camera | Schedule record |
Camera Config | Motion record |
- Camera Config | To change the configuration of the selected Camera |
- Assign IP to Camera | To change camera, click the “Assign IP to Camera” button. |
An | Assign IP of Camera dialog box will appear. You must select |
| |
| the camera and click the Add button to add a new camera. |
-Connect / Disconnect Click the “Connect/Disconnect” button and the preview screen will appear with the video image.
NOTE: When a new camera is added, it is connected. You can see
| the image right away. If you click the “Connect/ Disconnect” |
- Erase | button, it will be in disconnecting, also, no image showed. |
Deletes the selected Camera from IPViewSE | |
- Extra Information | Shows extra information about the selected Camera |
- Manual Record | To record the motion from the camera Manually. |
- Schedule Record | With this option, you can record the motion of the Camera |
| with a schedule you configured. This way, the Camera will |
- Motion Record | only record at specific times. |
This option allows the camera to trigger recording by motion | |
| detected. You can adjust the sensitivity level and choose |
| the |
| warning options when motion is detected from motion setting. |
