TAKING A PICTURE
FLASH READY LED
En
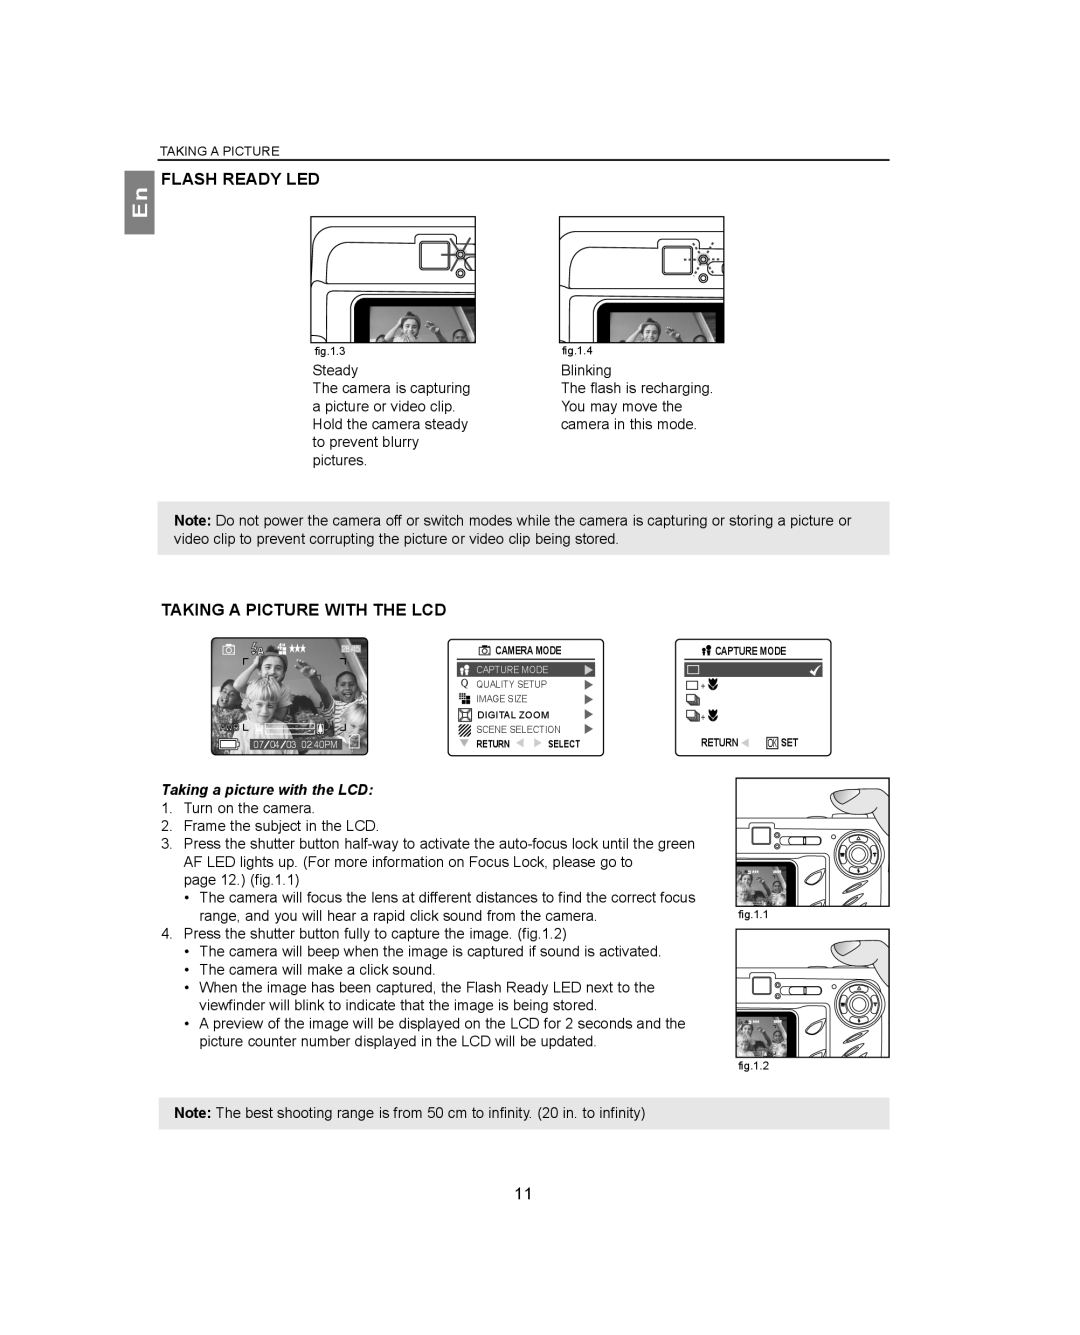
fig.1.3
fig.1.4 |
Steady
The camera is capturing a picture or video clip. Hold the camera steady to prevent blurry pictures.
Blinking
The flash is recharging. You may move the camera in this mode.
Note: Do not power the camera off or switch modes while the camera is capturing or storing a picture or video clip to prevent corrupting the picture or video clip being stored.
TAKING A PICTURE WITH THE LCD
A 4M | 28/45 | CAMERA MODE | CAPTURE MODE |
|
| CAPTURE MODE |
|
| Q | QUALITY SETUP | + |
|
| IMAGE SIZE |
|
AWB | DIGITAL ZOOM | + | |
SCENE SELECTION |
| ||
07 ⁄ 04 ⁄ 03 02:40PM | RETURN | SELECT | RETURN |
OK SET
Taking a picture with the LCD:
1.Turn on the camera.
2.Frame the subject in the LCD.
3.Press the shutter button
page 12.) (fig.1.1)
•The camera will focus the lens at different distances to find the correct focus range, and you will hear a rapid click sound from the camera.
4.Press the shutter button fully to capture the image. (fig.1.2)
•The camera will beep when the image is captured if sound is activated.
•The camera will make a click sound.
•When the image has been captured, the Flash Ready LED next to the viewfinder will blink to indicate that the image is being stored.
•A preview of the image will be displayed on the LCD for 2 seconds and the picture counter number displayed in the LCD will be updated.
A 4 | 28/45 |
| N |
fig.1.1 |
|
A 4 | 28/45 |
| N |
fig.1.2 |
|
Note: The best shooting range is from 50 cm to infinity. (20 in. to infinity)
11
