Crestron CEN-CN

Ethernet/Cresnet Interface

2.Enter the IP address of the configured CEN-CN and click the Connect button. (Within the address, X and Y may range from 0 to 255. In the example shown below, X is 1 and Y is 2.)

Connect TCP/IP Address

3.The message shown below signifies a successful connection.

Crestron Terminal Protocol Console Opened

4.Perform any of the diagnostics and features that the viewport provides.

Troubleshooting Communications via Ethernet

NOTE: Before performing this procedure, refer to “Hookup Diagram for Normal

Operation” on page 17 for cabling instructions.

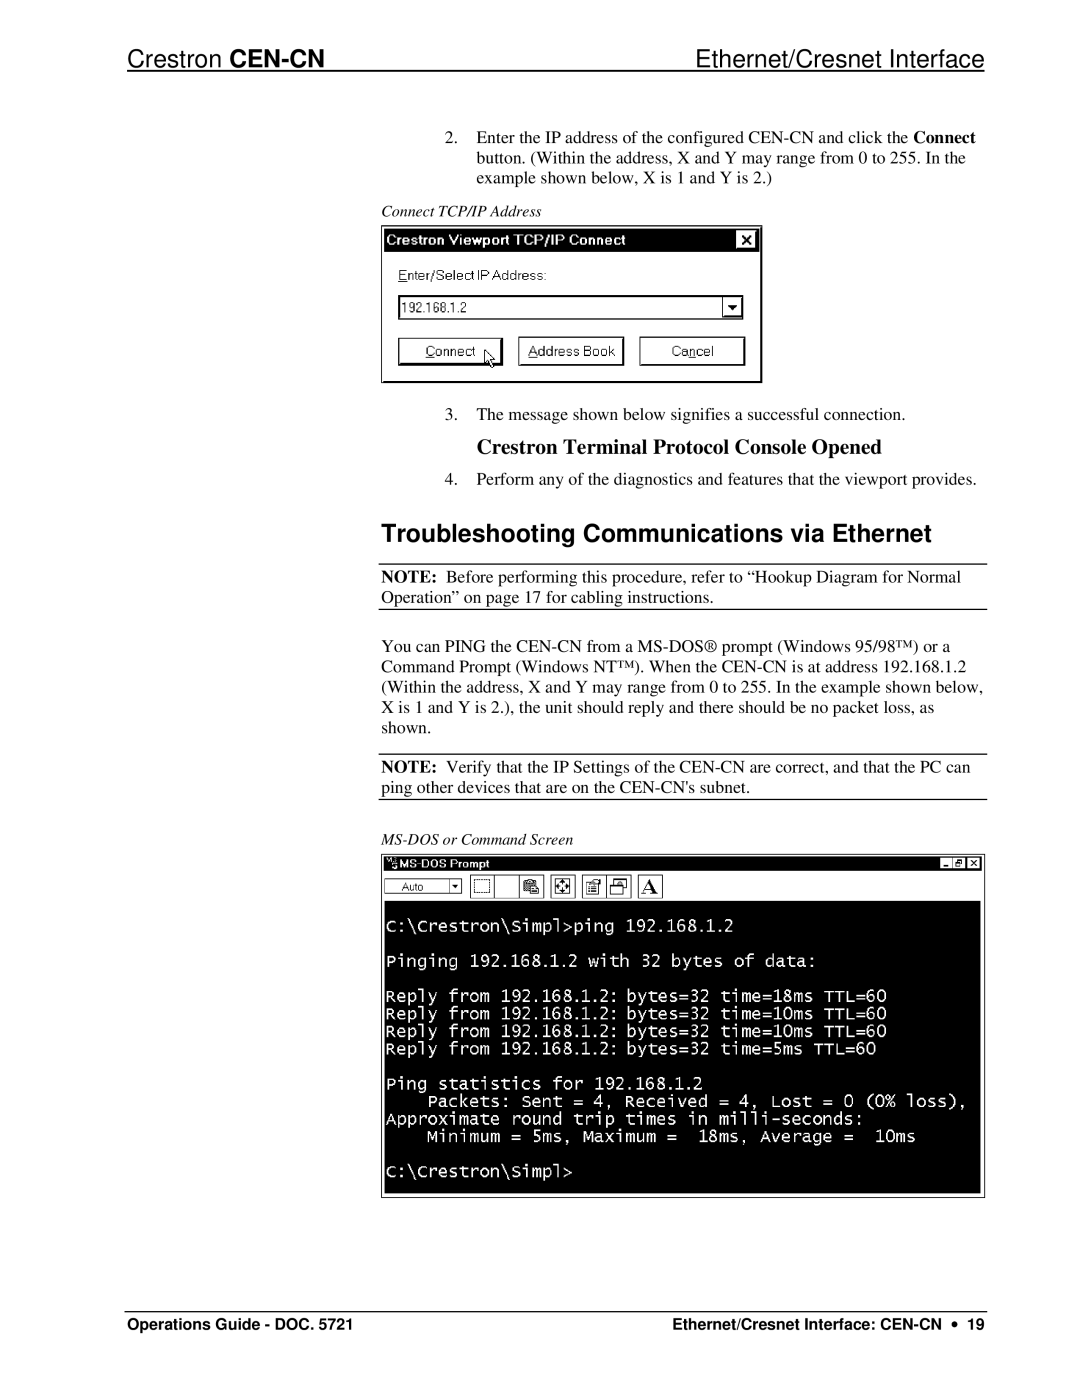
You can PING the CEN-CN from a MS-DOS® prompt (Windows 95/98™) or a Command Prompt (Windows NT™). When the CEN-CN is at address 192.168.1.2 (Within the address, X and Y may range from 0 to 255. In the example shown below, X is 1 and Y is 2.), the unit should reply and there should be no packet loss, as shown.

NOTE: Verify that the IP Settings of the CEN-CN are correct, and that the PC can ping other devices that are on the CEN-CN's subnet.

MS-DOS or Command Screen

Operations Guide - DOC. 5721

Ethernet/Cresnet Interface: CEN-CN 19

Page 23
Image 23
Crestron electronic CEN-CN manual Troubleshooting Communications via Ethernet