Funciones del teclado (Figura 5)

El panel de control sobre esta unidad "ilumina" automáticamente cuando cualquier almohadilla(bloc) clave es deprimida.

Este rasgo "de iluminación" "auto-desactivará" (la vuelta - de) automáticamente aprox. 30 segundos después de que la almohadilla(el bloc) pasada(última) clave es deprimida.

I/O: Conmutador de corriente – encendido/apagado.

Luces indicadoras de MODO: Se iluminan bajo diferentes graduaciones de modo, Fig. 6.

Modo FRÍO:

Luz verde

Modo CALIENTE:

Luz roja

Modo SECO (deshumidificador):

Luz verde

Modo de VENTILADOR:

No hay luz indicadora

Luz verde: Permanece encendida mientras el compresor está funcionando. La luz verde se apaga cuando se obtiene la temperatura deseada. Corresponde tanto para el Aire Acondicionado como para el Deshumidificador.

Luz roja: Permanece encendida mientras la calefacción está funcionando. La luz roja se apaga cuando se obtiene la temperatura deseada.

Luz indicadora de lleno de agua: Centellea en rojo cuando el

nivel del agua en el tanque de agua supera el nivel máximo de graduación o si el tanque de agua no se encuentra en posición correcta en el armario. Figura 7.

VENTILADOR: Selecciona las velocidades del ventilador Baja-Mediana-Alta.

Opciones de ventilación:

Enfriamiento (3 velocidades) Baja-Mediana-Alta

Calefacción (2 velocidades) Alta-Mediana

Secar – Deshumidificación (1 velocidad) Mediana

Ventilador (3 velocidades) Baja-Mediana-Alta

La graduación de la temperatura/ la hora del día:

: se usa para graduar (hacia adelante) el Reloj de la hora. del día (incrementos de 1 minuto)

Se usa para graduar (hacia adelante) la temperatura. (incrementos de 1 grado Celsius)

Se usa para graduar (hacia adelante) la temperatura. (incrementos de 2 grados Fahrenheit).

Se usa para graduar (hacia adelante) el reloj automático. (incrementos de 10 minutos)

: Se usa para graduar (hacia atrás) el Reloj de la hora del día. (incrementos de 1 minuto)

Se usa para graduar (hacia atrás) la temperatura. (incrementos de 1 grado Celsius)

Se usa para graduar (hacia atrás) la temperatura. (incrementos de 2 grados Fahrenheit)

Se usa para graduar (hacia atrás) el reloj automático. (incrementos de 10 minutos)

VAIVÉN: Permite que las rejillas verticales tipo persiana oscilen automáticamente hacia adelante y hacia atrás (vaivén de 70°).

RELOJ: Permite iniciar y/o cambiar la graduación de la HORA DELDÍA.

RELOJ ACTIVADO: Se usa para iniciar el programa de tiempo de inicio automático AUTO ON, junto con las teclas y .

RELOJ DESACTIVADO: Se usa para iniciar el programa de tiempo de parada automática AUTO OFF, junto con las teclas y

.

Fig. 5

Luz verde durante el enfriamiento.

Luz roja durante la calefacción

Luz verde durante la deshumidificación.

Fig. 6

Una señal de advertencia de 8 pitidos sonará y el indicador de lleno de agua centelleará cada 0.5 segundos.

Fig. 7

Tabla de conversión de temperaturas

°C 10 11 12 13 14 15 16 17 18 19 20 21

°F 50 52 54 55 57 59 61 63 64 66 68 70

°C 22 23 24 25 26 27 28 29 30 31 32 33

°F 72 73 75 77 79 81 82 84 86 88 90 91

Nota: Este aparato tiene la opción que se permite de ponerlo en las temperaturas"Celsius" o "Fahrenheit" Para cambiar la

visualización de la temperatura oprima la tecla " " (temp/clock) y la tecla "clock" simultáneamente para cambiar entre la escala Celsius y la escala Fahrenheit.

La escala Celsius permite cambios en incrementos de 1˚C. La escala Fahrenheit permite cambios en incrementos de 2˚F.

Setting the AUTO-ON TIMER (cont’d)

5)All of the settings are now registered. TURN

THE UNIT “OFF” USING THE I/O SWITCH.

6)To set the AUTO-ONtimer, the unit must be turned to the “off” position (non-operational).

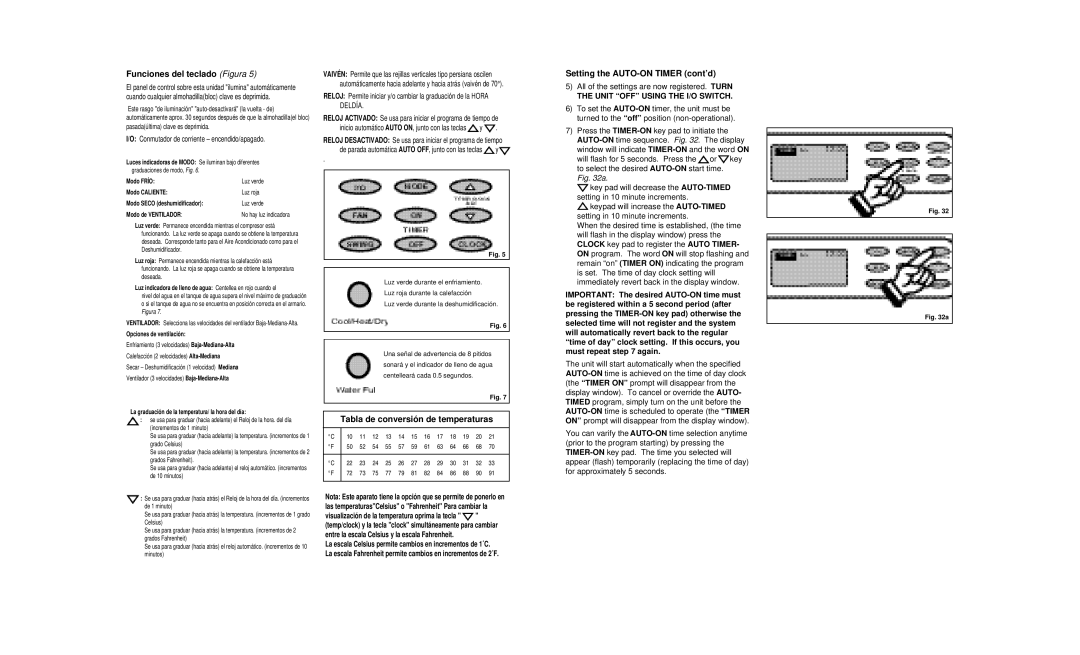
7)Press the TIMER-ONkey pad to initiate the AUTO-ONtime sequence. Fig. 32. The display window will indicate TIMER-ONand the word ON

will flash for 5 seconds. Press the or key to select the desired AUTO-ONstart time.

Fig. 32a.

key pad will decrease the AUTO-TIMEDsetting in 10 minute increments.

keypad will increase the AUTO-TIMEDsetting in 10 minute increments.

When the desired time is established, (the time will flash in the display window) press the CLOCK key pad to register the AUTO TIMER- ON program. The word ON will stop flashing and remain “on”(TIMER ON) indicating the program is set. The time of day clock setting will immediately revert back in the display window.

IMPORTANT: The desired AUTO-ON time must be registered within a 5 second period (after pressing the TIMER-ON key pad) otherwise the selected time will not register and the system will automatically revert back to the regular “time of day” clock setting. If this occurs, you must repeat step 7 again.

The unit will start automatically when the specified AUTO-ONtime is achieved on the time of day clock (the “TIMER ON” prompt will disappear from the display window). To cancel or override the AUTO- TIMED program, simply turn on the unit before the AUTO-ONtime is scheduled to operate (the “TIMER ON” prompt will disappear from the display window).

You can varify the AUTO-ONtime selection anytime (prior to the program starting) by pressing the TIMER-ONkey pad. The time you selected will appear (flash) temporarily (replacing the time of day) for approximately 5 seconds.

Fig. 32

Fig. 32a

Page 17
Image 17
Danby DPAC8399 Funciones del teclado Figura, Tabla de conversión de temperaturas, Setting the AUTO-ON Timer cont’d

DPAC8399 specifications

The Danby DPAC8399 is a versatile portable air conditioner designed to offer efficient cooling and comfort in various living spaces. Ideal for rooms up to 450 square feet, this unit seamlessly blends functionality with convenience, making it a popular choice for homeowners and renters alike.

One of the key features of the Danby DPAC8399 is its impressive cooling capacity of 8,000 BTUs, which ensures a rapid drop in indoor temperatures, providing relief during those sweltering summer months. This model also functions as a dehumidifier, capable of removing excess moisture from the air. With the ability to extract up to 69.5 pints of moisture per day, it helps prevent mold and mildew growth, contributing to a healthier living environment.

The air conditioner comes equipped with a highly efficient, environmentally friendly refrigerant (R410A), ensuring optimal cooling performance while minimizing the impact on the ozone layer. This makes the Danby DPAC8399 not only an effective cooling solution but also an eco-conscious choice for consumers seeking greener alternatives.

A standout feature of this model is its user-friendly electronic controls, complete with an LED display that makes operation straightforward. The included remote control allows users to adjust settings from across the room, providing convenience without the need to get up. With multiple modes available, including cooling, fan, and dehumidifier modes, users can customize their experience to suit their specific comfort needs.

The portable design of the Danby DPAC8399 includes smooth-rolling caster wheels, enabling easy movement from one room to another. Its sleek, compact design ensures it won't take up much space, making it a practical option for apartments or smaller homes. Additionally, the unit comes with a window installation kit for hassle-free setup, enabling users to enjoy cool air almost immediately.

Energy efficiency is another hallmark of the Danby DPAC8399. It features an Energy Efficiency Ratio (EER) rating that emphasizes its low energy consumption, making it an economical choice for cooling throughout the season. This not only helps in reducing utility bills but also contributes to environmental sustainability.

In summary, the Danby DPAC8399 stands out in the world of portable air conditioners with its powerful cooling capabilities, efficient moisture removal, user-friendly controls, and eco-friendly features. Its mobility and compact design make it an ideal cooling solution for a variety of spaces, ensuring a comfortable atmosphere regardless of the outdoor temperatures.