8.Insert the waste toner container into position and then push it to ensure that it is firmly seated in place.
9.Slide the toner cartridge back into the printer.
10.Close the front cover firmly.
If the front cover is not completely closed, the printer will not operate. Ensure that all toner cartridges are installed properly. If any toner cartridge is installed improperly, the front cover do not close.
11.Turn the printer on.
Each LED blinks red in a repeated order. Wait for about 1.5 minutes for your printer to get ready.
REPLACING THE WASTE TONER CONTAINER
When the life span of the waste toner container has expired, the Dell Toner Management System™ program window appears on the computer, indicating the waste toner container needs to be replaced. Otherwise your printer stops printing.
1.Turn the printer off, then wait a few minutes for the printer to cool.
2.Open the front cover.
3.Pull the waste toner container out of the printer using its handle.
Ensure that you lay the waste toner container on a flat surface so that the toner does not spill.
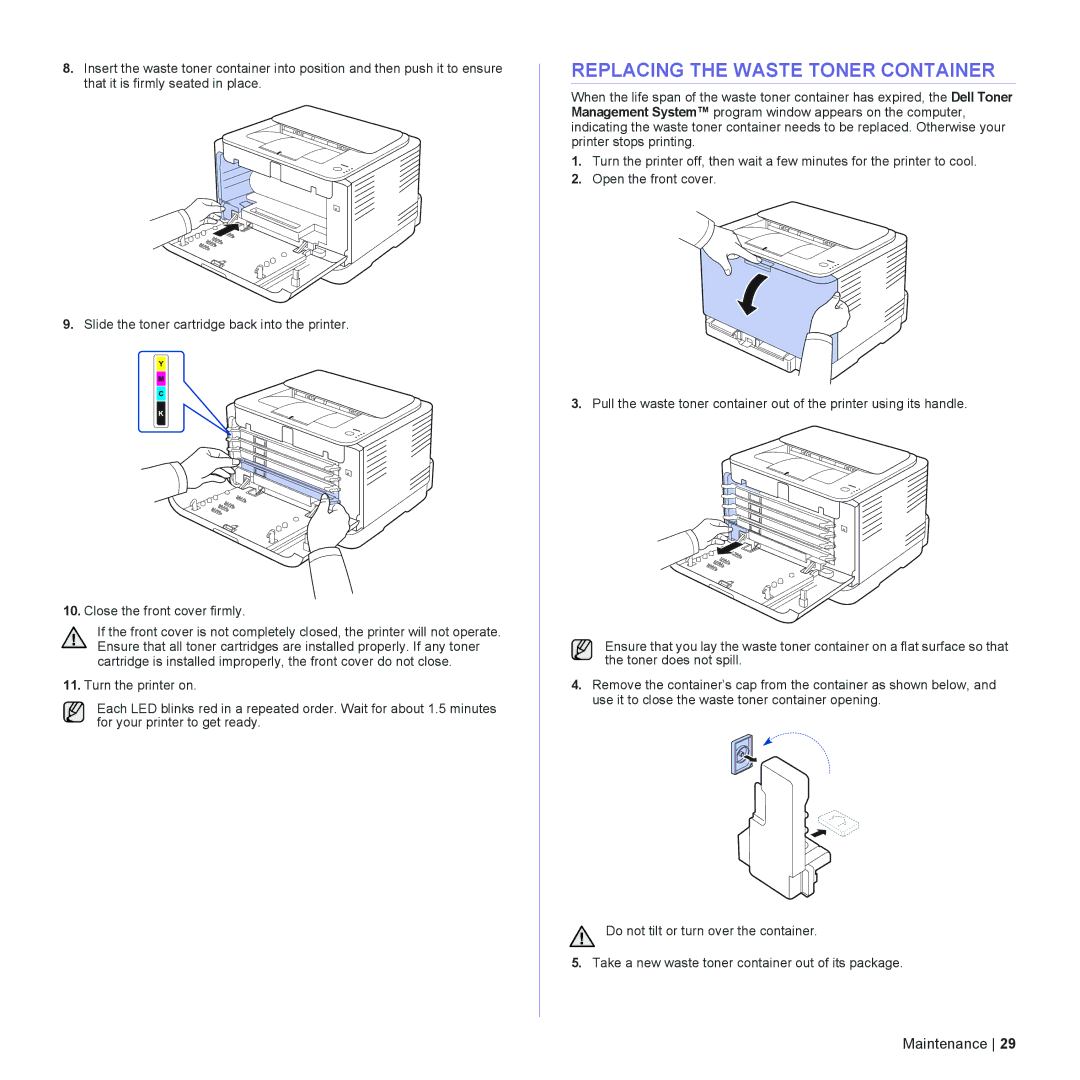
4.Remove the container’s cap from the container as shown below, and use it to close the waste toner container opening.
Do not tilt or turn over the container.
5.Take a new waste toner container out of its package.