8.Replace the computer cover (see Installing the Computer Cover).
9.Reconnect the computer and devices to electrical outlets, and then turn them on.
10.Remove any drivers required for the card as described in the card documentation.
11.If you removed a sound card:
a.Enter system setup (see System Setup), go to Onboard Devices and select Integrated Audio, and then change the setting to On.
b.Connect external audio devices to the audio connectors on the back panel of the computer. See Back Panel Connectors.
12.If you removed an
a.Enter system setup (see System Setup), go to Onboard Devices and select Integrated NIC, and then change the setting to On.
b.Connect the network cable to the integrated connector on the back panel of the computer. See Back Panel Connectors.
Drive Panel
CAUTION: Before you begin any of the procedures in this section, follow the safety instructions in the Product Information Guide.
CAUTION: To guard against electrical shock, always unplug your computer from the electrical outlet before removing the cover.
Removing the Drive Panel
1.Follow the procedures in Before You Begin.
2.Remove the computer cover (see Removing the Computer Cover).
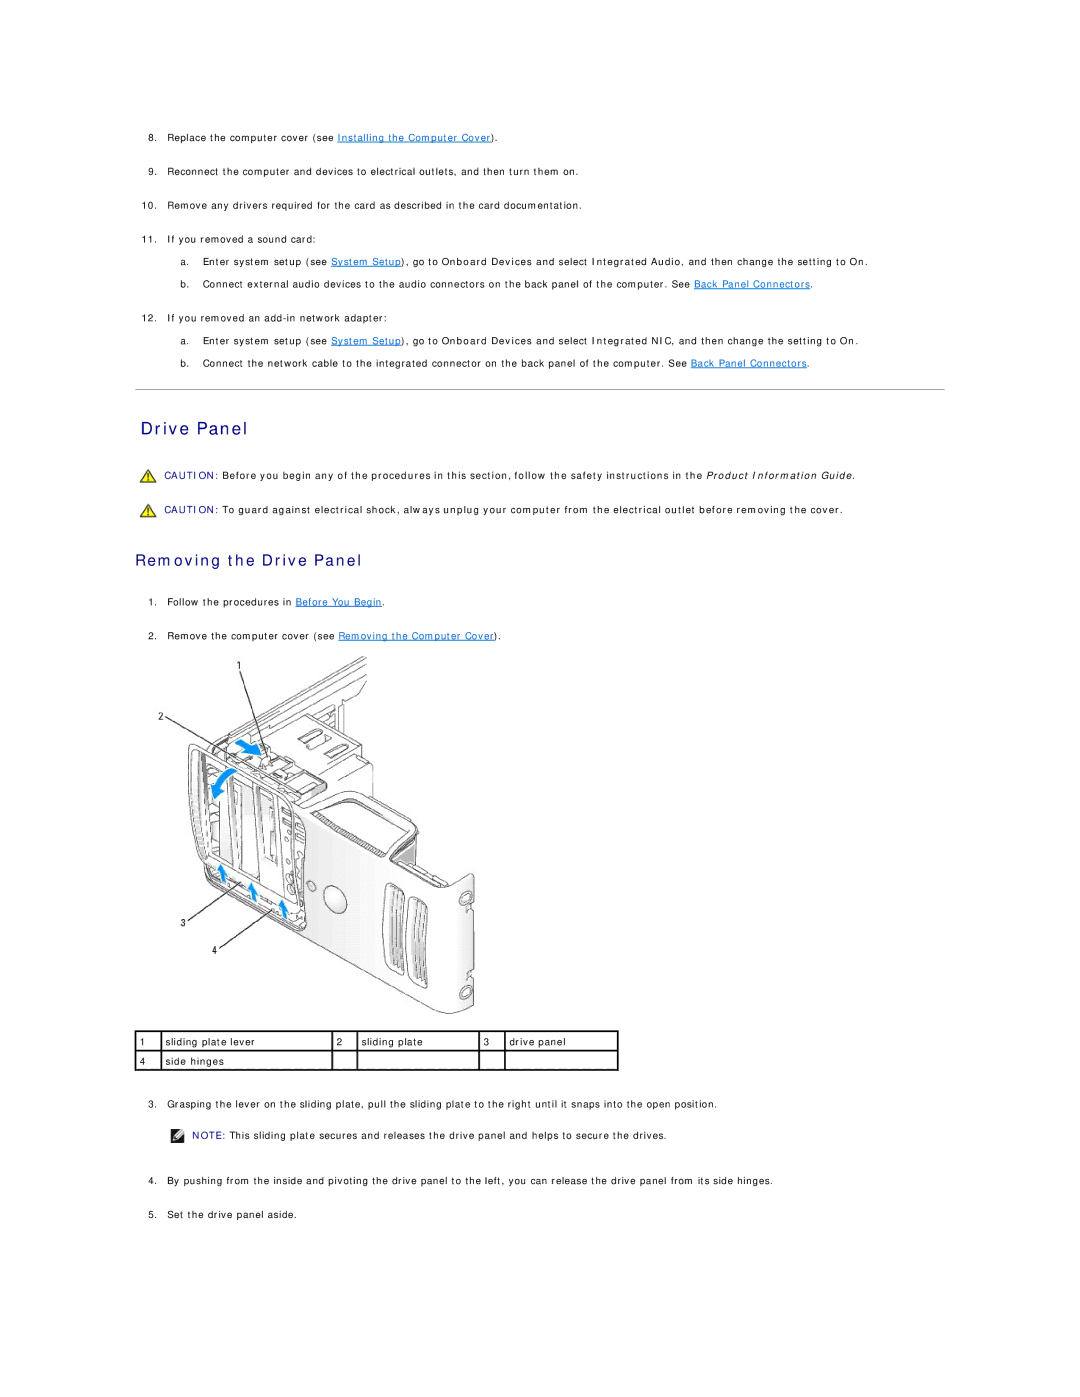
1 | sliding plate lever | 2 | sliding plate | 3 | drive panel |
4side hinges
3.Grasping the lever on the sliding plate, pull the sliding plate to the right until it snaps into the open position.
![]() NOTE: This sliding plate secures and releases the drive panel and helps to secure the drives.
NOTE: This sliding plate secures and releases the drive panel and helps to secure the drives.
4.By pushing from the inside and pivoting the drive panel to the left, you can release the drive panel from its side hinges.
5.Set the drive panel aside.