11.Connect any cables disconnected before removing the heat sink assembly.
12.Replace the computer cover (see Installing the Computer Cover).
13.Connect your computer and devices to an electrical outlet, and turn them on.
14.Verify that the computer works correctly by running the Dell Diagnostics (see Dell Diagnostics).
I/O Panel
CAUTION: Before you begin any of the procedures in this section, follow the safety instructions in the Product Information Guide.
CAUTION: To guard against electrical shock, always unplug your computer from the electrical outlet before opening the cover.
CAUTION: The heat sink assembly, power supply, and other components may be very hot during normal operation. Be sure that they have had sufficient time to cool before you touch them.
NOTICE: To prevent static damage to components inside your computer, discharge static electricity from your body before you touch any of your computer's electronic components. You can do so by touching an unpainted metal surface on the computer chassis.
Removing the I/O Panel
NOTE: Note the routing of all cables as you remove them so that you can
1.Follow the procedures in Before You Begin.
2.Remove the computer cover (see Removing the Computer Cover).
NOTICE: When sliding the I/O panel out of the computer, be extremely careful. Carelessness my result in damage to the cable connectors and the cable routing clips.
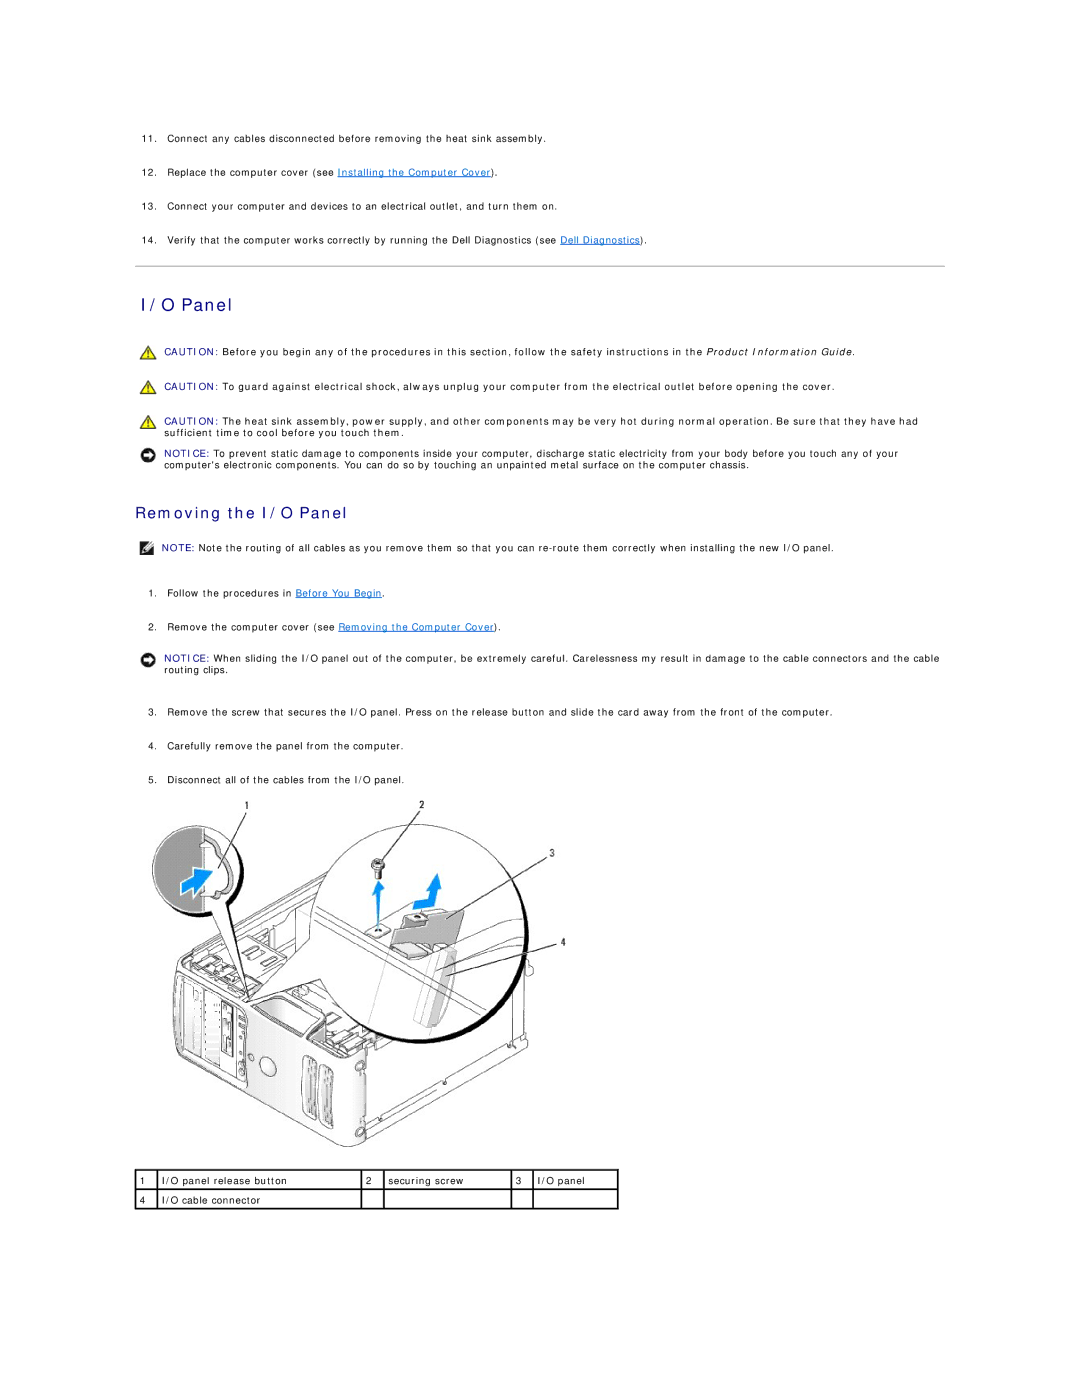
3.Remove the screw that secures the I/O panel. Press on the release button and slide the card away from the front of the computer.
4.Carefully remove the panel from the computer.
5.Disconnect all of the cables from the I/O panel.
1 | I/O panel release button | 2 | securing screw | 3 | I/O panel |
|
|
|
|
|
|
4 | I/O cable connector |
|
|
|
|
|
|
|
|
|
|