Installing the I/O Panel
1. Reconnect the cables to the I/O panel.
NOTICE: Take care not to damage the cable connectors and the cable routing clips when sliding the I/O panel into the computer.
2.Slide the I/O panel into place using the guides on the I/O panel bracket to help position the I/O panel in place, and use the notch on the I/O panel bracket to help seat the panel. Rotate the panel until the release button is secure.
3.Replace the screw that secures the I/O panel.
4.Replace the computer cover (see Installing the Computer Cover).
5.Connect your computer and devices to an electrical outlet, and turn them on.
6.Verify that the computer works correctly by running the Dell Diagnostics (see Dell Diagnostics).
Processor Fan
CAUTION: Before you begin any of the procedures in this section, follow the safety instructions in the Product Information Guide.
CAUTION: To guard against electrical shock, always unplug your computer from the electrical outlet before opening the cover.
CAUTION: The heat sink assembly, power supply, and other components may be very hot during normal operation. Be sure that they have had sufficient time to cool before you touch them.
NOTICE: To prevent static damage to components inside your computer, discharge static electricity from your body before you touch any of your computer's electronic components. You can do so by touching an unpainted metal surface on the computer chassis.
Removing the Processor Fan
1.Follow the procedures in Before You Begin.
2.Remove the computer cover (see Removing the Computer Cover).
3.Carefully disconnect and move any cables that are routed over the heat sink assembly.
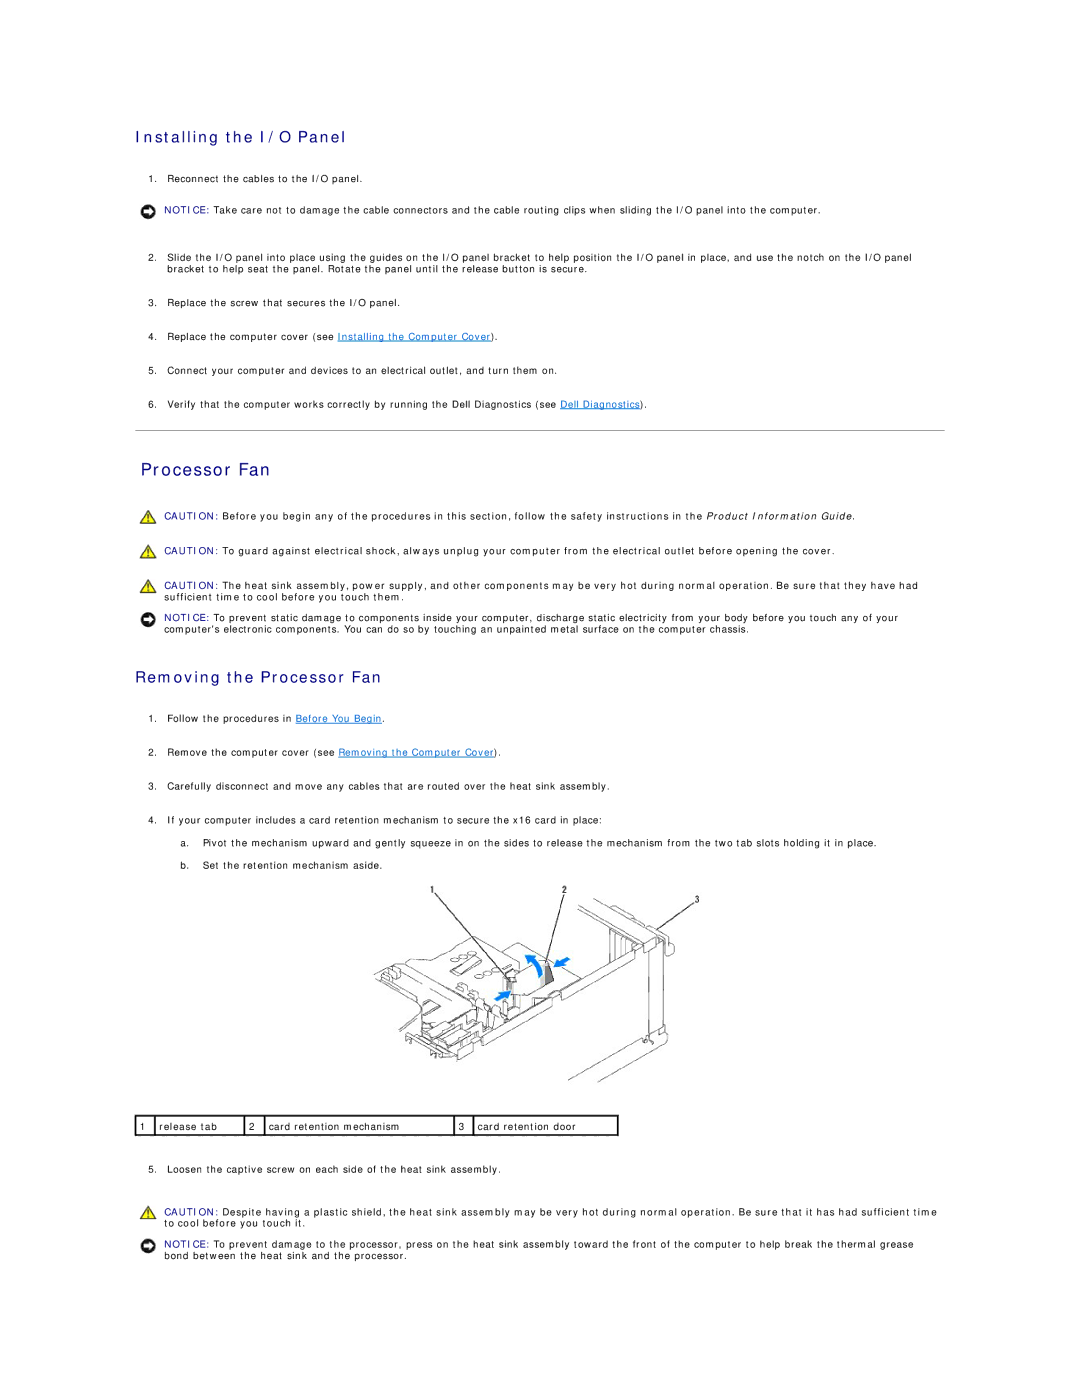
4.If your computer includes a card retention mechanism to secure the x16 card in place:
a.Pivot the mechanism upward and gently squeeze in on the sides to release the mechanism from the two tab slots holding it in place.
b.Set the retention mechanism aside.
1 | release tab | 2 | card retention mechanism | 3 | card retention door |
5. Loosen the captive screw on each side of the heat sink assembly.
CAUTION: Despite having a plastic shield, the heat sink assembly may be very hot during normal operation. Be sure that it has had sufficient time to cool before you touch it.
NOTICE: To prevent damage to the processor, press on the heat sink assembly toward the front of the computer to help break the thermal grease bond between the heat sink and the processor.