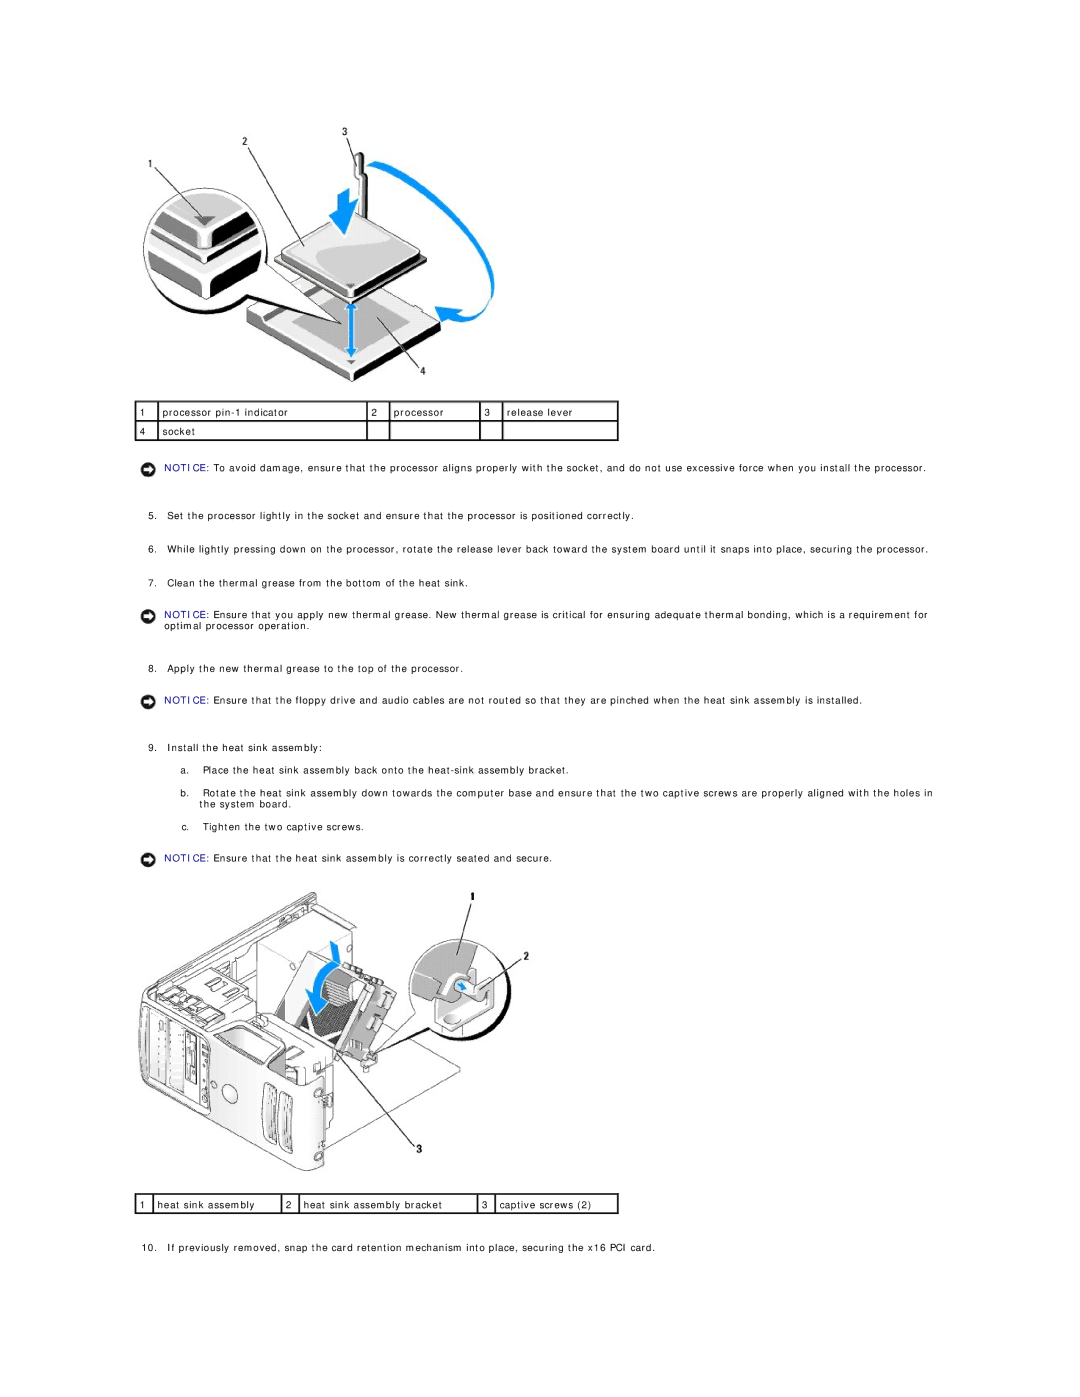
1 | processor | 2 | processor | 3 | release lever |
|
|
|
|
|
|
4 | socket |
|
|
|
|
|
|
|
|
|
|
NOTICE: To avoid damage, ensure that the processor aligns properly with the socket, and do not use excessive force when you install the processor.
5.Set the processor lightly in the socket and ensure that the processor is positioned correctly.
6.While lightly pressing down on the processor, rotate the release lever back toward the system board until it snaps into place, securing the processor.
7.Clean the thermal grease from the bottom of the heat sink.
NOTICE: Ensure that you apply new thermal grease. New thermal grease is critical for ensuring adequate thermal bonding, which is a requirement for optimal processor operation.
8. Apply the new thermal grease to the top of the processor.
NOTICE: Ensure that the floppy drive and audio cables are not routed so that they are pinched when the heat sink assembly is installed.
9.Install the heat sink assembly:
a.Place the heat sink assembly back onto the
b.Rotate the heat sink assembly down towards the computer base and ensure that the two captive screws are properly aligned with the holes in the system board.
c.Tighten the two captive screws.
NOTICE: Ensure that the heat sink assembly is correctly seated and secure.
1 | heat sink assembly | 2 | heat sink assembly bracket | 3 | captive screws (2) |
|
|
|
|
|
|
10. If previously removed, snap the card retention mechanism into place, securing the x16 PCI card.