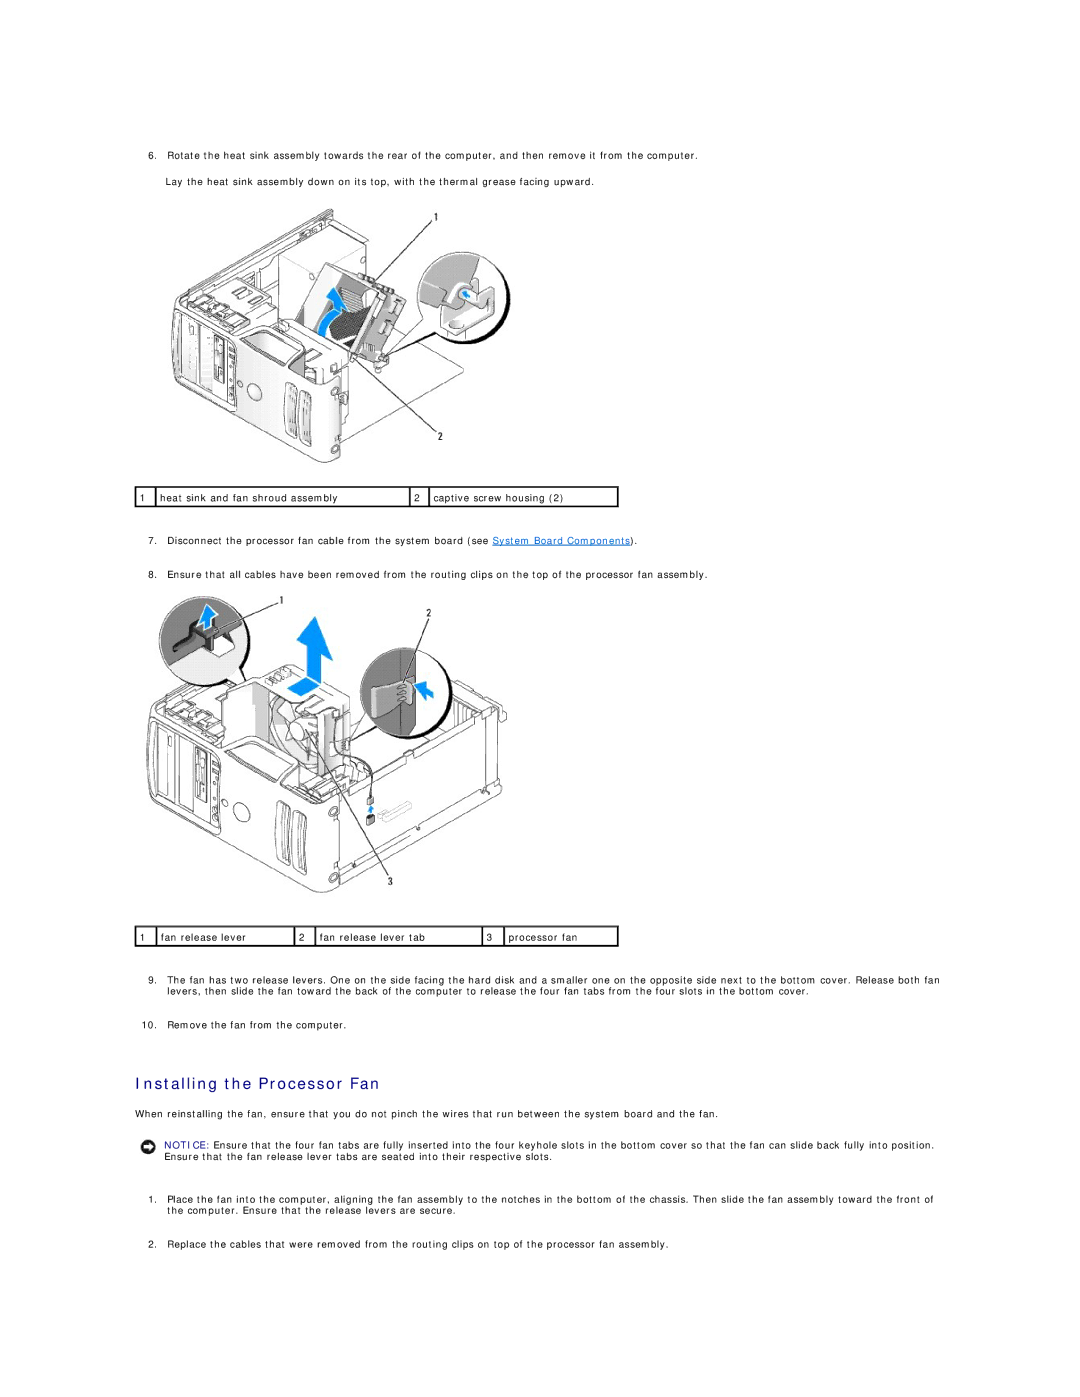
6.Rotate the heat sink assembly towards the rear of the computer, and then remove it from the computer.
Lay the heat sink assembly down on its top, with the thermal grease facing upward.
1 | heat sink and fan shroud assembly | 2 | captive screw housing (2) |
|
|
|
|
7.Disconnect the processor fan cable from the system board (see System Board Components).
8.Ensure that all cables have been removed from the routing clips on the top of the processor fan assembly.
1 | fan release lever | 2 | fan release lever tab | 3 | processor fan |
|
|
|
|
|
|
9.The fan has two release levers. One on the side facing the hard disk and a smaller one on the opposite side next to the bottom cover. Release both fan levers, then slide the fan toward the back of the computer to release the four fan tabs from the four slots in the bottom cover.
10.Remove the fan from the computer.
Installing the Processor Fan
When reinstalling the fan, ensure that you do not pinch the wires that run between the system board and the fan.
NOTICE: Ensure that the four fan tabs are fully inserted into the four keyhole slots in the bottom cover so that the fan can slide back fully into position. Ensure that the fan release lever tabs are seated into their respective slots.
1.Place the fan into the computer, aligning the fan assembly to the notches in the bottom of the chassis. Then slide the fan assembly toward the front of the computer. Ensure that the release levers are secure.
2.Replace the cables that were removed from the routing clips on top of the processor fan assembly.