Hard-Disk Drive
hard-disk
driveE6
E5
flex-cable connector
E1
carrier
| (screws E1–E6 |
| are 4 mm) |
E3 | E4 |
E2 | 4 mm |
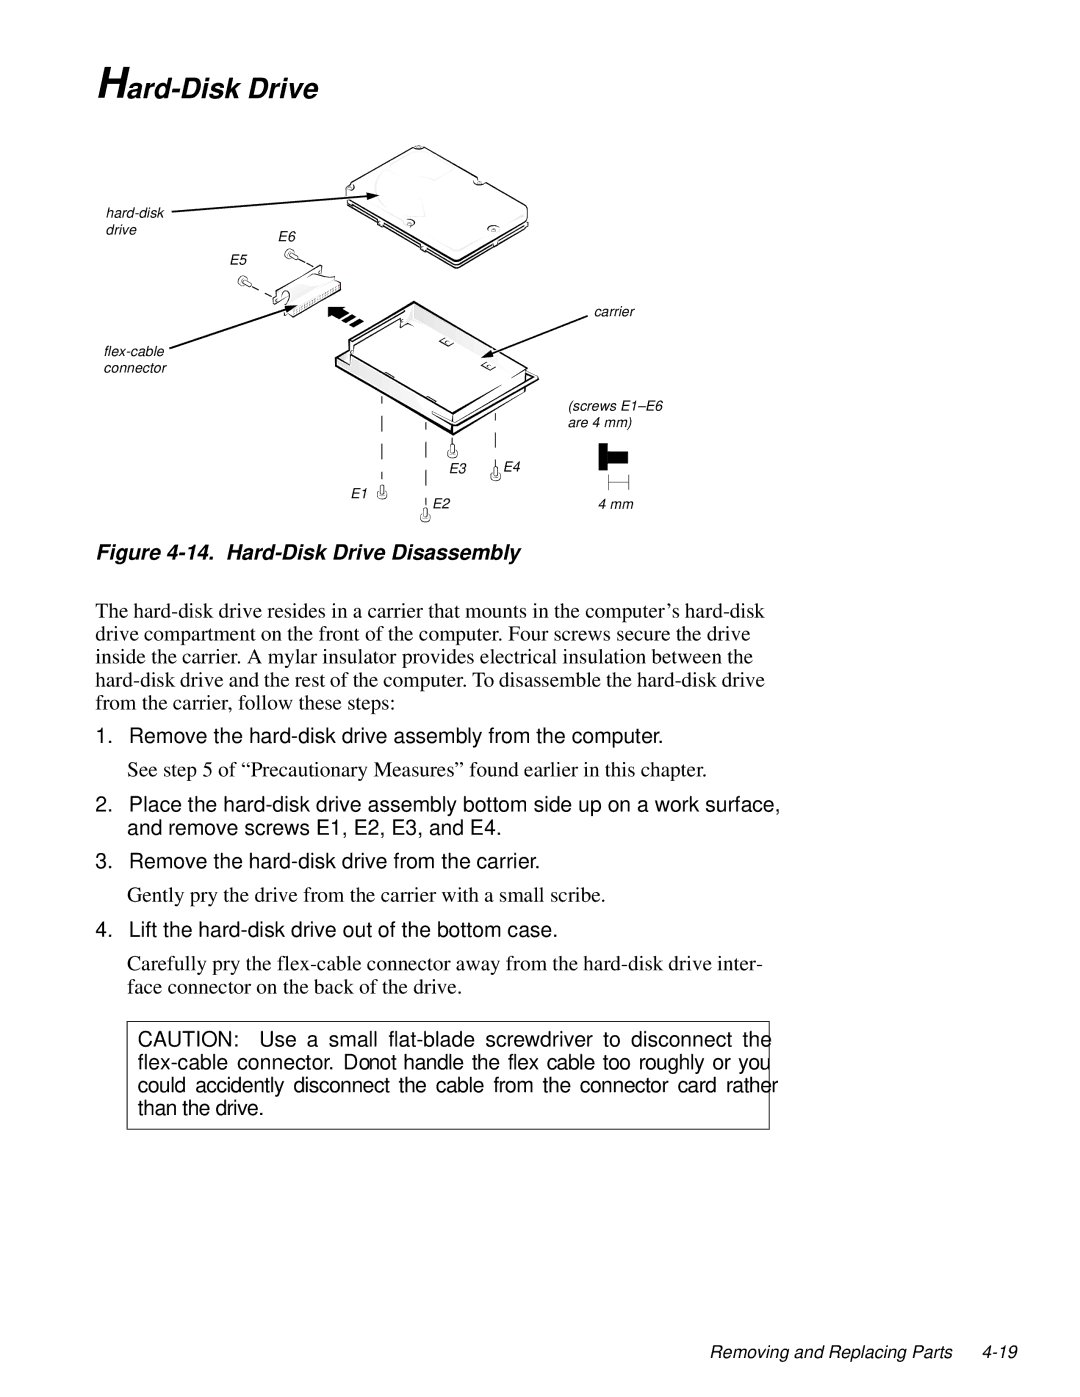
Figure 4-14. Hard-Disk Drive Disassembly
The hard-disk drive resides in a carrier that mounts in the computer’s hard-disk drive compartment on the front of the computer. Four screws secure the drive inside the carrier. A mylar insulator provides electrical insulation between the hard-disk drive and the rest of the computer. To disassemble the hard-disk drive from the carrier, follow these steps:
1.Remove the hard-disk drive assembly from the computer.
See step 5 of “Precautionary Measures” found earlier in this chapter.
2.Place the hard-disk drive assembly bottom side up on a work surface, and remove screws E1, E2, E3, and E4.
3.Remove the hard-disk drive from the carrier.
Gently pry the drive from the carrier with a small scribe.
4.Lift the hard-disk drive out of the bottom case.
Carefully pry the flex-cable connector away from the hard-disk drive inter- face connector on the back of the drive.
CAUTION: Use a small flat-blade screwdriver to disconnect the flex-cable connector. Do not handle the flex cable too roughly or you could accidently disconnect the cable from the connector card rather than the drive.
Removing and Replacing Parts 4-19

