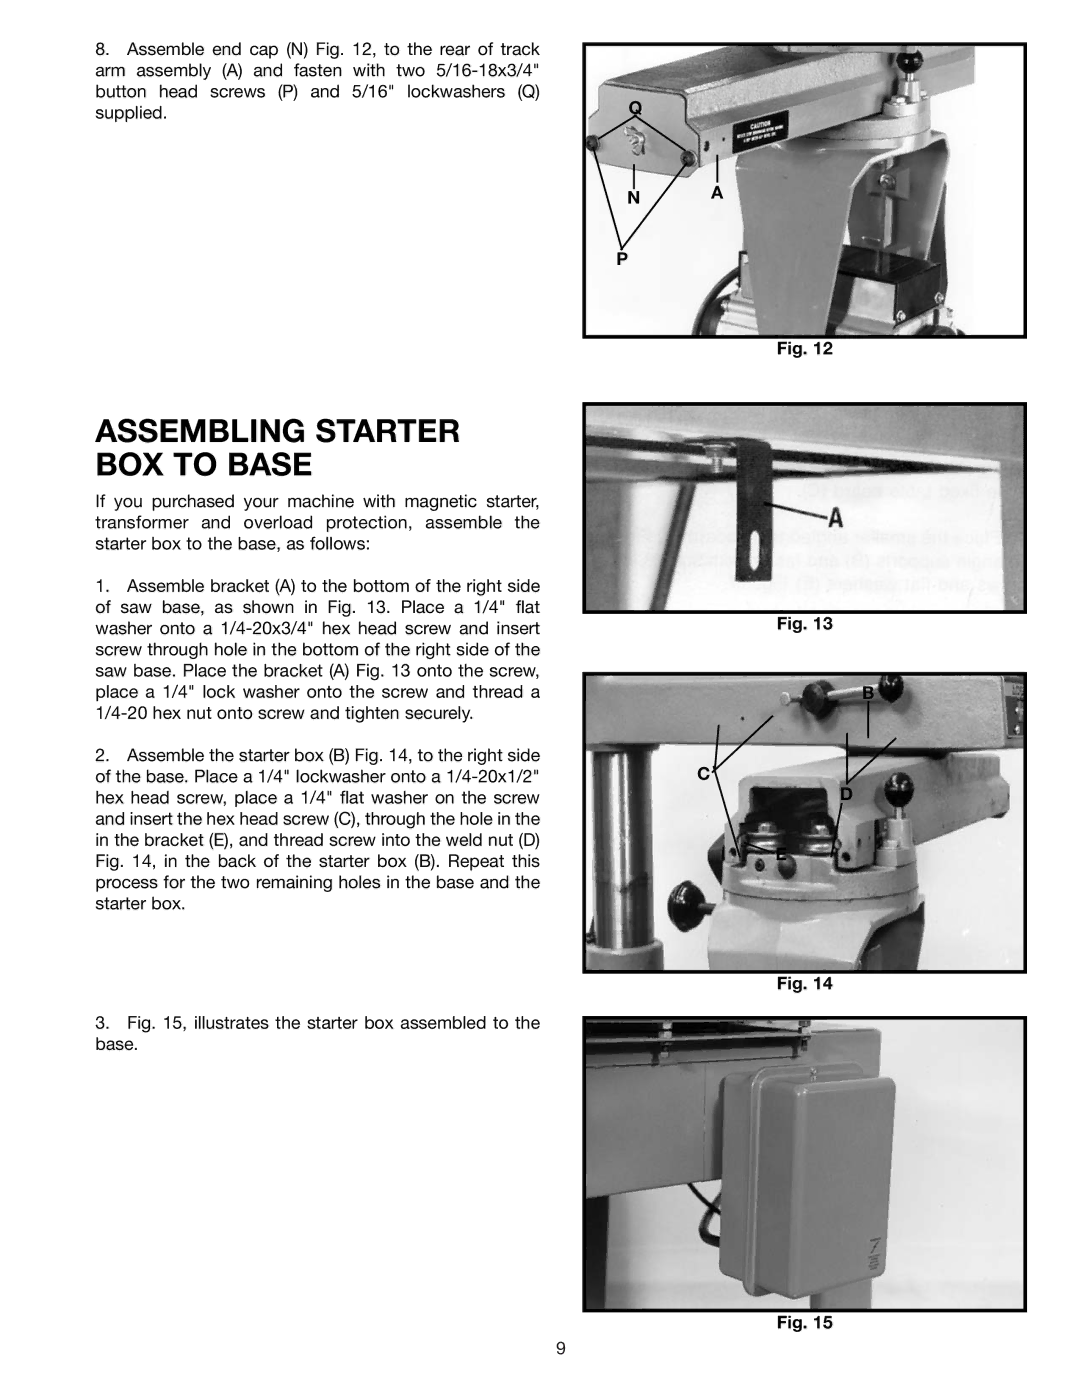
8.Assemble end cap (N) Fig. 12, to the rear of track arm assembly (A) and fasten with two 5/16-18x3/4" button head screws (P) and 5/16" lockwashers (Q) supplied.

ASSEMBLING STARTER BOX TO BASE

If you purchased your machine with magnetic starter, transformer and overload protection, assemble the starter box to the base, as follows:

1.Assemble bracket (A) to the bottom of the right side of saw base, as shown in Fig. 13. Place a 1/4" flat washer onto a 1/4-20x3/4" hex head screw and insert screw through hole in the bottom of the right side of the saw base. Place the bracket (A) Fig. 13 onto the screw, place a 1/4" lock washer onto the screw and thread a 1/4-20 hex nut onto screw and tighten securely.

2.Assemble the starter box (B) Fig. 14, to the right side of the base. Place a 1/4" lockwasher onto a 1/4-20x1/2" hex head screw, place a 1/4" flat washer on the screw and insert the hex head screw (C), through the hole in the in the bracket (E), and thread screw into the weld nut (D) Fig. 14, in the back of the starter box (B). Repeat this process for the two remaining holes in the base and the starter box.

3.Fig. 15, illustrates the starter box assembled to the base.

Q

NA

P

Fig. 12

Fig. 13

B

C

D

E

Fig. 14

Fig. 15

9

Page 9
Image 9
Delta 33-892, 33-890, 33-891 Assembling Starter BOX to Base, Illustrates the starter box assembled to the base