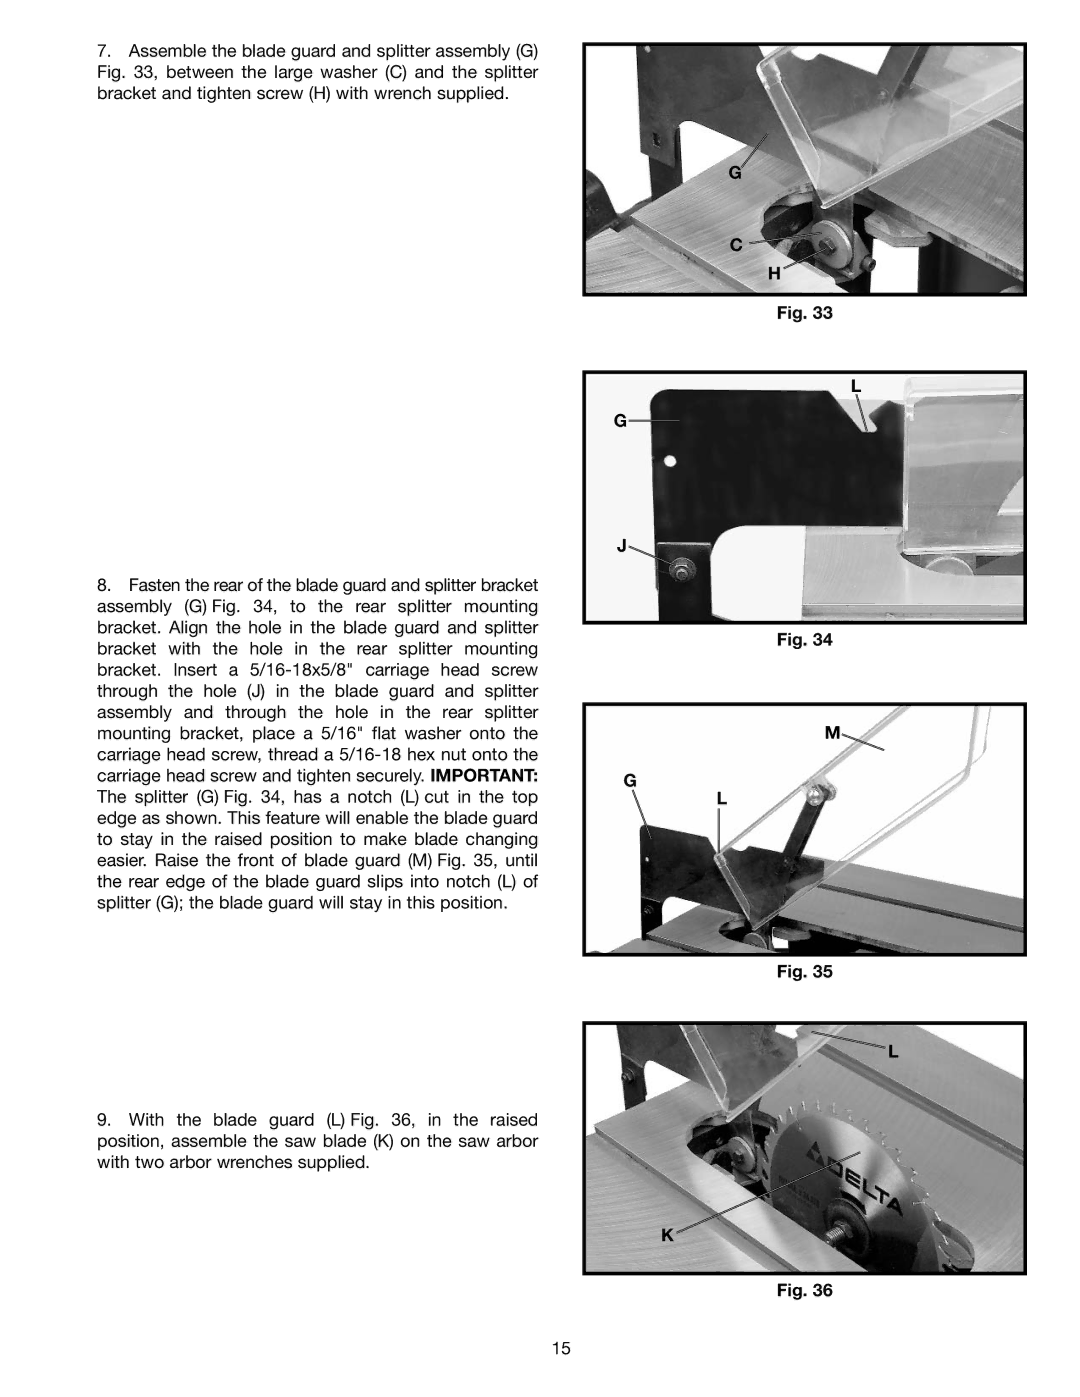
7.Assemble the blade guard and splitter assembly (G) Fig. 33, between the large washer (C) and the splitter bracket and tighten screw (H) with wrench supplied.

8.Fasten the rear of the blade guard and splitter bracket assembly (G) Fig. 34, to the rear splitter mounting bracket. Align the hole in the blade guard and splitter bracket with the hole in the rear splitter mounting bracket. Insert a 5/16-18x5/8" carriage head screw through the hole (J) in the blade guard and splitter assembly and through the hole in the rear splitter mounting bracket, place a 5/16" flat washer onto the carriage head screw, thread a 5/16-18 hex nut onto the carriage head screw and tighten securely. IMPORTANT: The splitter (G) Fig. 34, has a notch (L) cut in the top edge as shown. This feature will enable the blade guard to stay in the raised position to make blade changing easier. Raise the front of blade guard (M) Fig. 35, until the rear edge of the blade guard slips into notch (L) of splitter (G); the blade guard will stay in this position.

9.With the blade guard (L) Fig. 36, in the raised position, assemble the saw blade (K) on the saw arbor with two arbor wrenches supplied.

G

C

H

Fig. 33

L

G

J

Fig. 34

M

G

L

Fig. 35

L

K

Fig. 36

15

Page 15
Image 15
Delta 36-650 instruction manual