Fireplace
Installation
Continued
9.Follow instructions below to install logs, lava rock and ember material.
10.Close glass door, lock latches on top and bottom of door and replace screen (see steps 5 and 6 of
Removing Glass Door, page 24).
11.Close top and bottom louvers.
Left Side
Brick Panel
Figure 44 - Installing Side Brick Panels
Installing logs, lava rock and glowing embers
Each log is marked with a number. These numbers will help you identify the log when installing. It is very important to install these logs exactly as instructed. Do not modify logs. Only use logs supplied with fireplace.
Open louvers, remove screen, unlock door latches and open glass door. See steps 1 and 2 of Remov- ing Glass Door, page 24. Install logs according to instructions for fireplace model numbers.
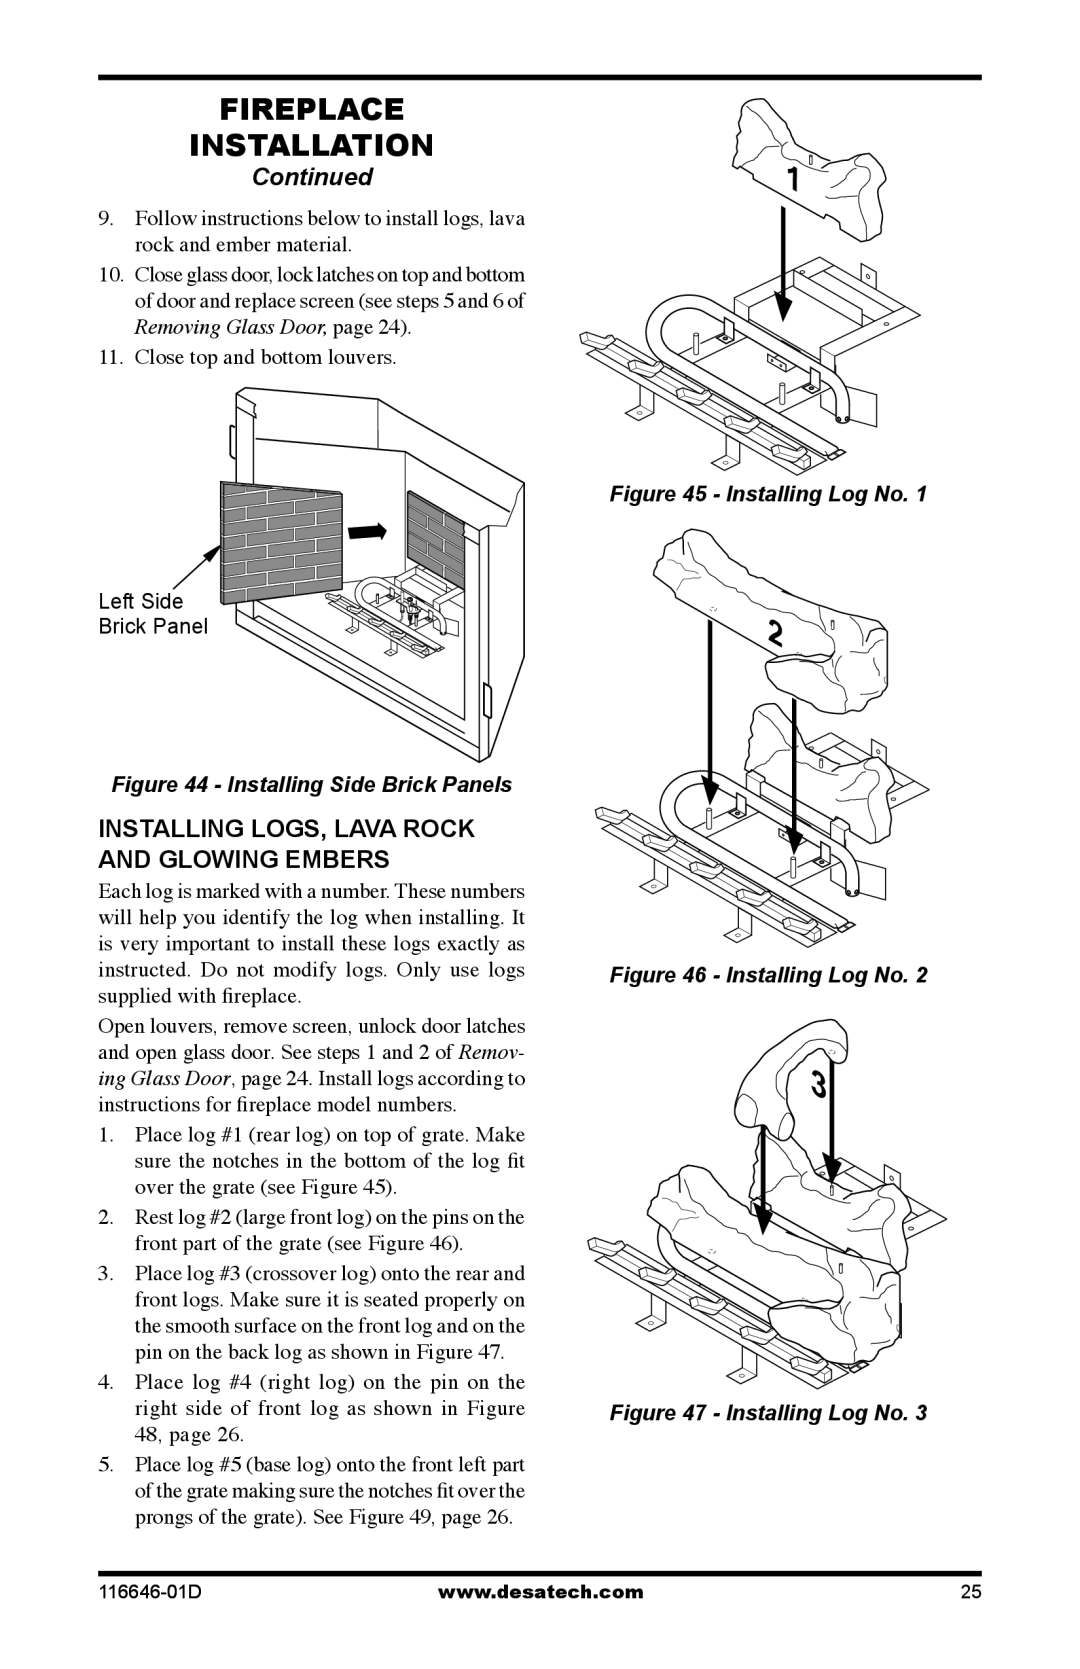
1.Place log #1 (rear log) on top of grate. Make sure the notches in the bottom of the log fit over the grate (see Figure 45).
2.Rest log #2 (large front log) on the pins on the front part of the grate (see Figure 46).
3.Place log #3 (crossover log) onto the rear and front logs. Make sure it is seated properly on the smooth surface on the front log and on the pin on the back log as shown in Figure 47.
4.Place log #4 (right log) on the pin on the right side of front log as shown in Figure 48, page 26.
5.Place log #5 (base log) onto the front left part of the grate making sure the notches fit over the prongs of the grate). See Figure 49, page 26.
1![]()
![]()
Figure 45 - Installing Log No. 1
2
Figure 46 - Installing Log No. 2
3
Figure 47 - Installing Log No. 3
www.desatech.com | 25 |