Setting up
Setting up
Install the projector according to the environment and manner the projector will be used in.
Arrangement
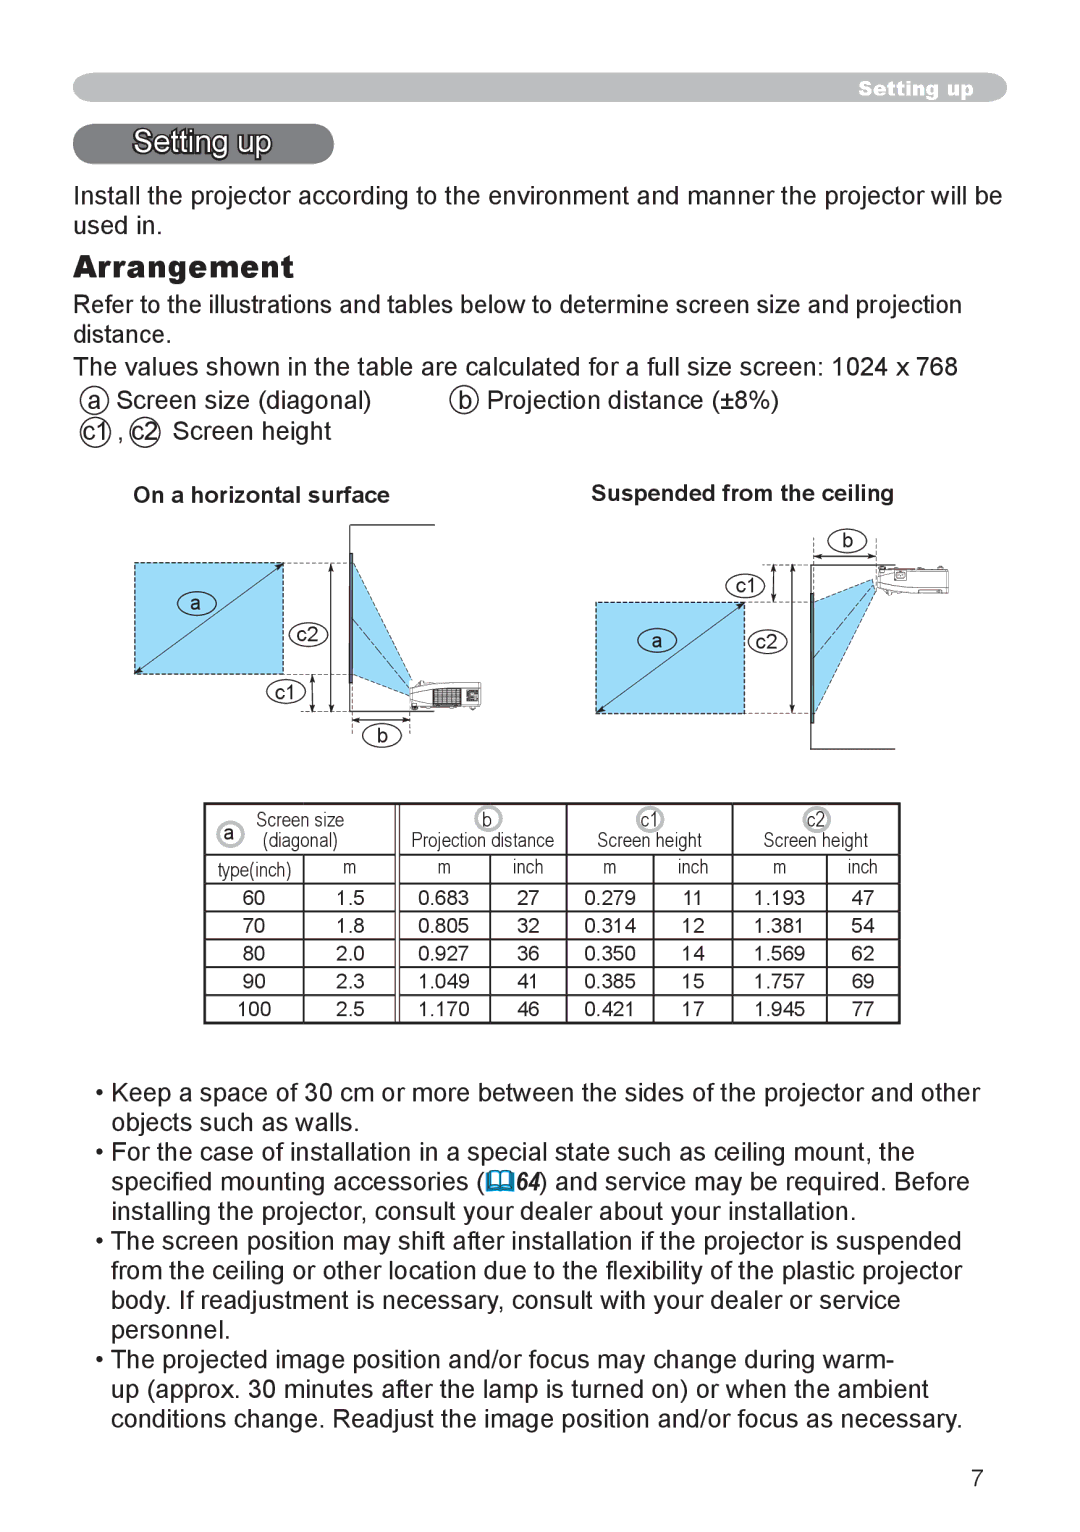
Refer to the illustrations and tables below to determine screen size and projection distance.
The values shown in the table are calculated for a full size screen: 1024 x 768
a Screen size (diagonal) | b Projection distance (±8%) |
c1 , c2 Screen height |
|
On a horizontal surface | Suspended from the ceiling |
a
c2
c1
b
c1
a c2
b
aScreen size
(diagonal)
type(inch) m
601.5
701.8
802.0
902.3
1002.5
| b |
| c1 |
| c2 | |||
Projection distance | Screen height | Screen height | ||||||
m |
| inch | m |
| inch | m |
| inch |
0.683 |
| 27 | 0.279 |
| 11 | 1.193 |
| 47 |
0.805 |
| 32 | 0.314 |
| 12 | 1.381 |
| 54 |
0.927 |
| 36 | 0.350 |
| 14 | 1.569 |
| 62 |
1.049 |
| 41 | 0.385 |
| 15 | 1.757 |
| 69 |
1.170 |
| 46 | 0.421 |
| 17 | 1.945 |
| 77 |
•Keep a space of 30 cm or more between the sides of the projector and other objects such as walls.
•For the case of installation in a special state such as ceiling mount, the specified mounting accessories (&64) and service may be required. Before installing the projector, consult your dealer about your installation.
•The screen position may shift after installation if the projector is suspended from the ceiling or other location due to the flexibility of the plastic projector body. If readjustment is necessary, consult with your dealer or service personnel.
•The projected image position and/or focus may change during warm- up (approx. 30 minutes after the lamp is turned on) or when the ambient conditions change. Readjust the image position and/or focus as necessary.
7