10 DX-LDVD19-10A
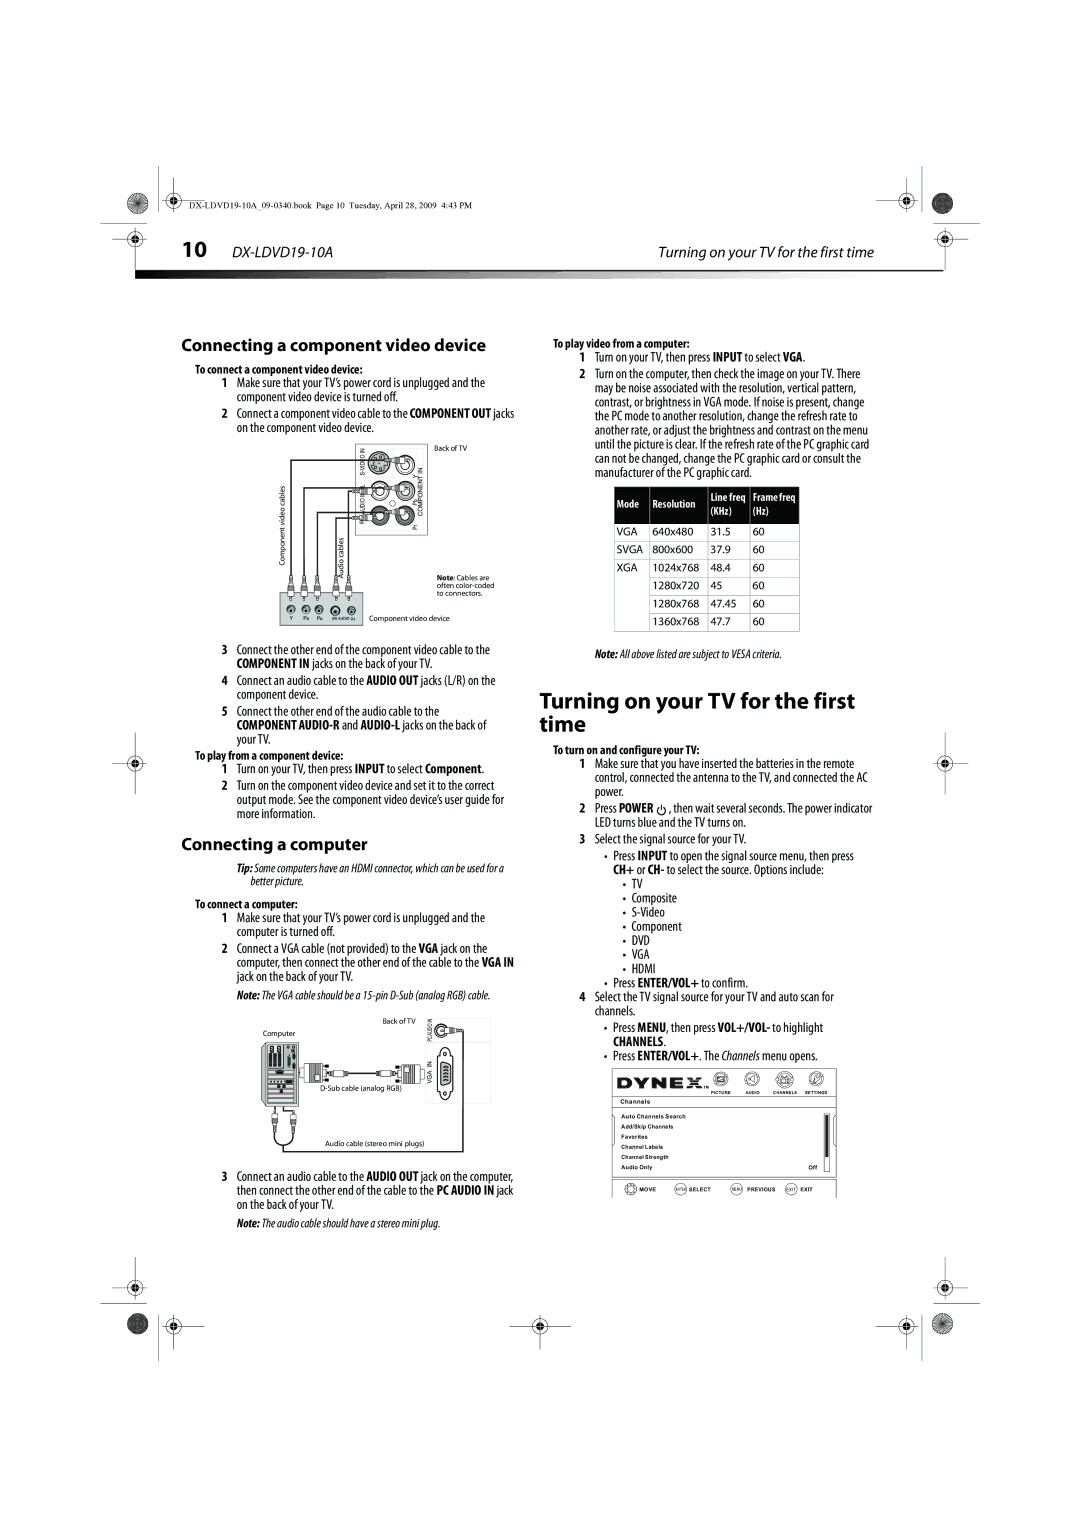
Connecting a component video device
To connect a component video device:
1Make sure that your TV’s power cord is unplugged and the component video device is turned off.
2Connect a component video cable to the COMPONENT OUT jacks on the component video device.
Turning on your TV for the first time
To play video from a computer:
1Turn on your TV, then press INPUT to select VGA.
2 Turn on the computer, then check the image on your TV. There |
may be noise associated with the resolution, vertical pattern, |
contrast, or brightness in VGA mode. If noise is present, change |
the PC mode to another resolution, change the refresh rate to |
another rate, or adjust the brightness and contrast on the menu |
until the picture is clear. If the refresh rate of the PC graphic card |
Component video cables | Audio cables | |||||||
|
|
|
|
|
|
|
|
|
|
|
|
|
|
|
|
|
|
|
|
|
|
|
|
|
|
|
IN | Back of TV |
AUDIO IN L | Pb Y COMPONENT IN |
R | Pr |
|
Note: Cables are often
Component video device
can not be changed, change the PC graphic card or consult the |
manufacturer of the PC graphic card. |
Mode | Resolution | Line freq | Frame freq | |
(KHz) | (Hz) | |||
|
| |||
VGA | 640x480 | 31.5 | 60 | |
|
|
|
| |
SVGA | 800x600 | 37.9 | 60 | |
|
|
|
| |
XGA | 1024x768 | 48.4 | 60 | |
|
|
|
| |
| 1280x720 | 45 | 60 | |
|
|
|
| |
| 1280x768 | 47.45 | 60 | |
|
|
|
| |
| 1360x768 | 47.7 | 60 | |
|
|
|
|
3Connect the other end of the component video cable to the COMPONENT IN jacks on the back of your TV.
4Connect an audio cable to the AUDIO OUT jacks (L/R) on the component device.
5Connect the other end of the audio cable to the COMPONENT
To play from a component device:
1Turn on your TV, then press INPUT to select Component.
2Turn on the component video device and set it to the correct output mode. See the component video device’s user guide for more information.
Connecting a computer
Tip: Some computers have an HDMI connector, which can be used for a better picture.
To connect a computer:
1Make sure that your TV’s power cord is unplugged and the computer is turned off.
2Connect a VGA cable (not provided) to the VGA jack on the computer, then connect the other end of the cable to the VGA IN jack on the back of your TV.
Note: The VGA cable should be a
| Back of TV | IN |
Computer |
| AUDIO |
| PC | |
|
| |
|
| VGA IN |
Audio cable (stereo mini plugs)
3Connect an audio cable to the AUDIO OUT jack on the computer, then connect the other end of the cable to the PC AUDIO IN jack on the back of your TV.
Note: The audio cable should have a stereo mini plug.
Note: All above listed are subject to VESA criteria.
Turning on your TV for the first time
To turn on and configure your TV:
1Make sure that you have inserted the batteries in the remote control, connected the antenna to the TV, and connected the AC power.
2Press POWER ![]() , then wait several seconds. The power indicator LED turns blue and the TV turns on.
, then wait several seconds. The power indicator LED turns blue and the TV turns on.
3Select the signal source for your TV.
•Press INPUT to open the signal source menu, then press CH+ or CH- to select the source. Options include:
•TV
•Composite
•
•Component
•DVD
•VGA
•HDMI
•Press ENTER/VOL+ to confirm.
4Select the TV signal source for your TV and auto scan for channels.
•Press MENU, then press VOL+/VOL- to highlight
CHANNELS.
•Press ENTER/VOL+. The Channels menu opens.
|
|
|
| PICTURE | AUDIO | CHANNELS | SETTINGS | |
Channels |
|
|
|
|
|
|
| |
Auto Channels Search |
|
|
|
|
|
| ||
Add/Skip Channels |
|
|
|
|
|
|
| |
Favorites |
|
|
|
|
|
|
| |
Channel Labels |
|
|
|
|
|
|
| |
Channel Strength |
|
|
|
|
|
|
| |
Audio Only |
|
|
|
|
|
| Off | |
| CH+ | ENTER | SELECT | MENU | PREVIOUS | EXIT | EXIT | |
- | + MOVE | |||||||
VOL | VOL |
|
|
|
|
|
|
|
CH-