Initial Installation
QUALIFIED INSTALLERS ONLY
7.Slide the decorative wall thimble up to the wall surface and attach with the screws provided. Apply decorative brass or chrome trim if desired (see right image in Figure 33).
NOTES:
(a)The four (4) wood screws provided should be replaced with the appropriate fasteners for stucco, brick, concrete, or other types of siding.
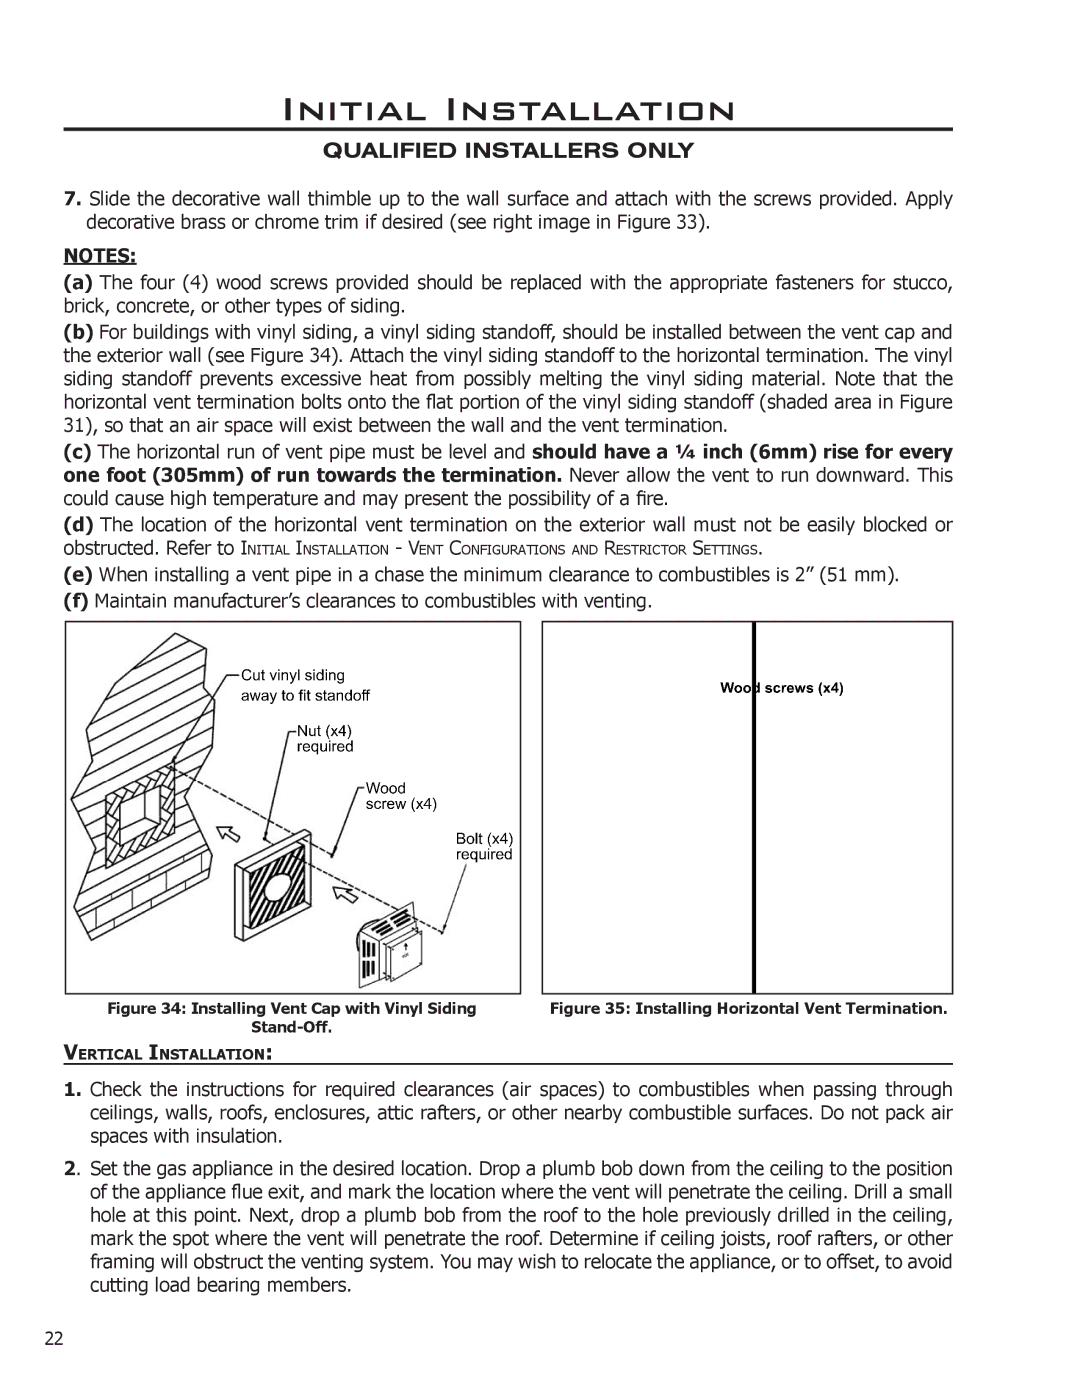
(b)For buildings with vinyl siding, a vinyl siding standoff, should be installed between the vent cap and the exterior wall (see Figure 34). Attach the vinyl siding standoff to the horizontal termination. The vinyl siding standoff prevents excessive heat from possibly melting the vinyl siding material. Note that the horizontal vent termination bolts onto the flat portion of the vinyl siding standoff (shaded area in Figure 31), so that an air space will exist between the wall and the vent termination.
(c)The horizontal run of vent pipe must be level and should have a 1⁄4 inch (6mm) rise for every one foot (305mm) of run towards the termination. Never allow the vent to run downward. This could cause high temperature and may present the possibility of a fire.
(d)The location of the horizontal vent termination on the exterior wall must not be easily blocked or
obstructed. Refer to INITIAL INSTALLATION - VENT CONFIGURATIONS AND RESTRICTOR SETTINGS.
(e)When installing a vent pipe in a chase the minimum clearance to combustibles is 2” (51 mm).
(f)Maintain manufacturer’s clearances to combustibles with venting.
Figure 34: Installing Vent Cap with Vinyl Siding | Figure 35: Installing Horizontal Vent Termination. |
| |
VERTICAL INSTALLATION: |
|
1.Check the instructions for required clearances (air spaces) to combustibles when passing through ceilings, walls, roofs, enclosures, attic rafters, or other nearby combustible surfaces. Do not pack air spaces with insulation.
2. Set the gas appliance in the desired location. Drop a plumb bob down from the ceiling to the position of the appliance flue exit, and mark the location where the vent will penetrate the ceiling. Drill a small hole at this point. Next, drop a plumb bob from the roof to the hole previously drilled in the ceiling, mark the spot where the vent will penetrate the roof. Determine if ceiling joists, roof rafters, or other framing will obstruct the venting system. You may wish to relocate the appliance, or to offset, to avoid cutting load bearing members.
22