Initial Installation
QUALIFIED INSTALLERS ONLY
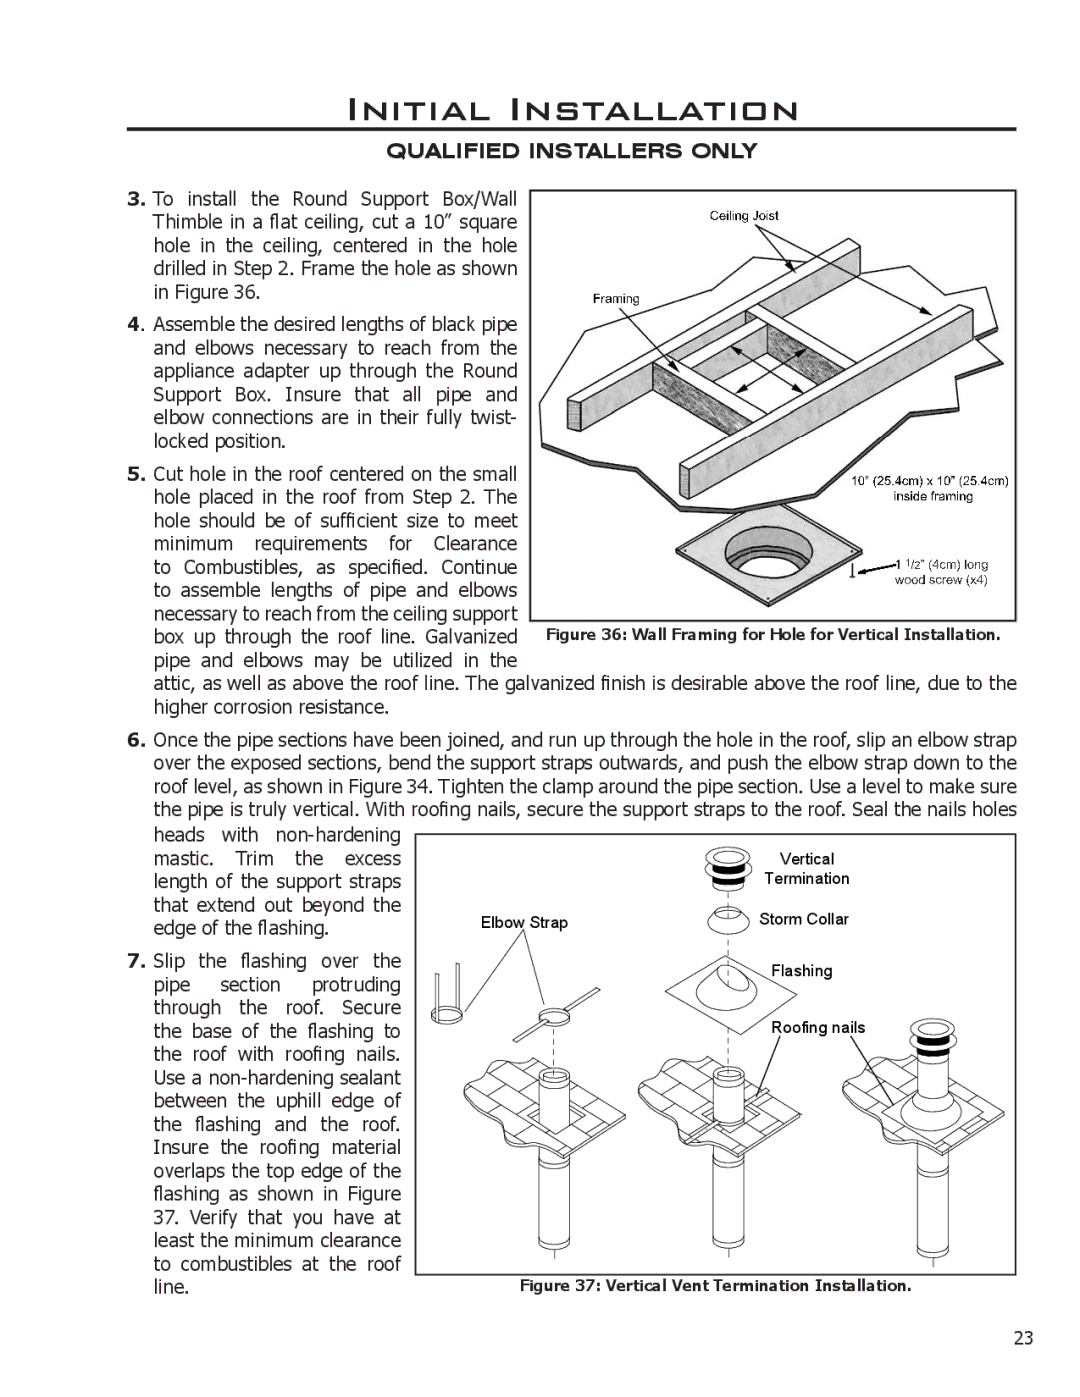
3.To install the Round Support Box/Wall Thimble in a flat ceiling, cut a 10” square hole in the ceiling, centered in the hole drilled in Step 2. Frame the hole as shown in Figure 36.
4. Assemble the desired lengths of black pipe and elbows necessary to reach from the appliance adapter up through the Round Support Box. Insure that all pipe and elbow connections are in their fully twist- locked position.
5.Cut hole in the roof centered on the small
hole placed in the roof from Step 2. The hole should be of sufficient size to meet minimum requirements for Clearance to Combustibles, as specified. Continue to assemble lengths of pipe and elbows necessary to reach from the ceiling support
box up through the roof line. Galvanized | Figure 36: Wall Framing for Hole for Vertical Installation. |
pipe and elbows may be utilized in the |
|
attic, as well as above the roof line. The galvanized finish is desirable above the roof line, due to the higher corrosion resistance.
6.Once the pipe sections have been joined, and run up through the hole in the roof, slip an elbow strap over the exposed sections, bend the support straps outwards, and push the elbow strap down to the roof level, as shown in Figure 34. Tighten the clamp around the pipe section. Use a level to make sure the pipe is truly vertical. With roofing nails, secure the support straps to the roof. Seal the nails holes
heads with
7.Slip the flashing over the pipe section protruding through the roof. Secure the base of the flashing to the roof with roofing nails. Use a
| Vertical |
| Termination |
Elbow Strap | Storm Collar |
| Flashing |
| Roofing nails |
Figure 37: Vertical Vent Termination Installation. | |
| 23 |