If you are just replacing an empty cartridge, then continue to step 4 and 5 below. If you are installing a full set of ArTainium®UV+ and ChromaBlast™ Digital Transfer Ink Cartridges, please continue to Step 6, Page 8.
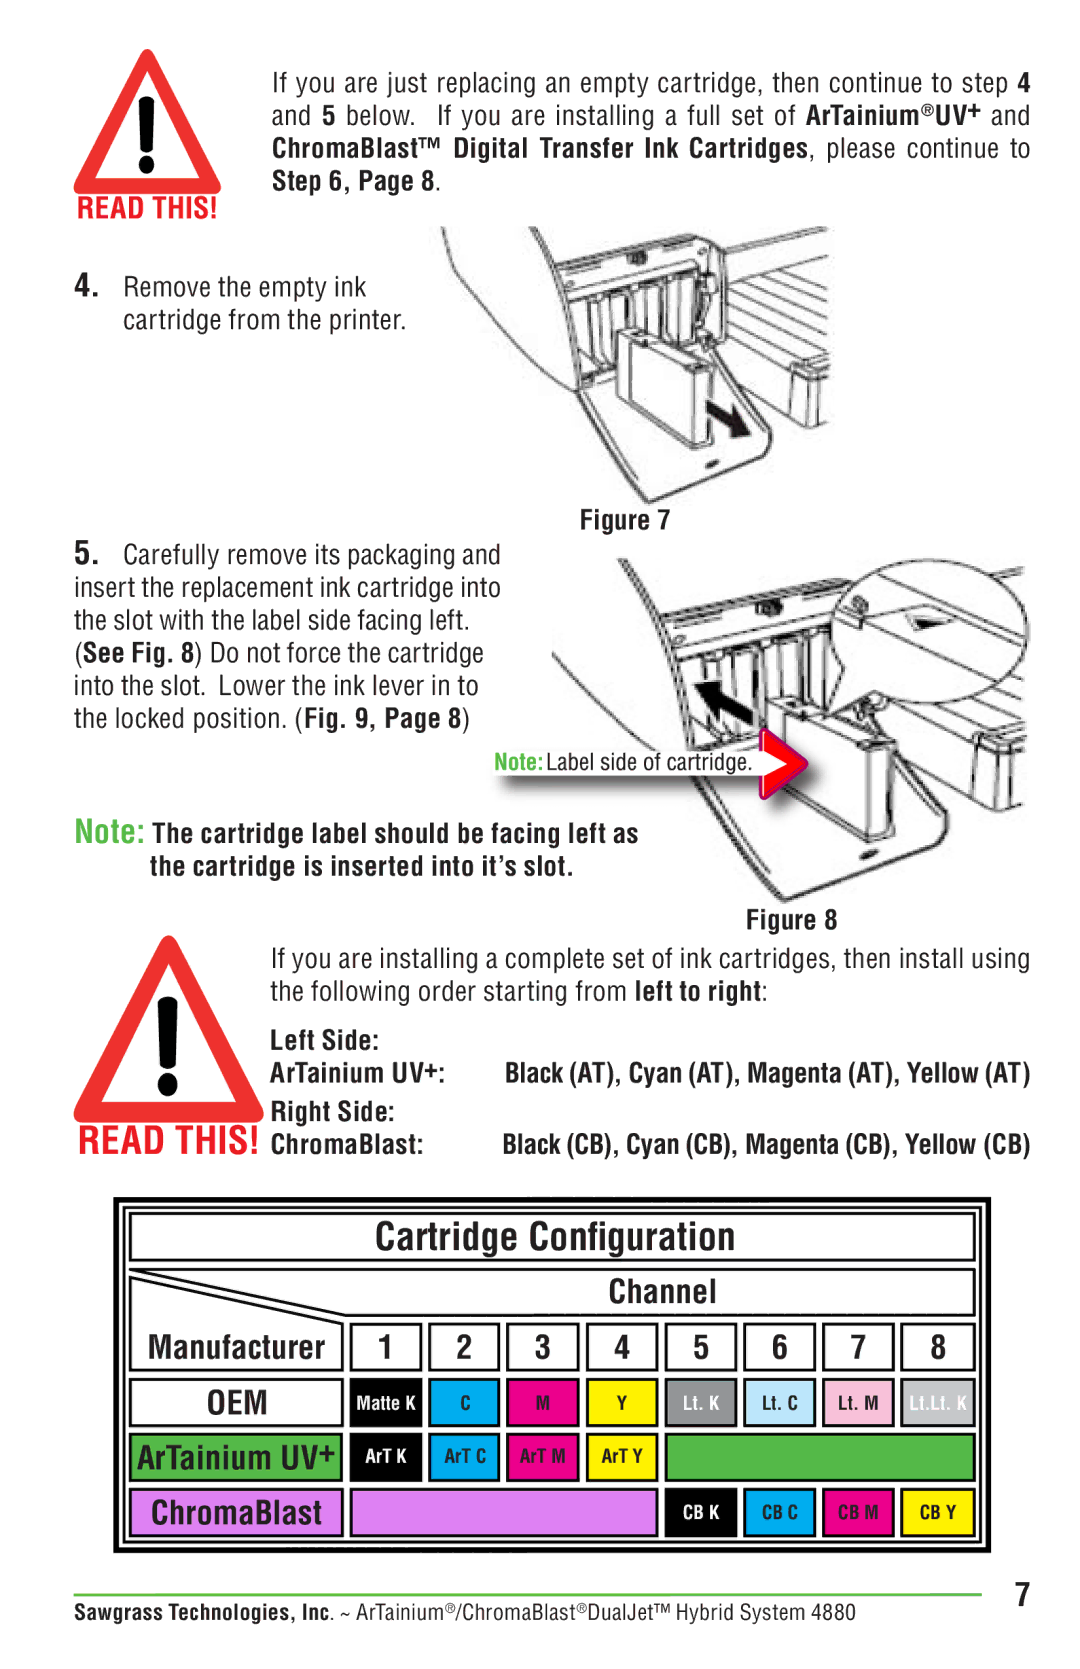
4.Remove the empty ink cartridge from the printer.
Figure 7
5.Carefully remove its packaging and insert the replacement ink cartridge into the slot with the label side facing left.
(See Fig. 8) Do not force the cartridge into the slot. Lower the ink lever in to the locked position. (Fig. 9, Page 8)
Note: The cartridge label should be facing left as the cartridge is inserted into it’s slot.
Figure 8
If you are installing a complete set of ink cartridges, then install using the following order starting from left to right:
Left Side:
ArTainium UV+: Black (AT), Cyan (AT), Magenta (AT), Yellow (AT)
Right Side: |
|
ChromaBlast: | Black (CB), Cyan (CB), Magenta (CB), Yellow (CB) |
Cartridge Configuration
Channel
Manufacturer |
| 1 |
| 2 |
| 3 |
| 4 |
|
|
|
|
|
|
|
|
|
OEM |
| Matte K |
| C |
| M |
| Y |
|
|
|
|
|
|
|
|
|
ArTainium UV+ |
| ArT K |
| ArT C |
| ArT M |
| ArT Y |
|
|
|
|
|
|
|
|
|
ChromaBlast |
|
|
|
|
|
|
|
|
5 ![]()
![]() 6
6 ![]()
![]() 7
7 ![]()
![]() 8
8
Lt. K ![]()
![]() Lt. C
Lt. C ![]()
![]() Lt. M
Lt. M ![]()
![]() Lt.Lt. K
Lt.Lt. K
CB K |
| CB C |
| CB M |
| CB Y |
|
|
|
|
|
|
|
Sawgrass Technologies, Inc. ~ ArTainium®/ChromaBlast®DualJet™ Hybrid System 4880