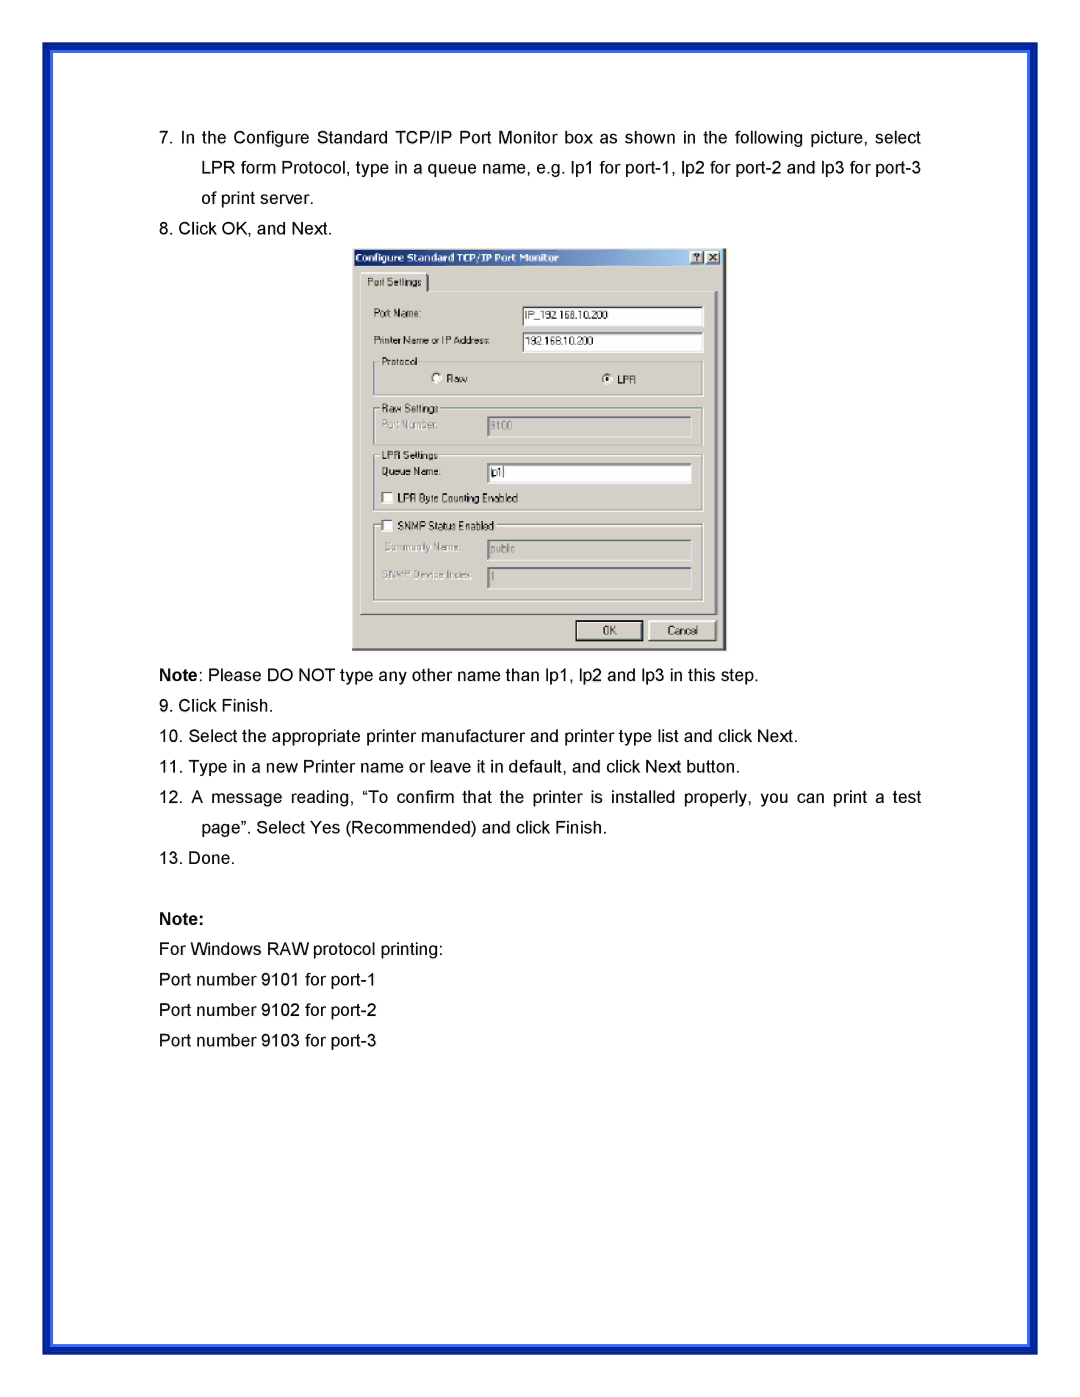
7.In the Configure Standard TCP/IP Port Monitor box as shown in the following picture, select LPR form Protocol, type in a queue name, e.g. lp1 for
8.Click OK, and Next.
Note: Please DO NOT type any other name than lp1, lp2 and lp3 in this step.
9.Click Finish.
10.Select the appropriate printer manufacturer and printer type list and click Next.
11.Type in a new Printer name or leave it in default, and click Next button.
12.A message reading, “To confirm that the printer is installed properly, you can print a test page”. Select Yes (Recommended) and click Finish.
13.Done.
Note:
For Windows RAW protocol printing:
Port number 9101 for
Port number 9102 for
Port number 9103 for