Manuals
/
Epson
/
Computer Equipment
/
Network Card
Epson
(USB 2.0)
user manual
Models:
(USB 2.0)
1
64
69
69
Download
69 pages
35.03 Kb
61
62
63
64
65
66
67
68
Page 64
Image 64
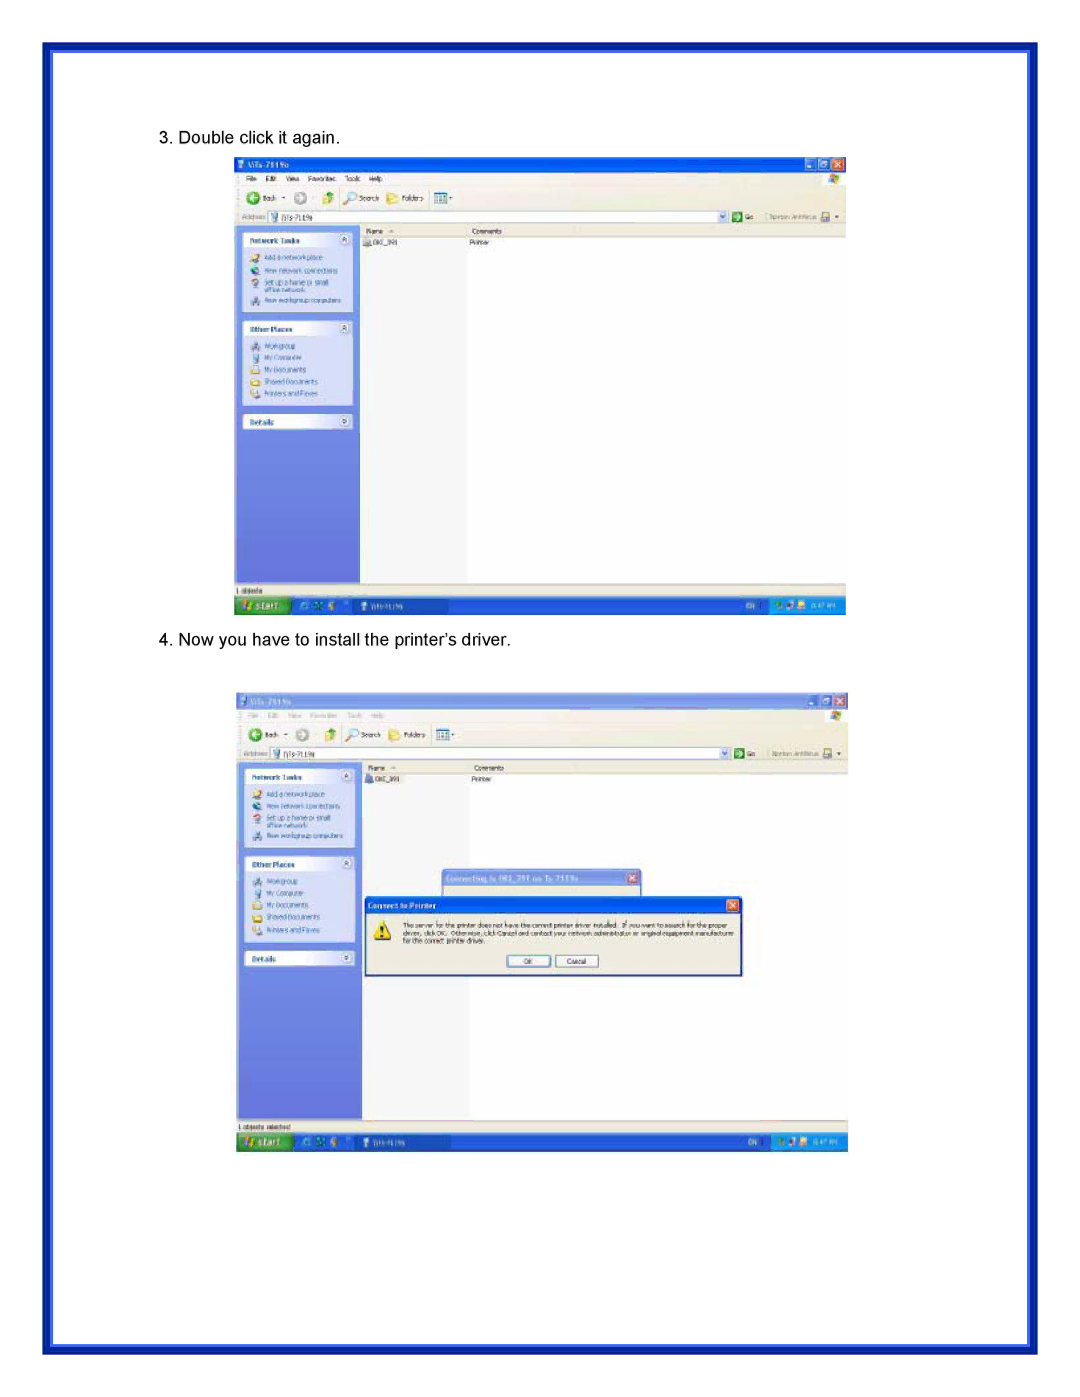
3. Double click it again.
4. Now you have to install the printer’s driver.
Page 63
Page 65
Page 64
Image 64
Page 63
Page 65
Contents
Port Print Server USB
Table of Contents
TCP/IP LPR Port Printing Installation
Trademarks
Copyright
Components and Features
LED Indicators
Introduction
State Indication
Before you start, you should prepare the following items
Print Server Installation
Network Environment
HP Web JetAdmin
Embedded Web server
Internet Printing Protocol
Comment
Software Installation
Installing the PSAdmin and Print Server’s Driver
Page
Page
Page
Page
Page
Page
Using PSAdmin
Wizard
TCP/IP Wizard
NetWare Wizard
Manual Setup
Obtain an IP address from a Dhcp server
Properties -TCP/IP Options
Specify an IP address
Reset
Upgrade
Refresh
Uninstalling the PSAdmin on Windows PC
Multiple Print Queues Configuration
Procedure
Windows NT/2000/XP/2003
Internet Printer Connection and HP Web JetAdmin
IPP Overview
Page
HP Web JetAdmin Overview
System Requirements Installing HP Web JetAdmin
Confirming Installation and Supply Access
Configuring and Modifying a Device
Configuration from Embedded Web Server
Using Embedded Web Server
Overview
Status Menu
Page
Printer Status
TCP/IP Status
Netware Status
NetWare NDS Setting
General Settings
NetWare Bindery Setting
AppleTalk Status
Snmp Status
Page
Setup Menu
System Setup
Printer Setup
Re-type Password
TCP/IP Setup
NetWare Setup
Page
Installing Print Server on NetWare 4.x/5.x
Installation Procedure
AppleTalk Setup
Setting Up a Macintosh Computer
Snmp Setup
Activities/SNMP Trap Messages / Description
MIB Object Names / Description
SMB Setup
Page
TCP/IP Protocol Installation
Network Print Monitor
Preparation
NetBEUI
IPX/SPX-compatible Protocol Installation
NetBEUI Protocol Installation
Page
Page
TCP/IP LPR Port Printing Installation
Basic TCP/IP Installation Overview
Assigning an IP Address
Use the Network Print Monitor utility
Page
Page
Page
Unix Installation
SCO Unix 8.0.0 Caldera Open Unix
System V Release 4 Unix
Redhat Linux
Page
Page
Upgrading Print Server
Upgrading the print server from PSAdmin
Upgrading the print server from Unix Through TCP/IP
Upgrading the print server from Browser
Troubleshooting
Windows 95/98/Me/NT/2000/XP/2003 Troubleshooting
Print Port Related Problems
Multi-Segment Frame Type 802.2 Installation
Print server Reconfiguration Procedure on Windows NT
Print Server Reconfiguration Procedure on Windows 95/98/Me
Moving the print server to a New Segment
TCP/IP Troubleshooting
Novell NetWare Troubleshooting
Moving Your Computer to a New Segment
If the gateway computer is a NT/UNIX server
If the gateway computer is a Novell NetWare file server
Page
Appendix
SMB Printing with Windows XP
Page
Page
Reset Button
Reboot the Print server
Question a
Frequently Asked Questions
Question B
Question D
Question E
Question F
Question G
Additional Installation Instructions
Top
Page
Image
Contents