Euphonix SH612 Studio Hub User Guide | Integration With Jupiter VM3000 Routers |
|
|
|
|
3.When finished, click Apply and then Close.
4.2.2Switcher Description
1.If switchers have already been added,
The Add rows to bottom dialog appears.
2.Enter the number of levels to add for the SH612 in the Rows to Add field.
This is typically
3.Click OK.
The empty rows appear at the bottom.
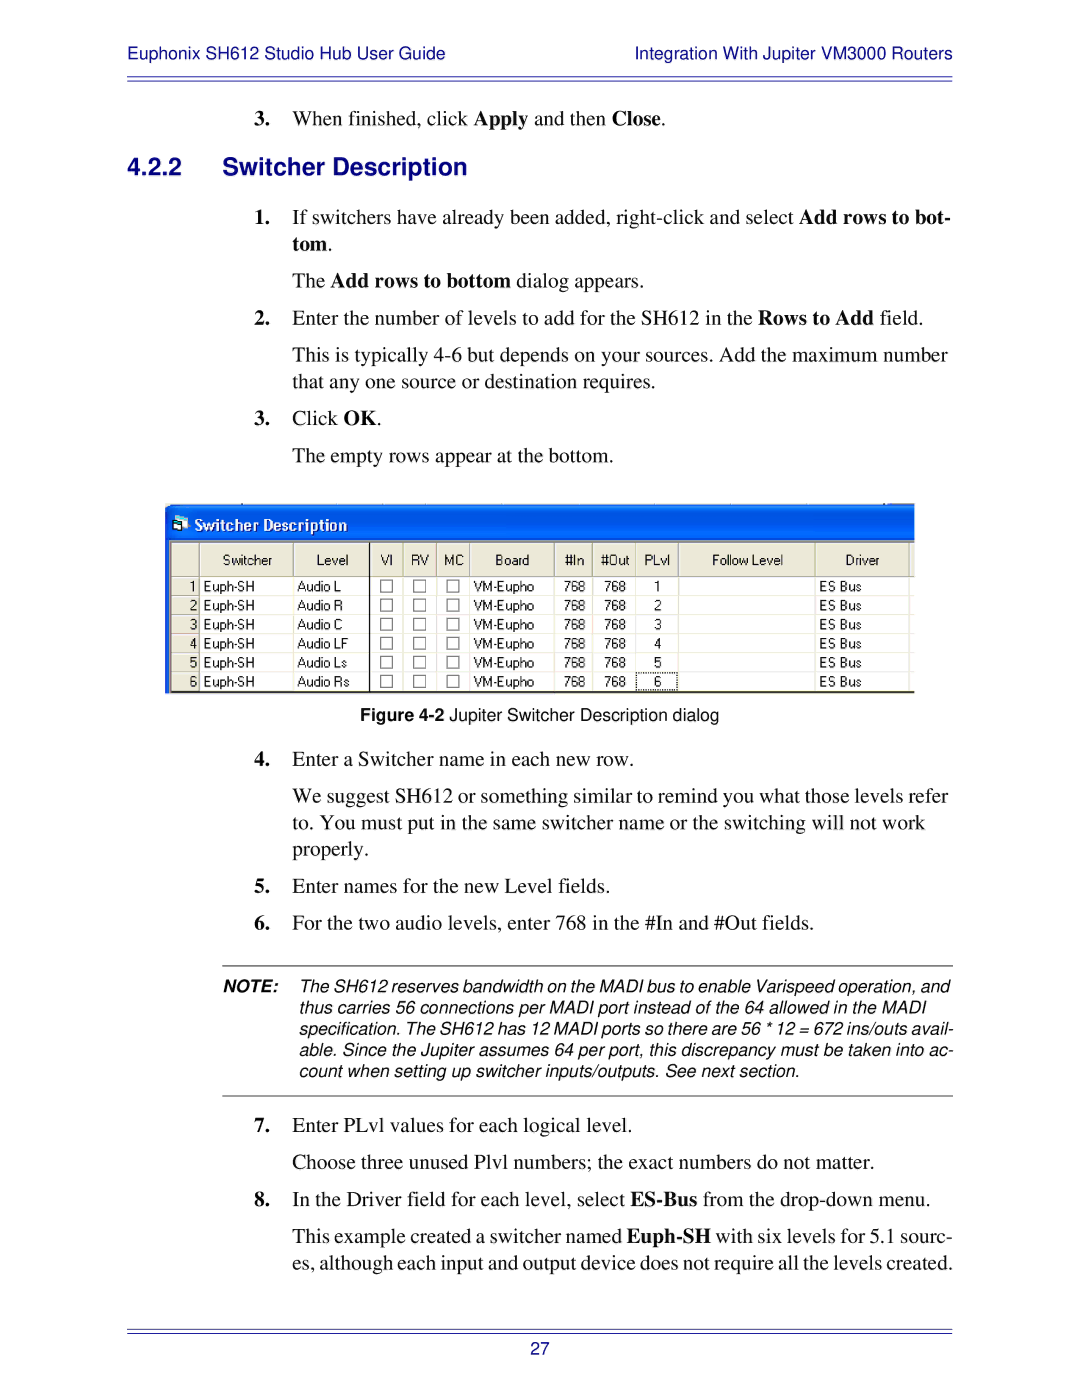
Figure 4-2 Jupiter Switcher Description dialog
4.Enter a Switcher name in each new row.
We suggest SH612 or something similar to remind you what those levels refer to. You must put in the same switcher name or the switching will not work properly.
5.Enter names for the new Level fields.
6.For the two audio levels, enter 768 in the #In and #Out fields.
NOTE: The SH612 reserves bandwidth on the MADI bus to enable Varispeed operation, and thus carries 56 connections per MADI port instead of the 64 allowed in the MADI specification. The SH612 has 12 MADI ports so there are 56 * 12 = 672 ins/outs avail- able. Since the Jupiter assumes 64 per port, this discrepancy must be taken into ac- count when setting up switcher inputs/outputs. See next section.
7.Enter PLvl values for each logical level.
Choose three unused Plvl numbers; the exact numbers do not matter.
8.In the Driver field for each level, select
This example created a switcher named
27