<Note>: If you import a WAV file to a recorded song, the imported file overwrites the existing track data. Note that if the time length of the imported file is shorter than the length of the existing track data, the imported file only overwrites the overlapping part.
The rest part of the original data still remains. Also note that you cannot undo the import operation. If you do not satisfy with the result, press the [UNDO/REDO] key to undo the import operation. The unit returns to the con- dition before importing a track.
1)While the unit is stopped, press the [MENU/ENTER] knob to enter the MENU mode.
The display now shows the first page of the menu selection screen.
2)Use the [MENU/ENTER] knob to select ![]() " on the second page and press the [MENU/ENTER] knob.
" on the second page and press the [MENU/ENTER] knob.
The display now shows the
3)Use the [MENU/ENTER] knob to select
"Song Import ![]() " on the second page and press the [MENU/ENTER] knob.
" on the second page and press the [MENU/ENTER] knob.
The display now shows the screen for selecting the folder on the
The folders you can import a mono WAV file from are limited to the root folder and subfolder in the next level.
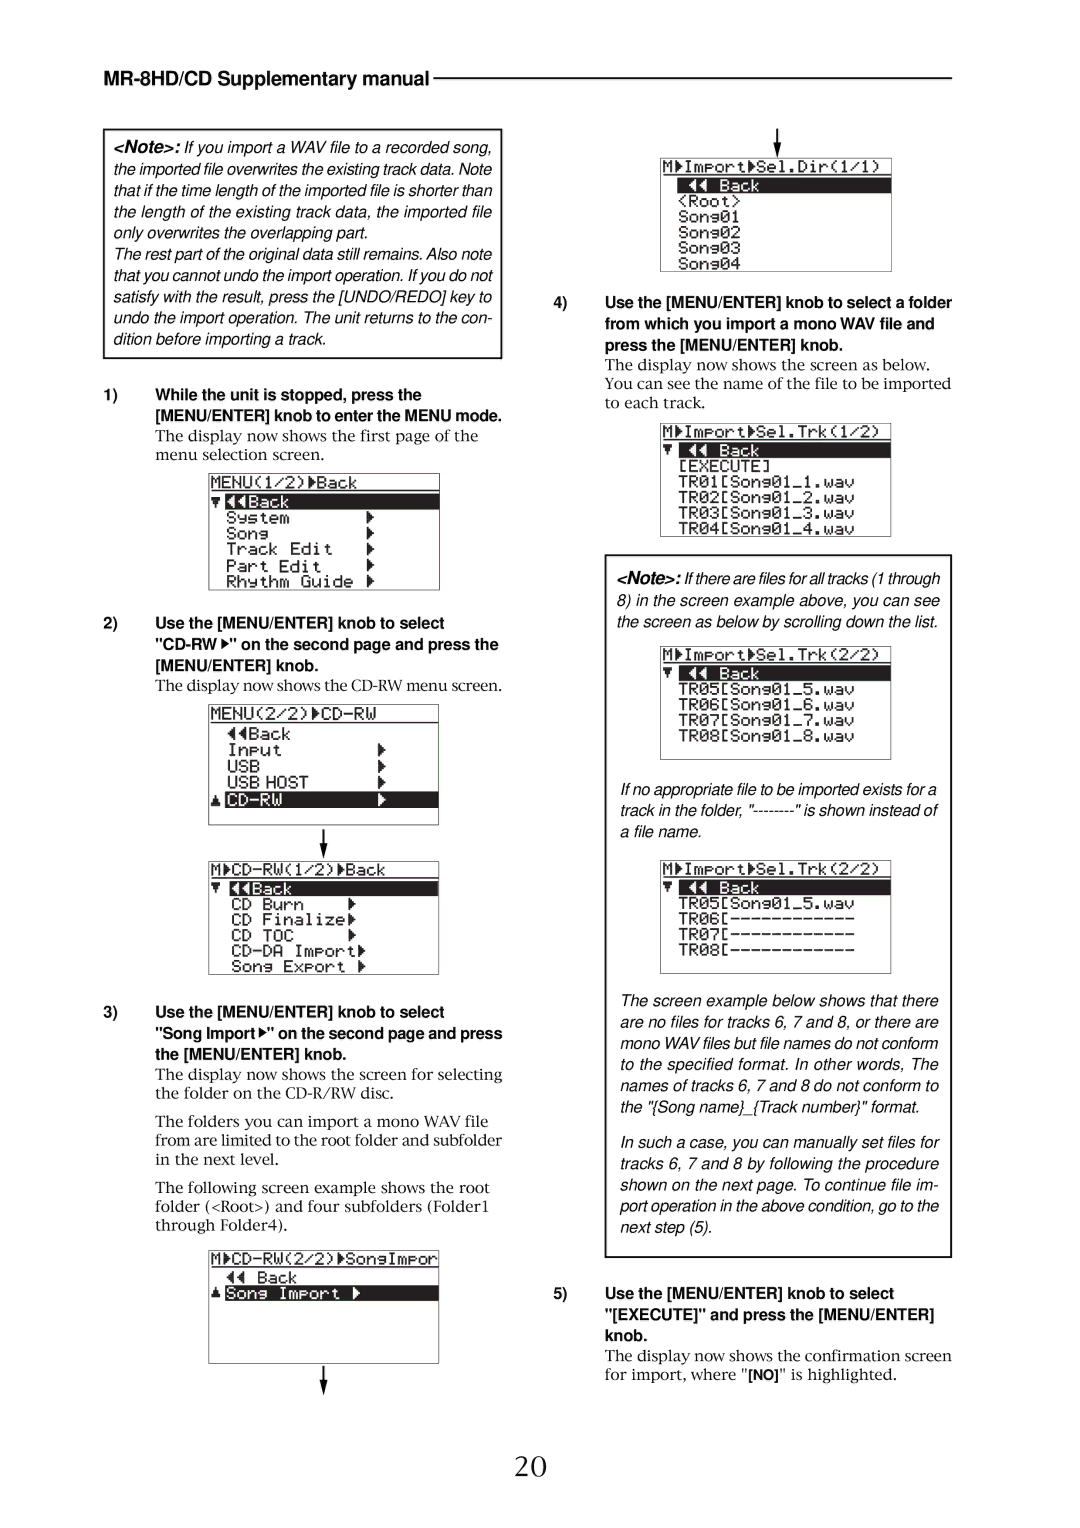
The following screen example shows the root folder (<Root>) and four subfolders (Folder1 through Folder4).
4)Use the [MENU/ENTER] knob to select a folder from which you import a mono WAV file and press the [MENU/ENTER] knob.
The display now shows the screen as below. You can see the name of the file to be imported to each track.
<Note>: If there are files for all tracks (1 through
8)in the screen example above, you can see the screen as below by scrolling down the list.
If no appropriate file to be imported exists for a track in the folder,
a file name.
The screen example below shows that there are no files for tracks 6, 7 and 8, or there are mono WAV files but file names do not conform to the specified format. In other words, The names of tracks 6, 7 and 8 do not conform to the "{Song name}_{Track number}" format.
In such a case, you can manually set files for tracks 6, 7 and 8 by following the procedure shown on the next page. To continue file im- port operation in the above condition, go to the next step (5).
5)Use the [MENU/ENTER] knob to select "[EXECUTE]" and press the [MENU/ENTER] knob.
The display now shows the confirmation screen for import, where "[NO]" is highlighted.
20