The User Interface of the Freecom Personal Media Suite
3.Starting the synchronization manually
a)Open the Freecom Personal Media Suite and click on the tab "Freecom SYNC".
b)Select a SYNC folder if you have not yet done so.
c)Click on "Sync now!" to start the data synchronization.
d)Alternatively,
5.4.8 Usage of the SYNC folder with other computers
Please follow these instructions if you want to use the SYNC folder with another (second) computer.
All files you want to work with on another computer have to be opened directly out of the Freecom SYNC folder! You should not copy them to another hard disk, as this might cause a later synchronization to perform incorrectly.
5.4.9 Synchronization of new or changed files
This example shows how you can synchronize files which were changed or created on the Freecom Hard Drive Pro, with the original files on the primary computer.
1.Connect the Freecom Hard Drive Pro with the primary computer.
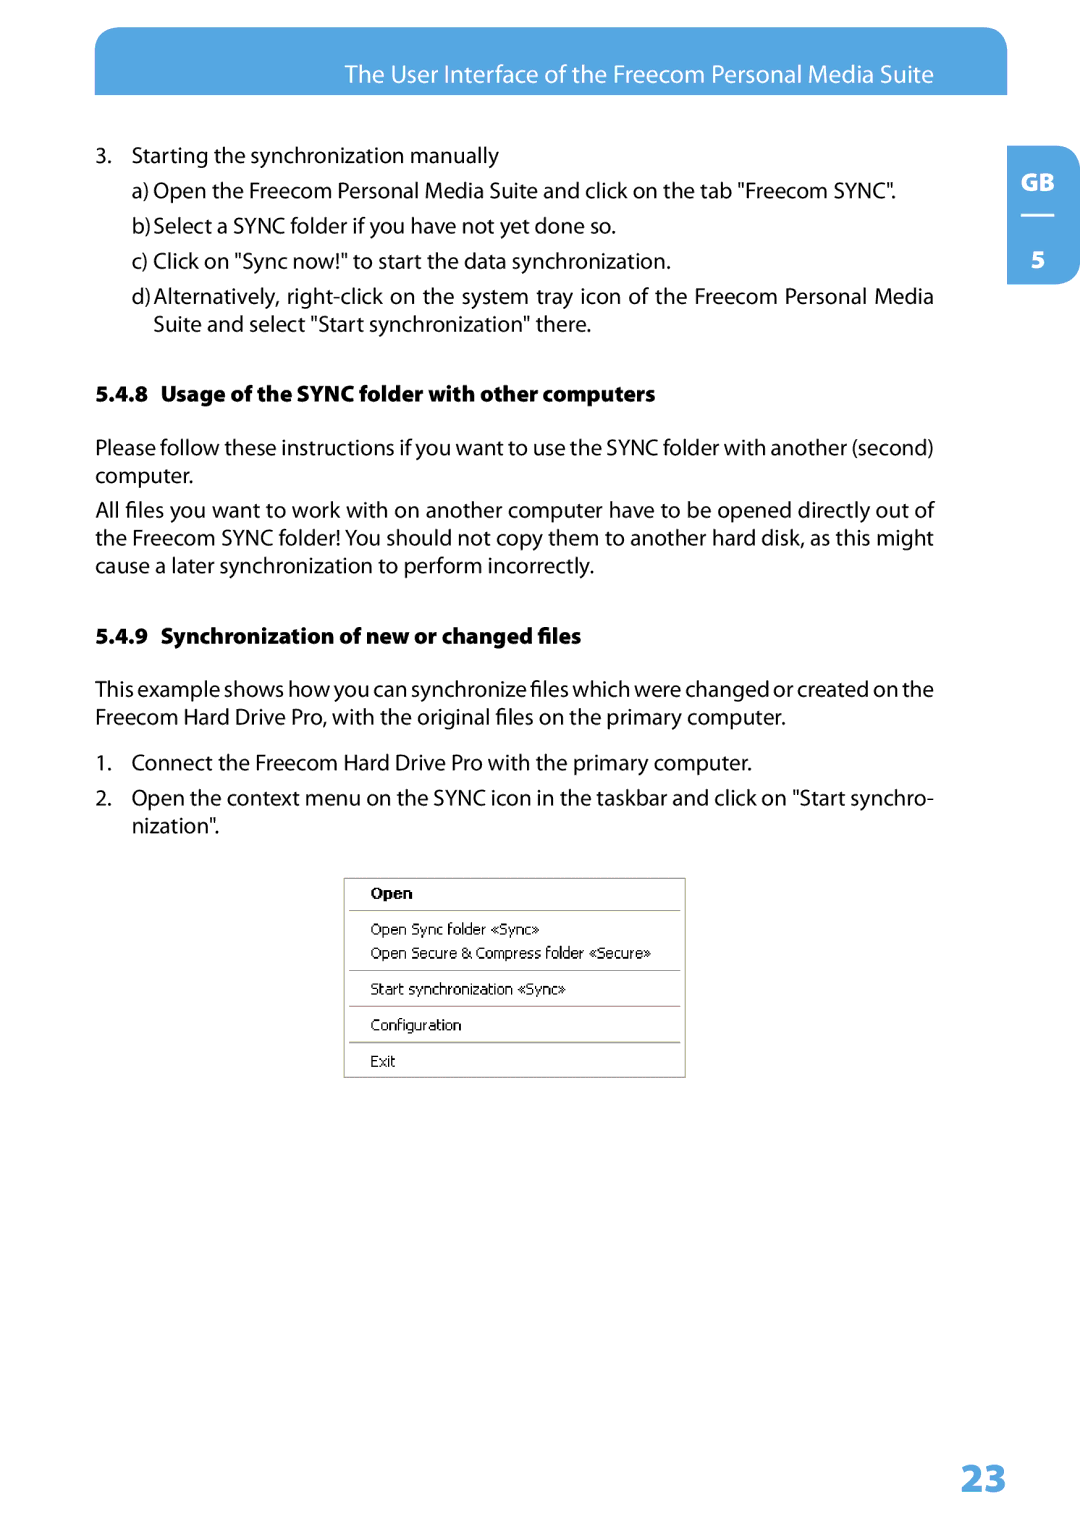
2.Open the context menu on the SYNC icon in the taskbar and click on "Start synchro- nization".
GB
5
23