Temperature
Cooler Warmer
Cool | Power | Heat | |
|
| ||
Fan | Fan |
| Money |
Only | Speed | Saver® | |
Timer Operation |
|
| |
On/Off | Start | Stop | Set Hr. |
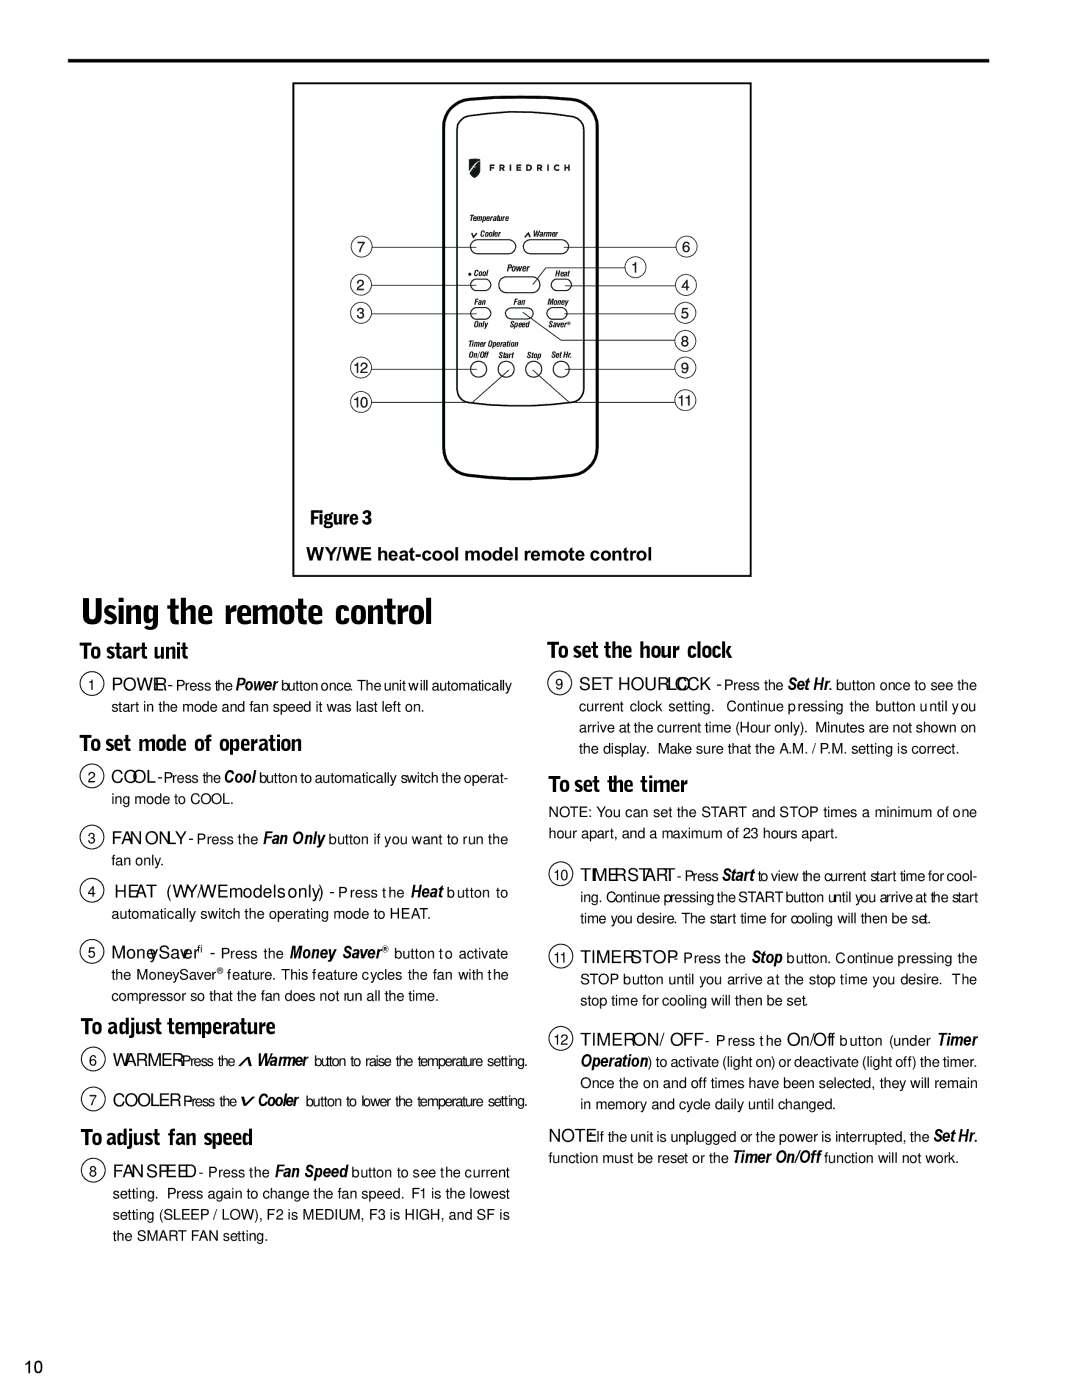
Figure 3
WY/WE
Using the remote control
To start unit
1POWER - Press the Power button once. The unit will automatically start in the mode and fan speed it was last left on.
To set mode of operation
2COOL - Press the Cool button to automatically switch the operat- ing mode to COOL.
3FAN ONLY - Press the Fan Only button if you want to run the fan only.
4 HEAT (WY/WE m odels only) - P ress t he Heat b utton to automatically switch the operating mode to HEAT.
5MoneySaver® - Press the Money Saver® button to activate the MoneySaver® feature. This feature cycles the fan with the compressor so that the fan does not run all the time.
To set the hour clock
9SET HOUR CLOCK - Press the Set Hr. button once to see the current clock setting. Continue pressing the button until you arrive at the current time (Hour only). Minutes are not shown on the display. Make sure that the A.M. / P.M. setting is correct.
To set the timer
NOTE: You can set the START and STOP times a minimum of one hour apart, and a maximum of 23 hours apart.
10TIMER START - Press Start to view the current start time for cool- ing. Continue pressing the START button until you arrive at the start time you desire. The start time for cooling will then be set.
11TIMER STOP - Press the Stop button. Continue pressing the STOP button until you arrive at the stop time you desire. The stop time for cooling will then be set.
To adjust temperature
6WARMER ![]() Warmer button to raise the temperature setting.
Warmer button to raise the temperature setting.
7COOLER - Press the![]() Cooler button to lower the temperature setting.
Cooler button to lower the temperature setting.
To adjust fan speed
8FAN SPEED - Press the Fan Speed button to see the current setting. Press again to change the fan speed. F1 is the lowest setting (SLEEP / LOW), F2 is MEDIUM, F3 is HIGH, and SF is the SMART FAN setting.
12TIMER ON / O FF - P ress t he O n/Off b utton (under Timer Operation) to activate (light on) or deactivate (light off) the timer. Once the on and off times have been selected, they will remain in memory and cycle daily until changed.
NOTE: If the unit is unplugged or the power is interrupted, the Set Hr. function must be reset or the Timer On/Off function will not work.
10