WARM & SERVE DRAWER INSTALLATION INSTRUCTIONS

NOTE: For stand-alone installation, the base must be capable of supporting 100 lbs. (45 kg). For a combination Warm & Serve Drawer and built-in oven installation, the base must be capable of supporting 250 lbs. (114 kg).

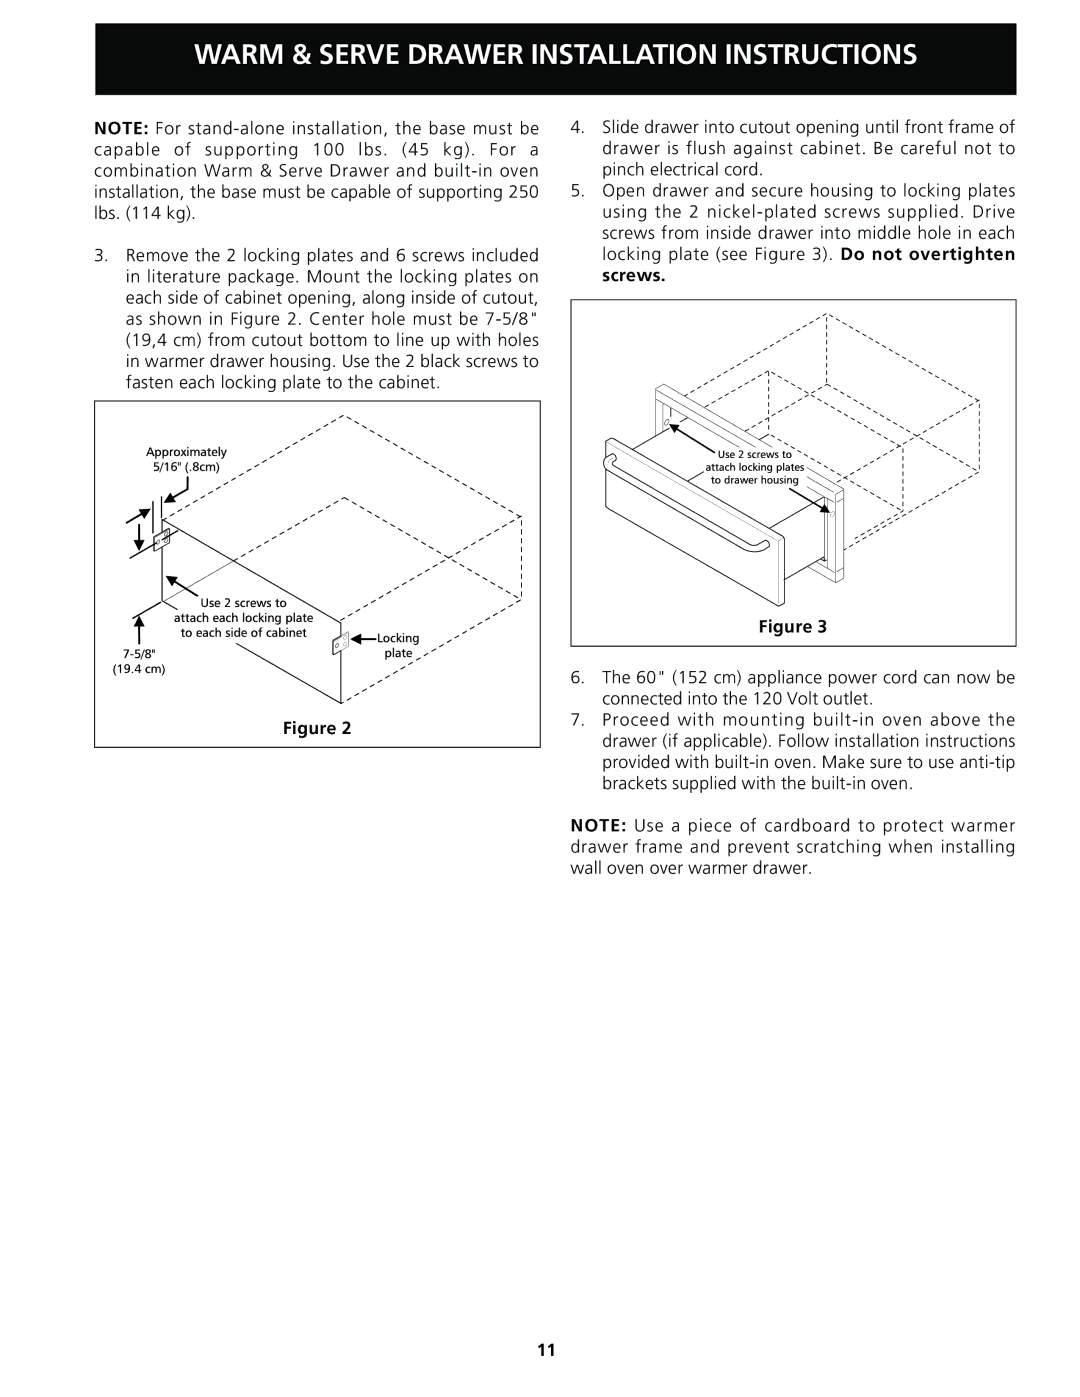
3.Remove the 2 locking plates and 6 screws included in literature package. Mount the locking plates on each side of cabinet opening, along inside of cutout, as shown in Figure 2. Center hole must be 7-5/8" (19,4 cm) from cutout bottom to line up with holes in warmer drawer housing. Use the 2 black screws to fasten each locking plate to the cabinet.

Figure 2

4.Slide drawer into cutout opening until front frame of drawer is flush against cabinet. Be careful not to pinch electrical cord.

5.Open drawer and secure housing to locking plates using the 2 nickel-plated screws supplied. Drive screws from inside drawer into middle hole in each locking plate (see Figure 3). Do not overtighten screws.

Figure 3

6.The 60" (152 cm) appliance power cord can now be connected into the 120 Volt outlet.

7.Proceed with mounting built-in oven above the drawer (if applicable). Follow installation instructions provided with built-in oven. Make sure to use anti-tip brackets supplied with the built-in oven.

NOTE: Use a piece of cardboard to protect warmer drawer frame and prevent scratching when installing wall oven over warmer drawer.

11

Page 11
Image 11
Frigidaire important safety instructions Warm & Serve Drawer Installation Instructions