24G SERIES FLATBOTTOM GAS FRYERS CHAPTER 1: SERVICE PROCEDURES
1.9 Troubleshooting Guides
FACTORY APPROVAL MUST BE OBTAINED PRIOR TO ANY WARRANTY WORK BEING
DONE OR DEAN CANNOT BE HELD RESPONSIBLE.
The following procedures must be performed by Factory Authorized Service Technicians, and are provided as an aid to expedite troubleshooting and repair of 24G Series frying systems.
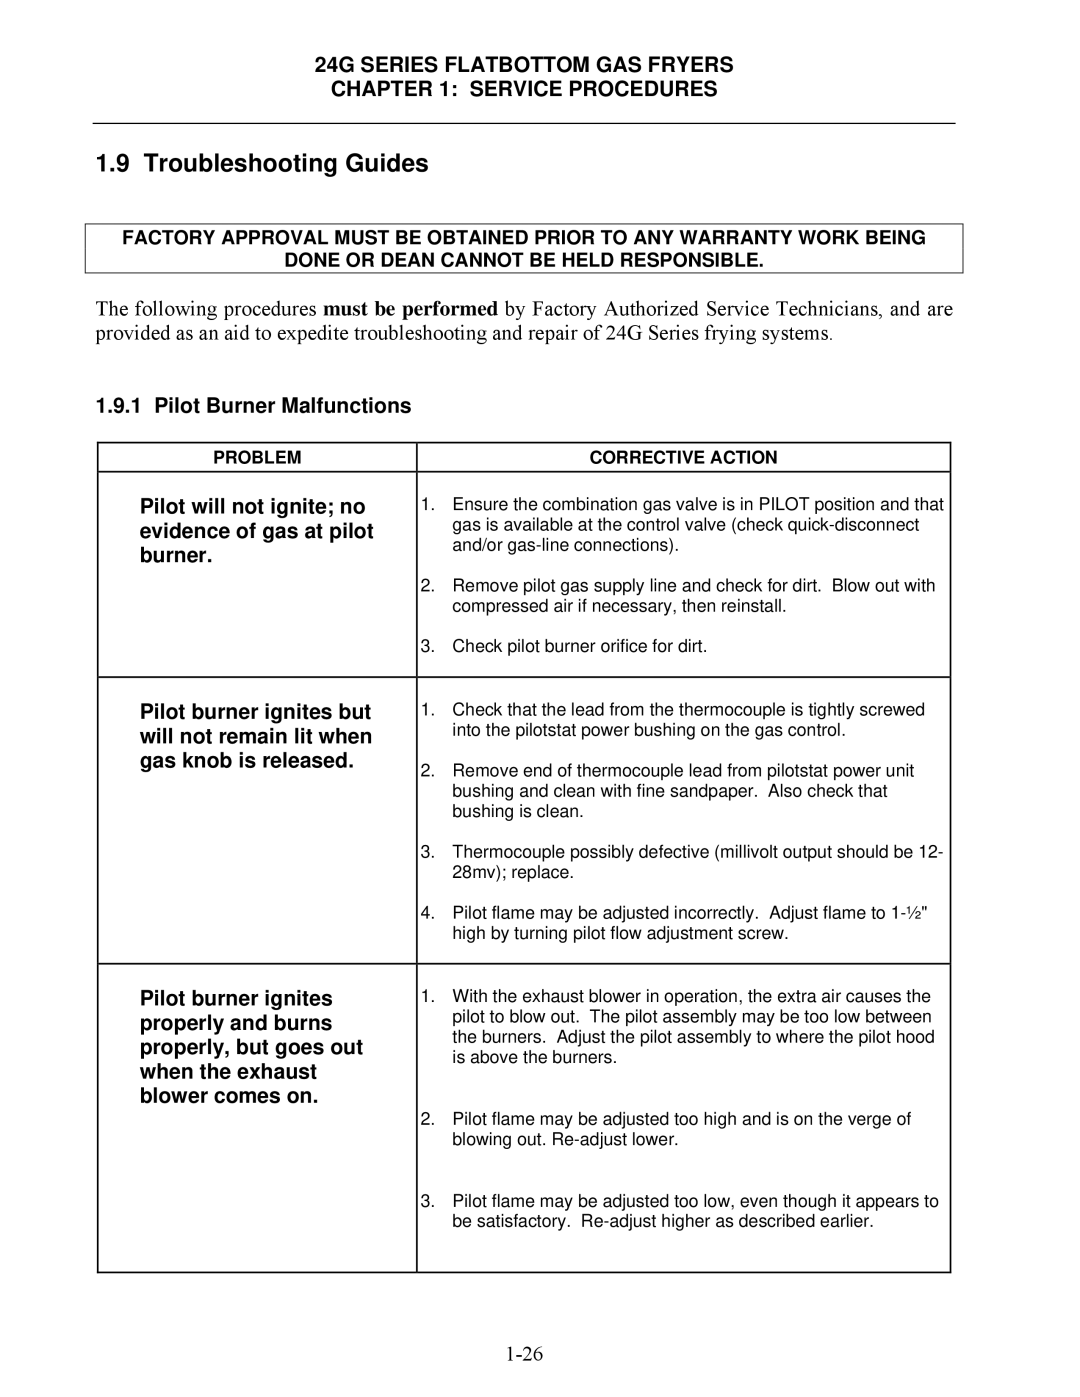
1.9.1 Pilot Burner Malfunctions
PROBLEM |
| CORRECTIVE ACTION |
Pilot will not ignite; no | 1. | Ensure the combination gas valve is in PILOT position and that |
evidence of gas at pilot |
| gas is available at the control valve (check |
burner. |
| and/or |
|
| |
| 2. | Remove pilot gas supply line and check for dirt. Blow out with |
|
| compressed air if necessary, then reinstall. |
| 3. | Check pilot burner orifice for dirt. |
|
|
|
Pilot burner ignites but | 1. | Check that the lead from the thermocouple is tightly screwed |
will not remain lit when |
| into the pilotstat power bushing on the gas control. |
gas knob is released. | 2. | Remove end of thermocouple lead from pilotstat power unit |
|
| bushing and clean with fine sandpaper. Also check that |
|
| bushing is clean. |
| 3. | Thermocouple possibly defective (millivolt output should be 12- |
|
| 28mv); replace. |
| 4. | Pilot flame may be adjusted incorrectly. Adjust flame to |
|
| high by turning pilot flow adjustment screw. |
|
|
|
Pilot burner ignites | 1. | With the exhaust blower in operation, the extra air causes the |
properly and burns |
| pilot to blow out. The pilot assembly may be too low between |
properly, but goes out |
| the burners. Adjust the pilot assembly to where the pilot hood |
| is above the burners. | |
when the exhaust |
| |
|
| |
blower comes on. | 2. | Pilot flame may be adjusted too high and is on the verge of |
| ||
|
| blowing out. |
| 3. | Pilot flame may be adjusted too low, even though it appears to |
|
| be satisfactory. |
|
|
|