Basic Setup
A
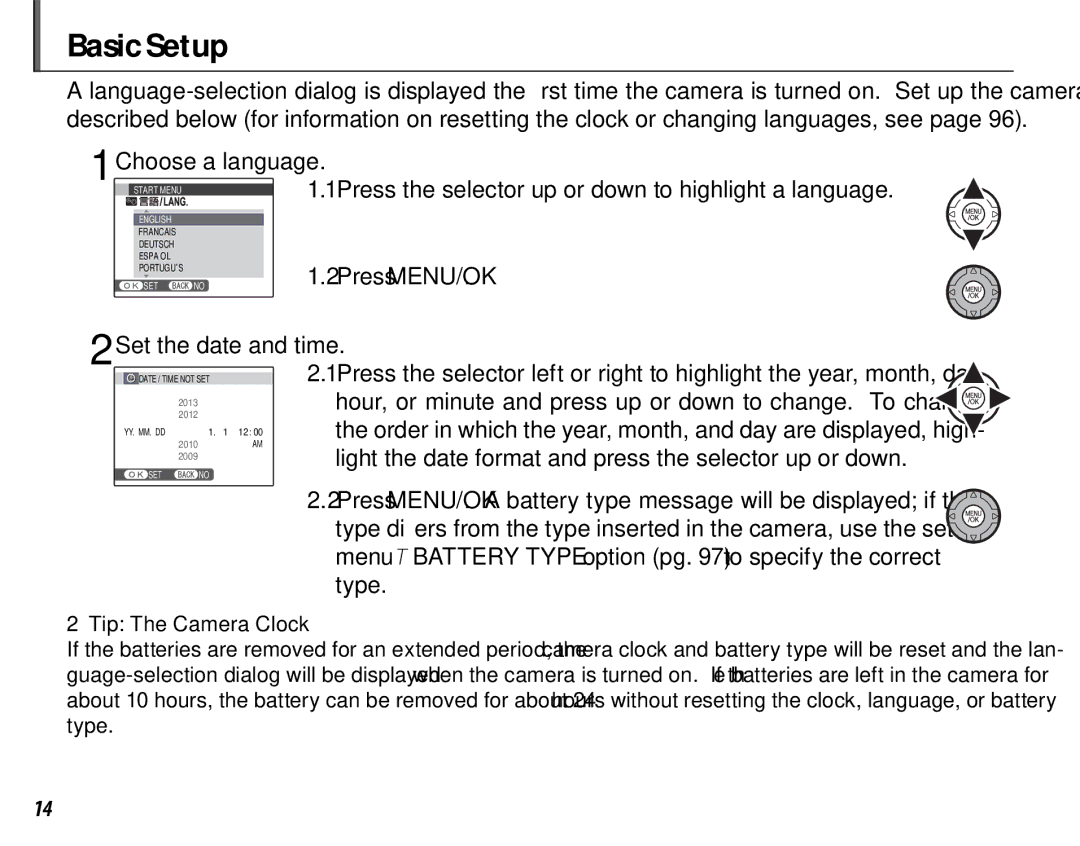
1Choose a language.
|
|
|
| 1.1 Press the selector up or down to highlight a language. |
START MENU |
|
| ||
|
|
|
| |
| ENGLISH |
|
|
|
| FRANCAIS |
|
|
|
| DEUTSCH |
|
|
|
| ESPAÑOL |
|
|
|
| PORTUGUÊS |
|
| 1.2 Press MENU/OK. |
| SET | NO | ||
2Set the date and time.
|
|
|
| 2.1 Press the selector left or right to highlight the year, month, day, | |
|
| DATE / TIME NOT SET |
| ||
|
|
| 2013 |
| hour, or minute and press up or down to change. To change |
|
|
| 2012 |
| the order in which the year, month, and day are displayed, high- |
| YY. MM. DD | 2011 1. 1 | 12:00 | ||
|
|
| 2010 | AM | light the date format and press the selector up or down. |
|
|
| 2009 |
| |
|
|
|
|
| |
|
| SET | NO |
|
|
2.2Press MENU/OK. A battery type message will be displayed; if the type differs from the type inserted in the camera, use the setup menu TBATTERY TYPE option (pg. 97) to specify the correct type.
2Tip: The Camera Clock
If the batteries are removed for an extended period, the camera clock and battery type will be reset and the lan-
14
