130
Olathe, Kansas 66062, U.S.A Abbey Park Industrial Estate
Introduction
Initializing the Rino Using My ID and Symbol Fields
Loran TD Format
103
Getting to Know Your Rino
Front of the Rino
Speaker LCD Display Thumb Stick
Back of the Rino
Main Display Pages
Operating the Rino
To use the Thumb Stick
To use the page Option Menu
To lock/unlock the buttons
Status Bar Overview
Radio
Initializing the Rino
To enter a name
Using My ID and Symbol Fields
To initialize the unit
To change the user symbol
Changing User symbol
Setting the Channel and Squelch Code
To change the Channel and/or Squelch Code
Scanning and Monitoring
To scan or monitor a channels
To setup a Scanlist
Setup Radio
Radio Page Option Menu
Unit Operation Radio
Setup Tones
Use Weather Radio
Informational Picture
Turn Radio/GPS On/Off
Mark Waypoint’s Indicators
Enable Send Location see the Setup Radio section
Peer-to-Peer Positioning
New Contact Page Overview
To transmit your location to other Rino users
To accept a new contact
Highlight OK and press In when done
To review a contact and contact details
To change contact details
To view a contact on the Map
Sending a Location
To send a location
Map
Press the Thumb Stick In to view the details of the Contact
To view a Contact from the Map
To change scales on the Map
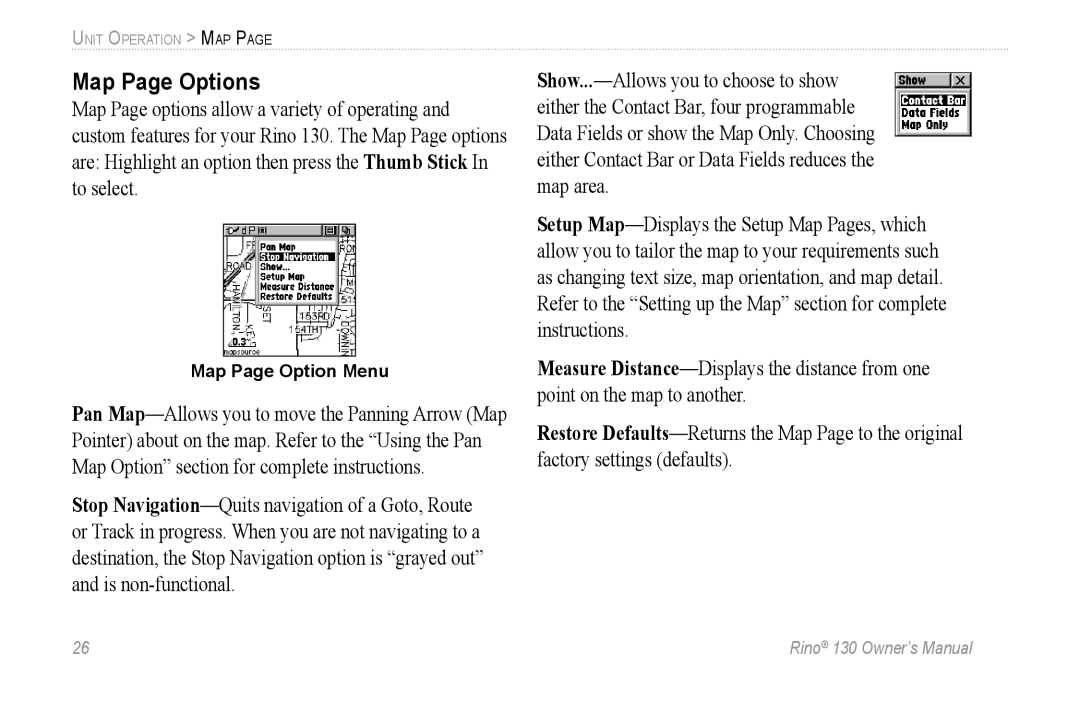
Map Page Options
Map Page Option Menu
Using the Pan Map Option
To find an item near the map pointer
Programming the Data Fields
To program a data field
Setting up the Map
To use Map Setup options
General Setup
To stop measuring, press the Page button
Measuring Distance
To use the Measure Distance option
Using the Navigation
Navigation
To stop navigating
Navigation Page Options
To change data fields
To use Sight ‘N Go to navigate
Using Sight ‘N Go
Calibrating the Compass
To turn the compass on and off
Use the Page button to access the Navigation
To calibrate the Electronic Compass
Altimeter
Altimeter Page Options
Adjusting the Zoom Ranges
To adjust zoom ranges
Viewing Pressure/Elevation Plots
To view elevation or pressure plots
Resetting Data
To reset the elevation data and max elevation fields
Viewing Points
To use the View Points option
To manually calibrate the altimeter
Calibrating the Altimeter
Programming Data Fields
Trip Computer
Trip Computer Page Options
Using the Main Menu
Main Menu
Alarm Clock-Provides a settable 24-hour alarm clock
Main Menu Options
To move, insert or remove a Main
Shortcuts Menu
Waypoints
Mark Waypoint
To mark your current location and open the Mark Waypoint
To change Mark Waypoint Page Options
Creating Waypoints
To create a waypoint for a map feature
To create a waypoint using the panning arrow
Projecting a Waypoint
Editing a Waypoint
To project a waypoint
To edit a waypoint
Use the Find ‘N Go feature to display the point
To delete a waypoint or contact
To move a waypoint by dragging it
To save Map or Find ‘N Go items as waypoints
Highlight the Find ‘N Go icon and press the Thumb Stick
To access the Find ‘N Go Menu
Find ‘N Go
Finding a Waypoint
To find a waypoint by nearest
To find a waypoint by name
Entering a waypoint name to find By Name
Finding a Contact
To find a contact
Finding a City
To find a city
Finding an Exit
To find an exit
Finding a Point of Interest
Shopping
To find a point of interest
To locate an address
Move to the Street field using the Thumb Stick
Finding an Address or Intersection
To locate an intersection
Finding an Intersection
Finding a Last Found Place
To find a Last Found Place
Weather Radio
To turn the Weather Radio on and off
Sending a Note
To send a saved note
To send a new note
Press the Thumb Stick In until the Shortcuts Menu appears
Press the Thumb Stick In to start navigation
Using a Goto
To activate a Goto
To create a route
Creating and Using a Route
Routes
Editing a Route
To add a Find ‘N Go Menu item to a route
To remove all waypoints
To reverse the route
To restore default settings for the route
To copy the route
To delete the route
To review a route point
To move a route point
To remove a point from the route list
To change a route point
Adding or Editing from the Route Map
To add a point at either end of a route
To add a route point within a route
Follow steps 1 and 2 in the previous instructions
To navigate a route
Navigating a Route
To review or remove a route point
To select data field options
Stopping Navigation
Data Fields for the Route
To save and use a Track
Tracks
To open the Tracks
Using the TracBack Feature
To use Track Log Setup options
Setting up the Track Log
To use the TracBack feature
To access the Proximity
To turn proximity alarms on or off
Proximity
To add a proximity point
Sky View Graphic
To access the Satellite
Satellite
Waas
Satellite Strength
Satellite Page Options
To select Track Up or North Up
To enter a new location
Setup Pages
Time Setup
To access the Setup Menu
To access the Time Setup
Units Setup
To access the Units Setup
Open the Main Menu Main Menu, scroll down and select Setup
To set the time
Loran TD Format
Display Setup
Heading Setup
To access the Display Setup
To adjust the contrast
To access the Heading Setup
To select either option
Interface Setup
To access the Interface Setup
Available interface formats are
To select a serial data format
System Setup
To access the System Setup
To change the battery type
Select the System icon to open the System Setup
To access the Calendar
Calendar
To change the month and year
To use the current month and year
To edit or delete a note
To delete notes by week
To view information for a date
Choose Delete Notes... from the Option Menu
Alarm Clock
To access the Alarm Clock
To set an alarm clock time
To turn the alarm clock on/off
To change calculator options
To access the Calculator
Calculator
To access the Stopwatch
Stopwatch
Stopwatch Lap Options
To use the Stopwatch
To access the Sun & Moon
Sun & Moon
To set the date and time
To set the location
To set the date
To access the Hunt & Fish
Hunt & Fish