I
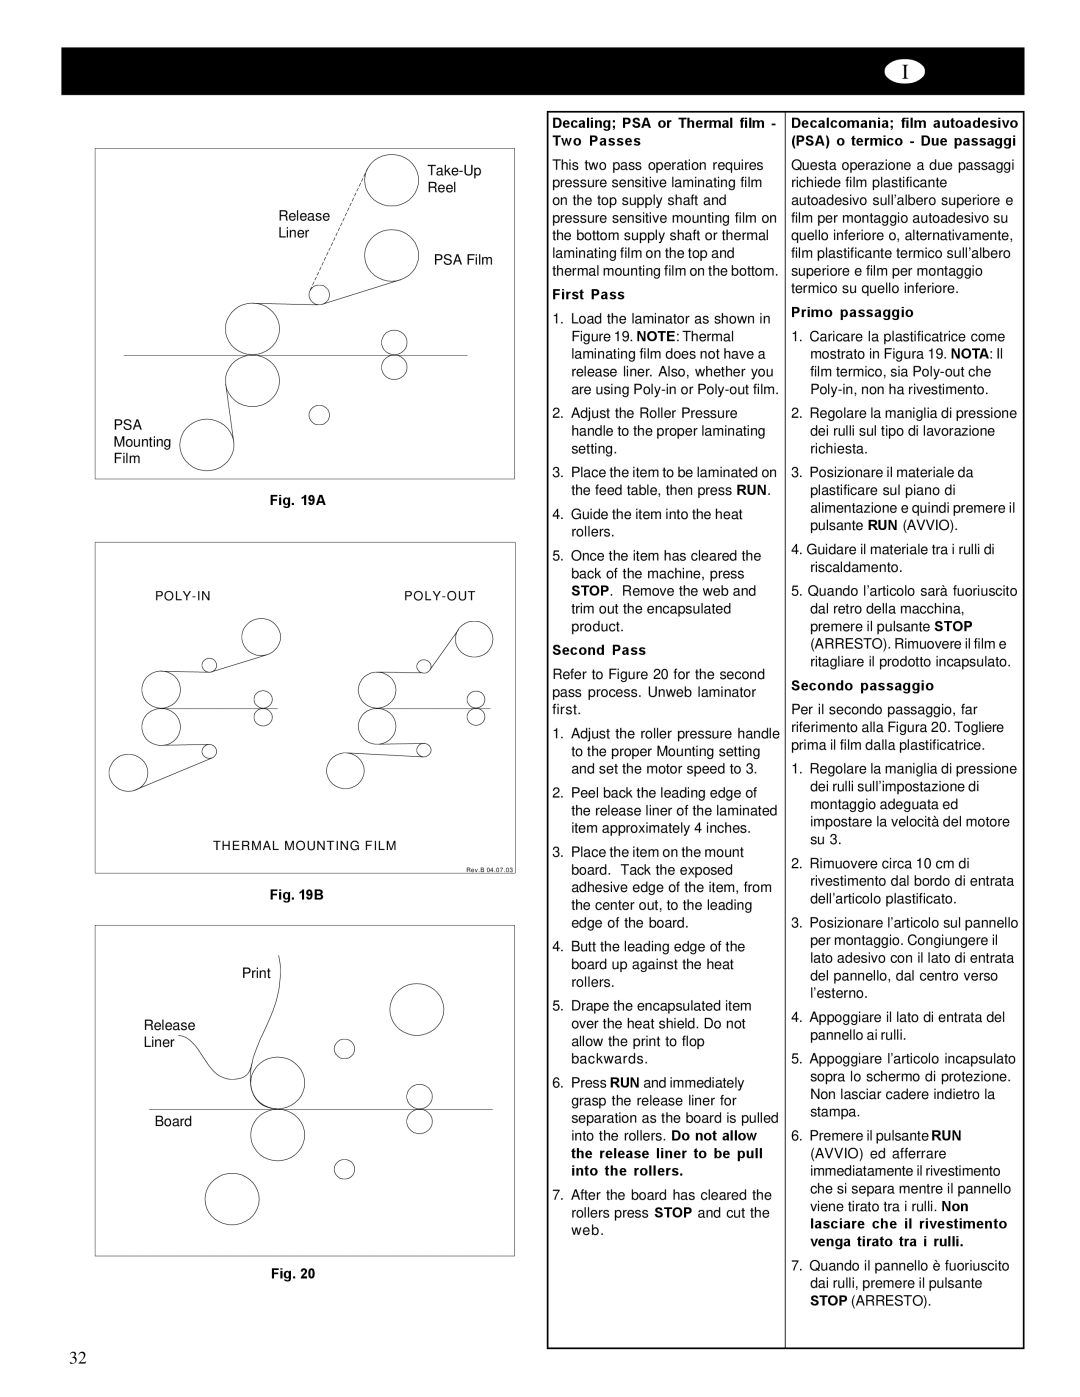
Reel |
Release |
Liner |
PSA Film |
PSA |
Mounting |
Film |
Fig. 19A
| THERMAL MOUNTING FILM |
| Rev.B 04.07.03 |
Fig. 19B
Release |
Liner |
Board |
Fig. 20
Decaling; PSA or Thermal film - Two Passes
This two pass operation requires pressure sensitive laminating film on the top supply shaft and pressure sensitive mounting film on the bottom supply shaft or thermal laminating film on the top and thermal mounting film on the bottom.
First Pass
1.Load the laminator as shown in Figure 19. NOTE: Thermal laminating film does not have a release liner. Also, whether you are using
2.Adjust the Roller Pressure handle to the proper laminating setting.
3.Place the item to be laminated on the feed table, then press RUN.
4.Guide the item into the heat rollers.
5.Once the item has cleared the back of the machine, press STOP. Remove the web and trim out the encapsulated product.
Second Pass
Refer to Figure 20 for the second pass process. Unweb laminator first.
1.Adjust the roller pressure handle to the proper Mounting setting and set the motor speed to 3.
2.Peel back the leading edge of the release liner of the laminated item approximately 4 inches.
3.Place the item on the mount board. Tack the exposed adhesive edge of the item, from the center out, to the leading edge of the board.
4.Butt the leading edge of the board up against the heat rollers.
5.Drape the encapsulated item over the heat shield. Do not allow the print to flop backwards.
6.Press RUN and immediately grasp the release liner for separation as the board is pulled into the rollers. Do not allow the release liner to be pull into the rollers.
7.After the board has cleared the rollers press STOP and cut the web.
Decalcomania; film autoadesivo (PSA) o termico - Due passaggi
Questa operazione a due passaggi richiede film plastificante autoadesivo sull’albero superiore e film per montaggio autoadesivo su quello inferiore o, alternativamente, film plastificante termico sull’albero superiore e film per montaggio termico su quello inferiore.
Primo passaggio
1.Caricare la plastificatrice come mostrato in Figura 19. NOTA: Il film termico, sia
2.Regolare la maniglia di pressione dei rulli sul tipo di lavorazione richiesta.
3.Posizionare il materiale da plastificare sul piano di alimentazione e quindi premere il pulsante RUN (AVVIO).
4.Guidare il materiale tra i rulli di riscaldamento.
5.Quando l’articolo sarà fuoriuscito dal retro della macchina, premere il pulsante STOP (ARRESTO). Rimuovere il film e ritagliare il prodotto incapsulato.
Secondo passaggio
Per il secondo passaggio, far riferimento alla Figura 20. Togliere prima il film dalla plastificatrice.
1.Regolare la maniglia di pressione dei rulli sull’impostazione di montaggio adeguata ed impostare la velocità del motore su 3.
2.Rimuovere circa 10 cm di rivestimento dal bordo di entrata dell’articolo plastificato.
3.Posizionare l’articolo sul pannello per montaggio. Congiungere il lato adesivo con il lato di entrata del pannello, dal centro verso l’esterno.
4.Appoggiare il lato di entrata del pannello ai rulli.
5.Appoggiare l’articolo incapsulato sopra lo schermo di protezione. Non lasciar cadere indietro la stampa.
6.Premere il pulsante RUN (AVVIO) ed afferrare immediatamente il rivestimento che si separa mentre il pannello viene tirato tra i rulli. Non lasciare che il rivestimento venga tirato tra i rulli.
7.Quando il pannello è fuoriuscito dai rulli, premere il pulsante STOP (ARRESTO).
32