CONVERSION TO PROPANE GAS | Orifices |
|
|
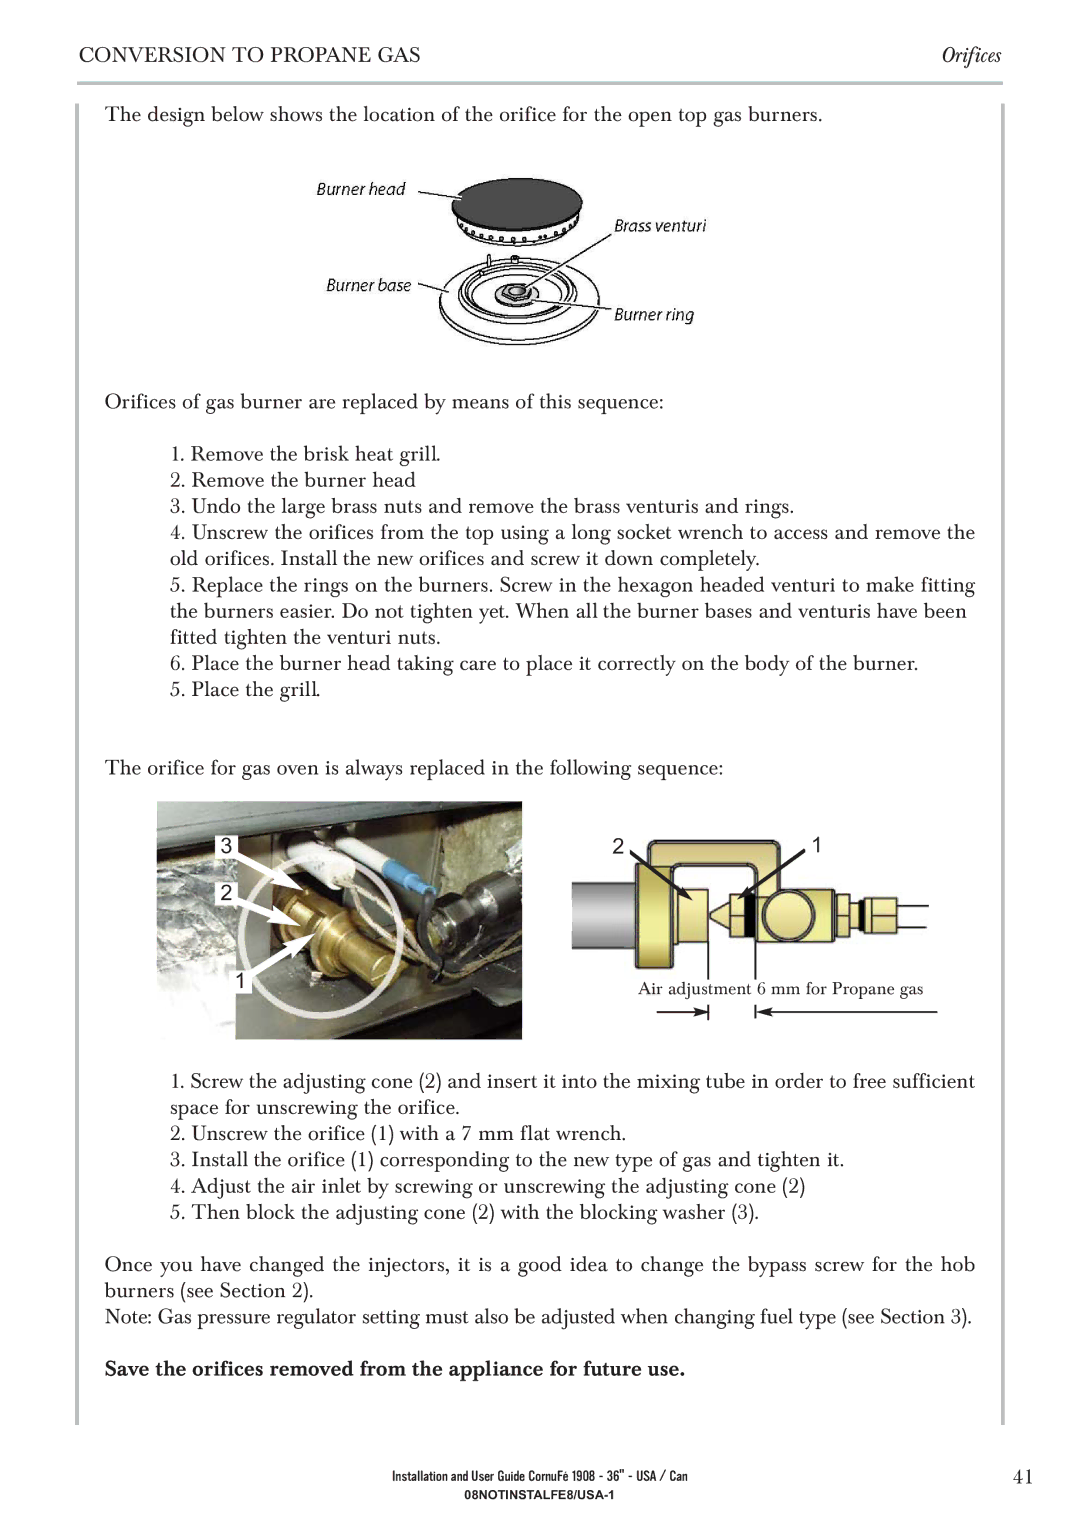
The design below shows the location of the orifice for the open top gas burners.
Orifices of gas burner are replaced by means of this sequence:
1.Remove the brisk heat grill.
2.Remove the burner head
3.Undo the large brass nuts and remove the brass venturis and rings.
4.Unscrew the orifices from the top using a long socket wrench to access and remove the old orifices. Install the new orifices and screw it down completely.
5.Replace the rings on the burners. Screw in the hexagon headed venturi to make fitting the burners easier. Do not tighten yet. When all the burner bases and venturis have been fitted tighten the venturi nuts.
6.Place the burner head taking care to place it correctly on the body of the burner.
5. Place the grill.
The orifice for gas oven is always replaced in the following sequence:
3 | 2 |
| 1 |
|
|
|
|
2
1 | Air adjustment 6 mm for Propane gas |
|
1.Screw the adjusting cone (2) and insert it into the mixing tube in order to free sufficient space for unscrewing the orifice.
2.Unscrew the orifice (1) with a 7 mm flat wrench.
3.Install the orifice (1) corresponding to the new type of gas and tighten it.
4.Adjust the air inlet by screwing or unscrewing the adjusting cone (2)
5.Then block the adjusting cone (2) with the blocking washer (3).
Once you have changed the injectors, it is a good idea to change the bypass screw for the hob burners (see Section 2).
Note: Gas pressure regulator setting must also be adjusted when changing fuel type (see Section 3).
Save the orifices removed from the appliance for future use.
Installation and User Guide CornuFé 1908 - 36" - USA / Can | 41 |