CONVERSION TO PROPANE GAS | Pressure Regulator |
|
|
3.GAS PRESSURE REGULATOR
If the appliance is to be converted this must be done befo- re installation.
The gas pressure regulator is always converted in the following sequence:
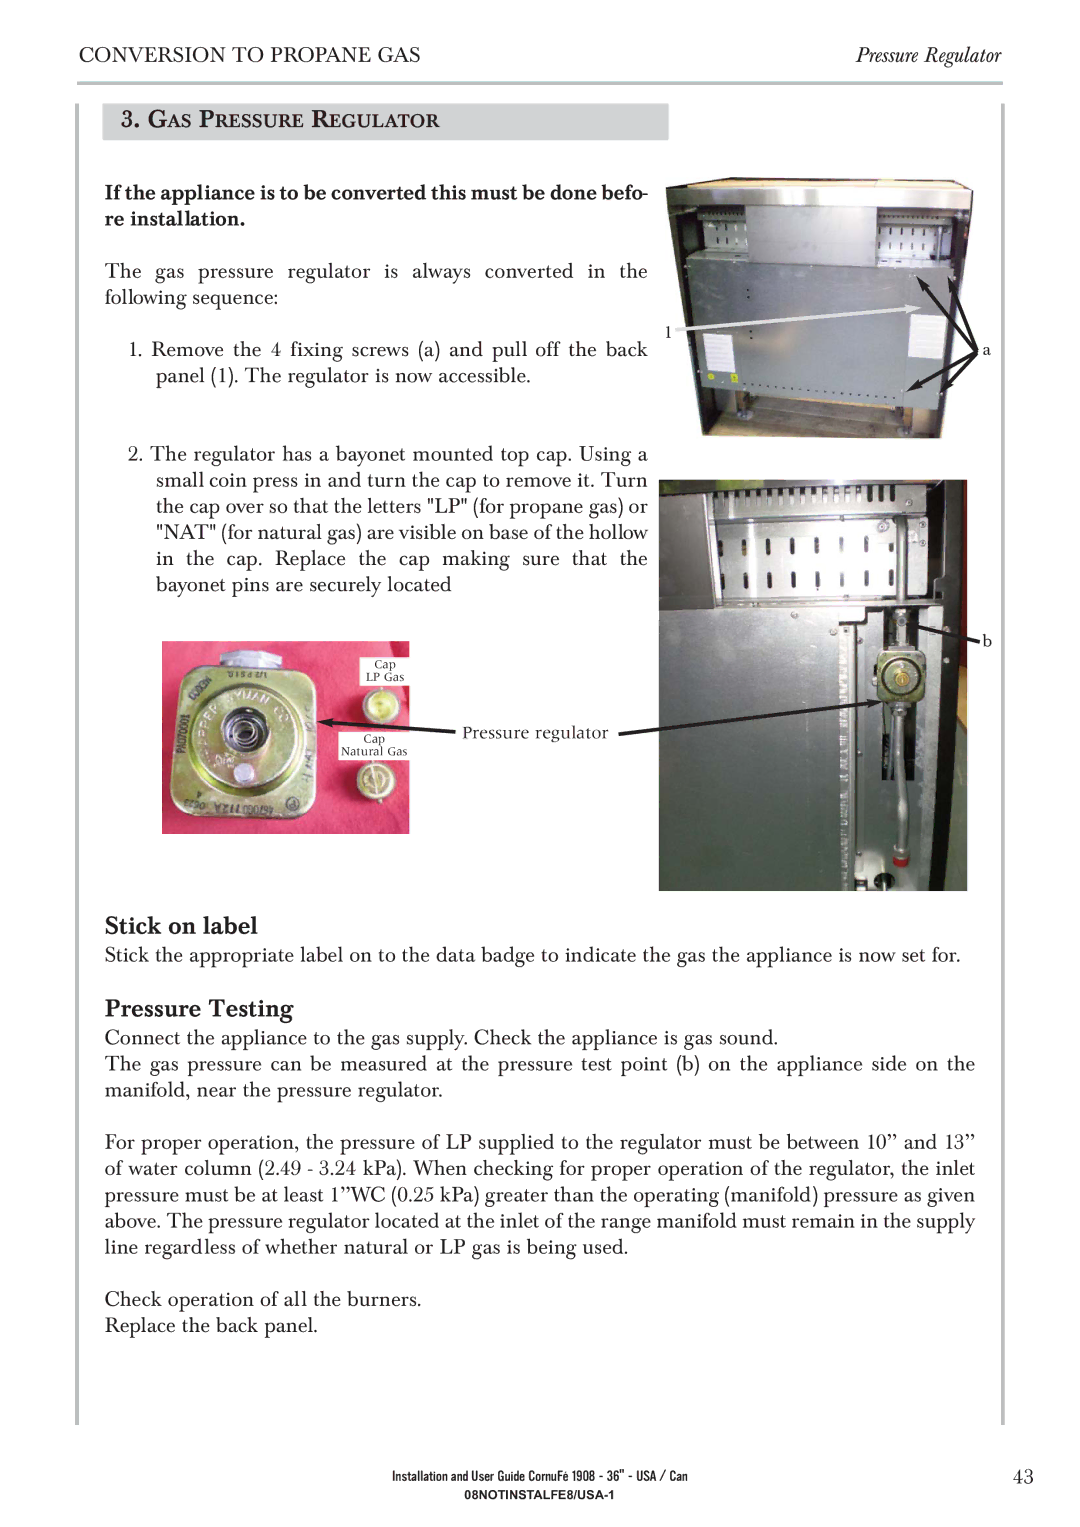
1. Remove the 4 fixing screws (a) and pull off the back | 1 | a |
| ||
panel (1). The regulator is now accessible. |
|
|
2.The regulator has a bayonet mounted top cap. Using a small coin press in and turn the cap to remove it. Turn the cap over so that the letters "LP" (for propane gas) or "NAT" (for natural gas) are visible on base of the hollow in the cap. Replace the cap making sure that the bayonet pins are securely located
Cap
LP Gas
Cap
Natural Gas
![]() b
b
Pressure regulator
Stick on label
Stick the appropriate label on to the data badge to indicate the gas the appliance is now set for.
Pressure Testing
Connect the appliance to the gas supply. Check the appliance is gas sound.
The gas pressure can be measured at the pressure test point (b) on the appliance side on the manifold, near the pressure regulator.
For proper operation, the pressure of LP supplied to the regulator must be between 10’’ and 13’’ of water column (2.49 - 3.24 kPa). When checking for proper operation of the regulator, the inlet pressure must be at least 1’’WC (0.25 kPa) greater than the operating (manifold) pressure as given above. The pressure regulator located at the inlet of the range manifold must remain in the supply line regardless of whether natural or LP gas is being used.
Check operation of all the burners.
Replace the back panel.
Installation and User Guide CornuFé 1908 - 36" - USA / Can | 43 |
