WALL MOUNT INSTALLATION
2
1
callback |
| hold |
TALK | cid | FORMAT |
delete | int | ca |
redial | ||
|
| ncel |
rev | play /stop | skip |
|
|
13 DEF
2ABC
4 GHI | 6 MNO |
5 JKL
7 PQRS | 9WXYZ |
8TUV
*TONE |
| erase | # PAUSE | |
O oper | ||||
ans | rogram | |||
|
| |||
chan | mute | mem | flash | |
4
8
3
56
7
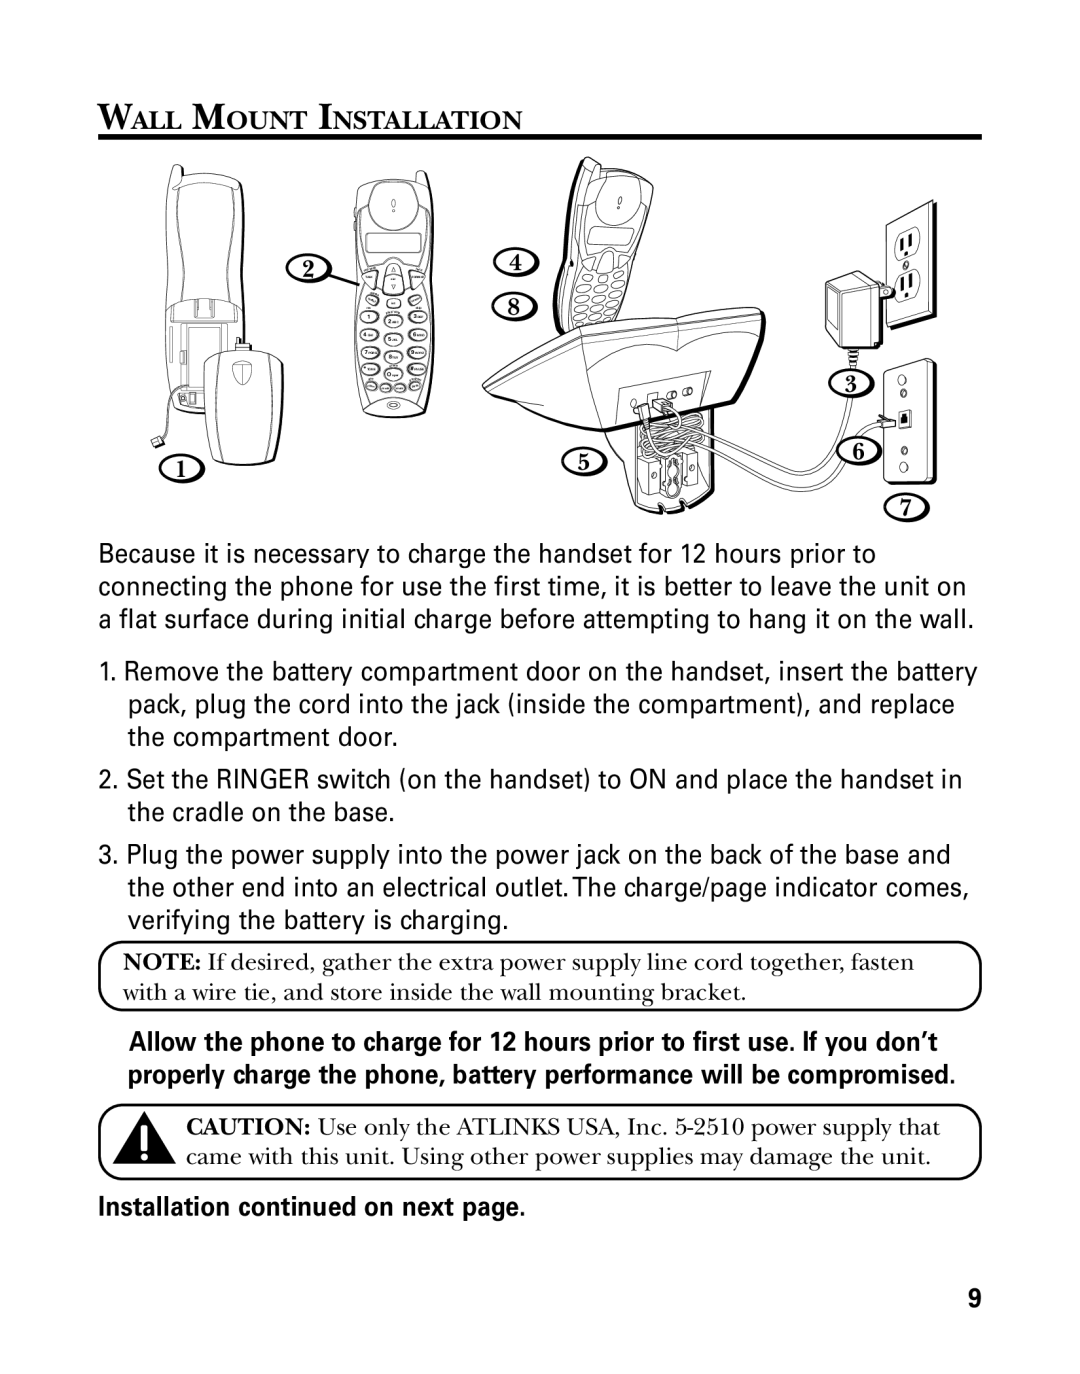
Because it is necessary to charge the handset for 12 hours prior to connecting the phone for use the first time, it is better to leave the unit on a flat surface during initial charge before attempting to hang it on the wall.
1.Remove the battery compartment door on the handset, insert the battery pack, plug the cord into the jack (inside the compartment), and replace the compartment door.
2.Set the RINGER switch (on the handset) to ON and place the handset in the cradle on the base.
3.Plug the power supply into the power jack on the back of the base and the other end into an electrical outlet.The charge/page indicator comes, verifying the battery is charging.
NOTE: If desired, gather the extra power supply line cord together, fasten with a wire tie, and store inside the wall mounting bracket.
Allow the phone to charge for 12 hours prior to first use. If you don’t properly charge the phone, battery performance will be compromised.
CAUTION: Use only the ATLINKS USA, Inc.
Installation continued on next page.
9