
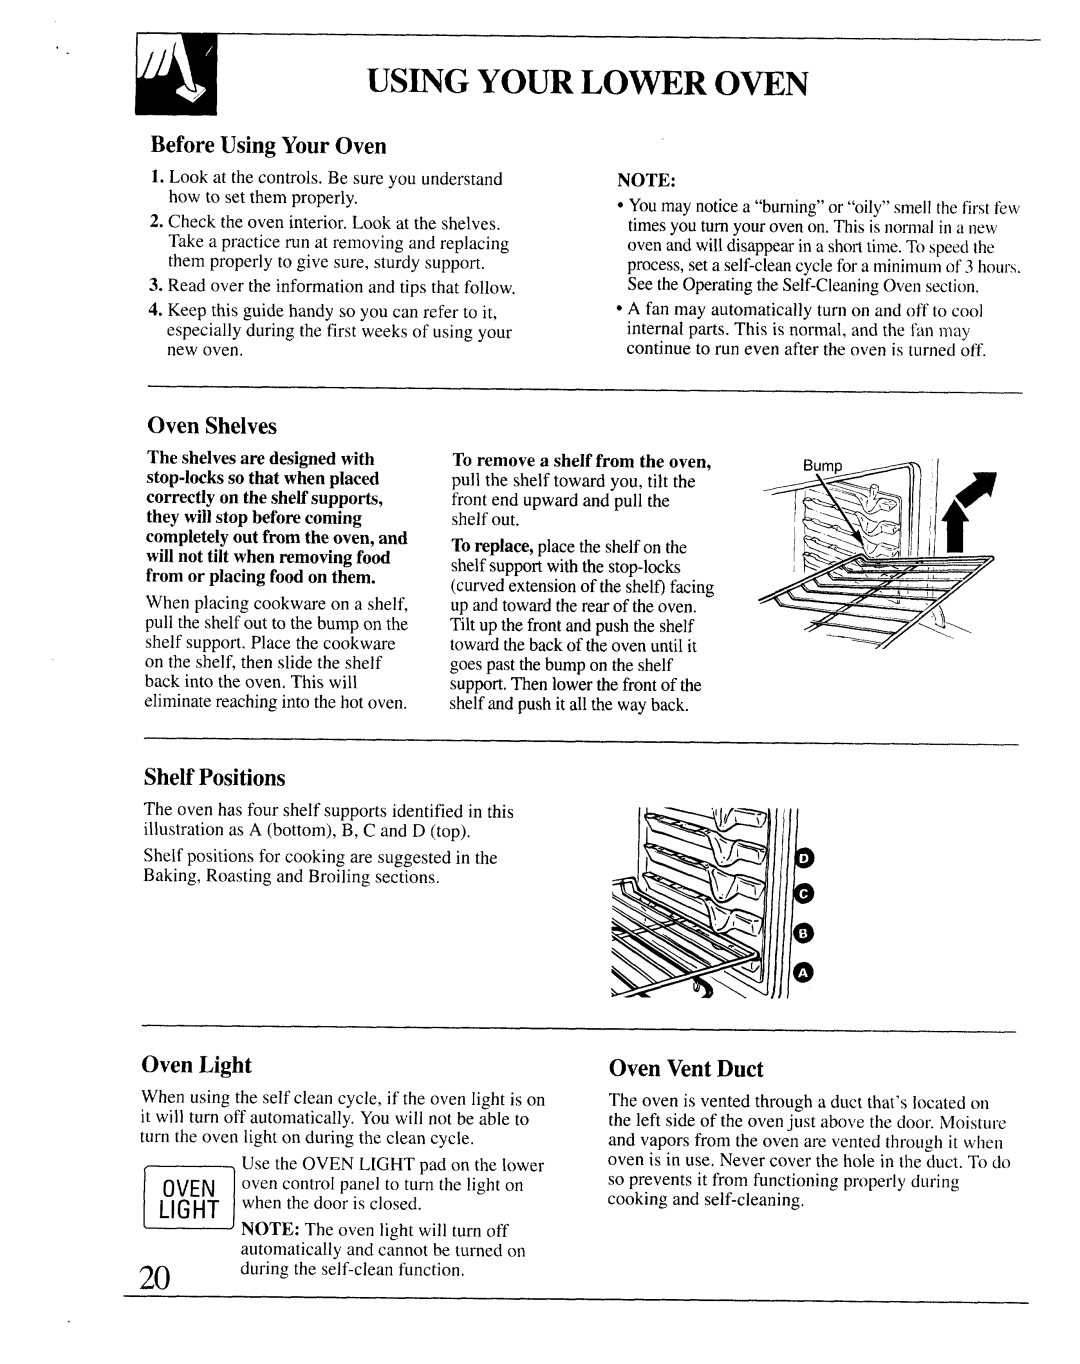
164D2966P127-I, JKP65, JKP64, JKP66 specifications
The GE JKP66, JKP64, JKP65, and 164D2966P127-I are noteworthy models in the portfolio of General Electric, a company renowned for its innovation in various industrial sectors. These series of products primarily focus on providing advanced solutions that cater to both residential and commercial needs, particularly in kitchen appliances.Starting with the GE JKP66 series, this model is heralded for its combination of elegance and functionality. It typically features a built-in wall oven design, offering flexibility in kitchen layout. It includes advanced cooking technologies like True European Convection, which promotes even baking by utilizing a third heating element and a fan that circulates hot air throughout the oven. This ensures that every dish is cooked uniformly, making it ideal for baking enthusiasts.
The JKP64 model emphasizes user-friendly interfaces coupled with digital controls, enabling precise temperature adjustments and cooking times. Additionally, it often comes with a self-cleaning option, saving users the hassle of manual scrubbing. The model is designed with high-quality materials, ensuring durability while also being aesthetically pleasing.
Similarly, the GE JKP65 model also boasts modern technology, including a smooth glass touch control panel that enhances the user experience. This model often showcases a spacious interior, allowing for larger meal preparations, which is perfect for family gatherings or entertaining guests. Furthermore, its halogen lighting provides excellent visibility, allowing users to monitor their cooking progress without having to open the door.
The 164D2966P127-I model is a versatile option that incorporates a combination of cutting-edge features. It emphasizes energy efficiency, aligning with modern demands for sustainable living. This model usually harnesses advanced heating elements to reduce cooking times while maximizing energy savings.
What sets these GE models apart is their commitment to innovation, durability, and energy efficiency, making them suitable for a variety of culinary tasks. The GE JKP series is designed with consumer needs in mind, incorporating state-of-the-art technology while ensuring ease of use. Whether you are a seasoned chef or a home cook, these models promise to elevate your cooking experience, blending seamlessly into your kitchen's aesthetics while offering top-tier performance.