GRIDDLE ACCESSORY
You must have the grill module to use the griddle accessory.
Your
WARNING: Do not use griddle modules JXDD43 or
JXDD46 with these cooktops.
How to Insert the Griddle Accessory and the Grill Module
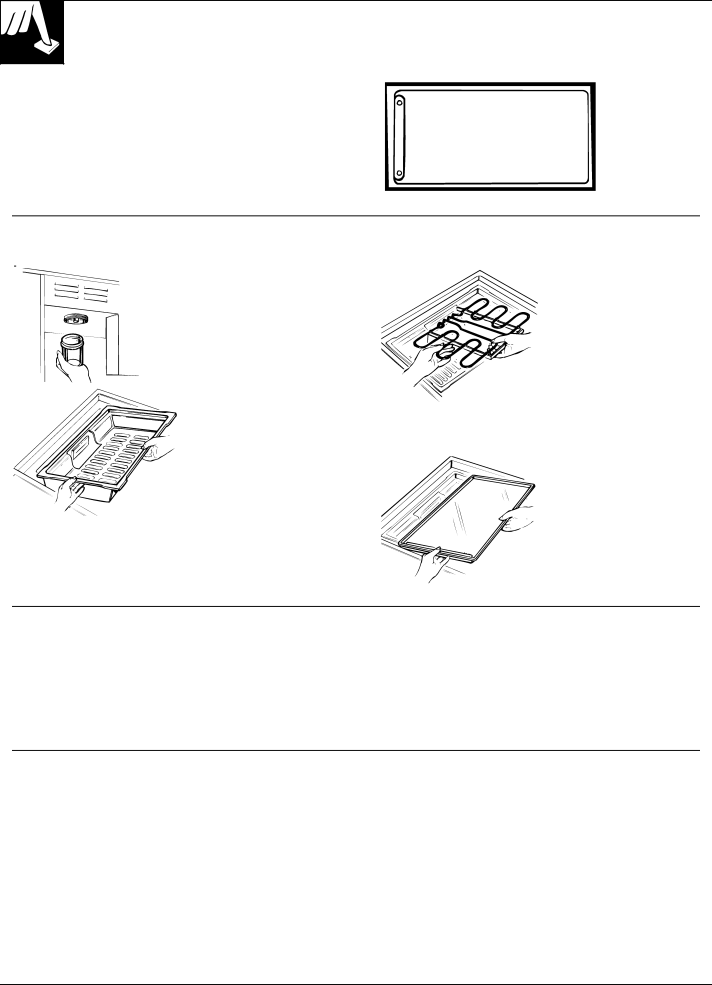
1. Make sure the grease collector jar is in place beneath the cooktop.
2. Fit the reflector pan in the cooktop. The slots ![]() in the pan permit grease
in the pan permit grease
to drain into the jar. Keep the slots open at all times.
3.Make sure all controls are turned to OFF. Hold the heating element with the plug facing the side of the cooktop and level with the surface. Insert the plug into the cooktop outlet as far as it will go. (Do not force.) The heating element support should rest on the ledge of the reflector pan.
4.Place the griddle plate on the reflector pan over the heating element. The plate should be seated properly on the reflector pan with the griddle’s drain holes at the front.
Removing the Griddle Module
When removing the parts of the grill module to clean, be sure all switches are in the OFF position and the module is cool. Remove the griddle plate and then slide the heating element toward the center of the cooktop until it is unplugged. Remove the reflector pan. Empty grease collector jar when cool. Be sure to replace the jar.
Using the Griddle
The
Preheat the griddle as recommended in the Griddle Cooking Guide. After preheating for the recommended amount of time, apply a small amount of oil or butter.
Do not overheat the griddle. Leaving the griddle at HI for more than 5 minutes without food can damage the
Because the heating element under the griddle is divided, you can vary the temperature of the front and rear sections.
18