Step 6
Installing the Ductwork
Use minimum 26 gauge galvanized or 24 gauge aluminum duct in 6″ round or 31⁄4″ x 10″ size, or combination of both.
PVC duct should be used if installing under a poured concrete slab.
NOTE: Local building code must be followed in specifying approved type and schedule of PVC duct used.
5″ round duct may be used on SHORT DUCT runs. But, note higher equivalent lengths for each 5″ dia. piece used. Don’t convert back to
5″ duct after use of 6″ round or 31⁄4″ x 10″ duct.
Always use an appropriate roof or wall cap with damper. Laundry type wall caps should NEVER be used.
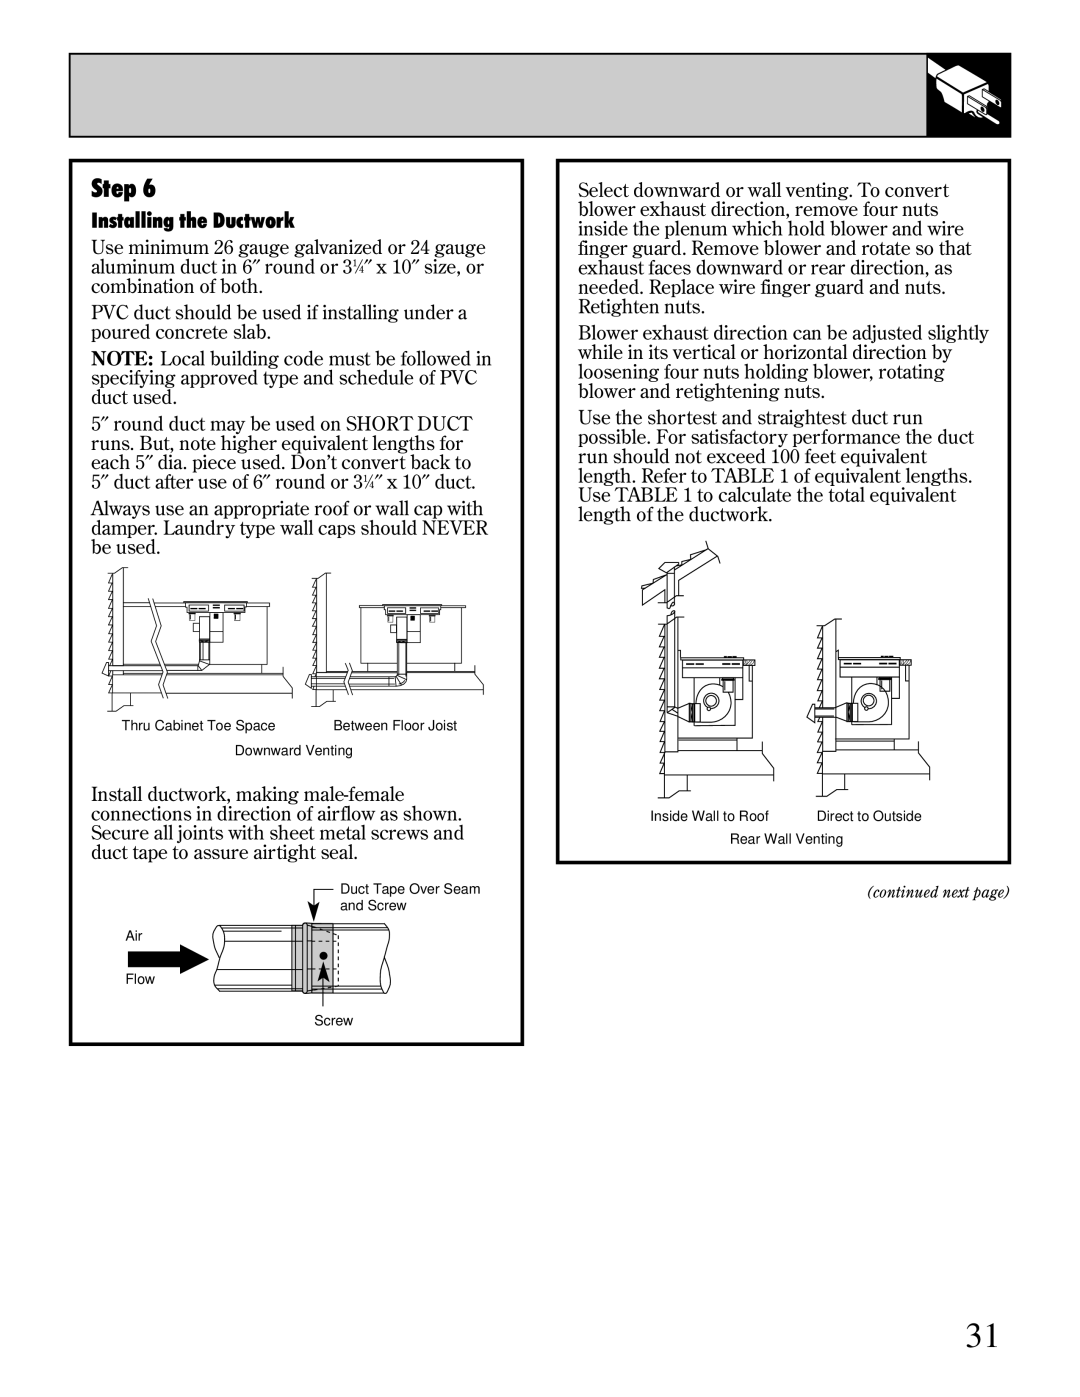
Thru Cabinet Toe Space |
| Between Floor Joist |
Downward Venting
Install ductwork, making
Duct Tape Over Seam
and Screw
Air
Flow
Screw
Select downward or wall venting. To convert blower exhaust direction, remove four nuts inside the plenum which hold blower and wire finger guard. Remove blower and rotate so that exhaust faces downward or rear direction, as needed. Replace wire finger guard and nuts. Retighten nuts.
Blower exhaust direction can be adjusted slightly while in its vertical or horizontal direction by loosening four nuts holding blower, rotating blower and retightening nuts.
Use the shortest and straightest duct run possible. For satisfactory performance the duct run should not exceed 100 feet equivalent length. Refer to TABLE 1 of equivalent lengths. Use TABLE 1 to calculate the total equivalent length of the ductwork.
Inside Wall to Roof |
| Direct to Outside |
Rear Wall Venting
(continued next page)
31