INSTALLATION INSTRUCTIONS
Before you begin
Read these instructions completely and carefully.
NOTE TO
NOTE: This appliance must be properly grounded.
Unless very knowledgeable in the installation of this product, engage a professional installer.
Tools You Will Need
•Saw
•Flat blade screwdriver
•Electrician’s pliers
•Duct tape
•Measuring tape or scale
•Carpenter’s square
•Wrench or socket set
•Drill and drill bit
•Sheet metal screws
•Junction box
NOTE: Installation of this unit requires 2 people. Do not attempt to install without assistance.
Electrical Requirements
CAUTION: FOR PERSONAL SAFETY, REMOVE HOUSE FUSE OR CIRCUIT BREAKER BEFORE BEGINNING INSTALLATION.
This appliance must be supplied with the proper voltage and frequency, as listed in these Installalation Instructions, and connected to an individual, properly grounded branch circuit, protected by a circuit breaker or time delay fuse. Proper electrical ratings should be verified with listing on product’s rating plate. The rating plate is located on the
All wire connections must be made in accordance with local codes and properly insulated. Check with your local utility for governing electrical codes and ordinances. In the absence of local electrical codes, the National Electrical Code, ANSI/NFPA No.
A copy of the National Electrical Code can be obtained by writing to:
National Fire Protection Association Batterymarch Park
Quincy, MA 02260
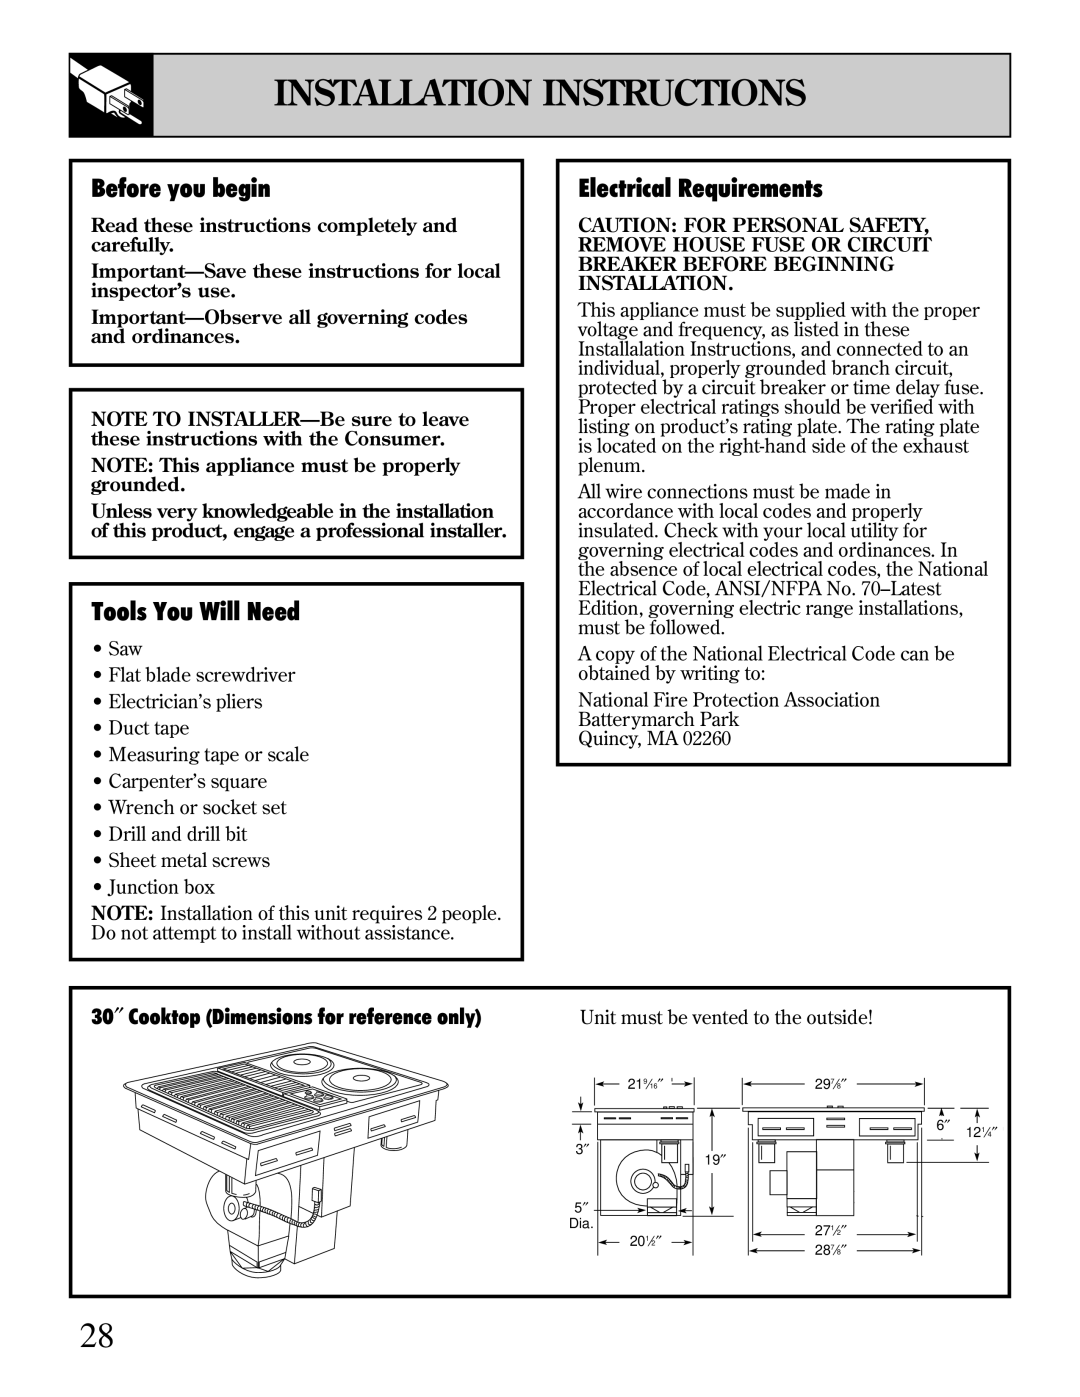
30″ Cooktop (Dimensions for reference only)
Unit must be vented to the outside!
219⁄16″ |
|
|
|
|
|
|
|
| 297⁄8″ |
|
|
|
|
|
|
|
| ||
|
|
| |||||||
|
|
|
|
|
|
|
|
|
|
|
|
|
|
|
|
|
|
|
|
|
|
|
|
|
|
|
|
|
|
|
|
|
|
|
|
|
|
|
|
|
|
|
|
|
|
|
|
|
|
3″ |
| 19″ |
|
| |
5″ |
|
|
Dia. | 201⁄2″ | 271⁄2″ |
| 287⁄8″ | |
|
|
6″ 121⁄4″
28