QUICKSTART GUIDE
AC or DC |
| AC or DC | |||
|
| NOTE: | |||
HEAVY COPPER CONDUCTOR |
| 14 gauge stranded | |||
OR BRAIDED WIRE |
| wire with suitable | |||
| disconnect devices | ||||
|
| ||||
|
| is recommended | |||
|
|
|
|
|
|
SWITCHGEAR
GROUND BUS
B8b | B8a | B6a | B6b | B5b |
| GND | |
F | S | - | + | + | - | + | |
I | U | LOW HIGH | |||||
L | |||||||
T | R |
|
|
|
|
| |
G | Control Power | Optional | |||||
E | |||||||
R | E |
|
|
|
| or | |
|
|
|
|
|
| ||
|
|
|
|
| Switch Module | ||
UR SERIES |
|
|
|
| |||
PROTECTION SYSTEM |
|
| |||||
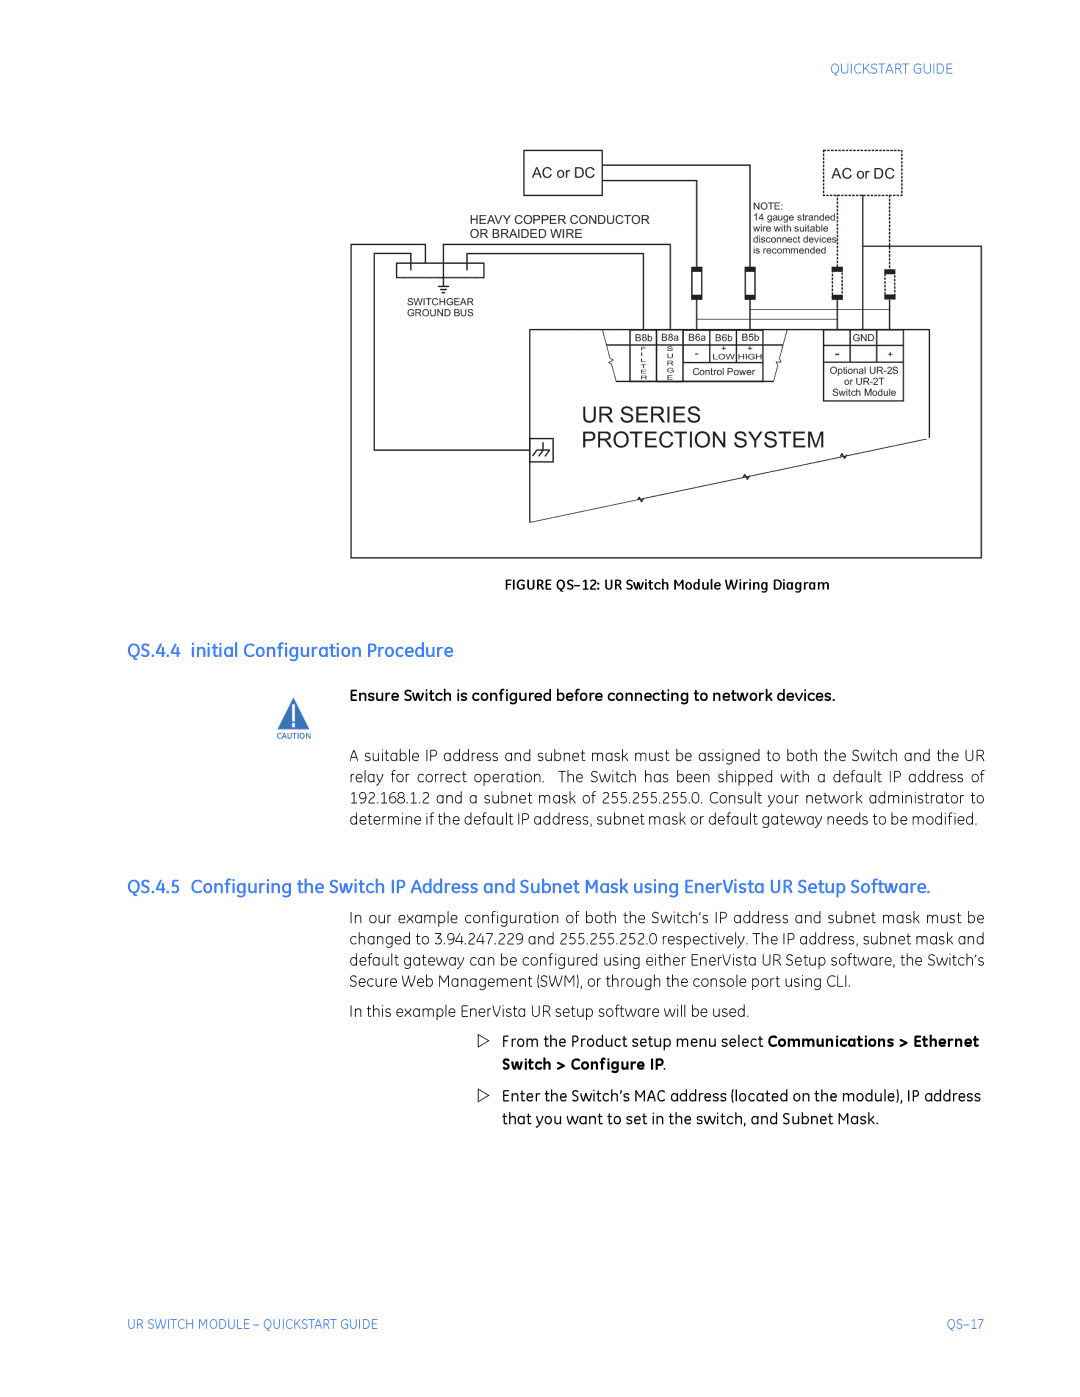
FIGURE QS–12: UR Switch Module Wiring Diagram
QS.4.4 initial Configuration Procedure
Ensure Switch is configured before connecting to network devices.
CAUTION
A suitable IP address and subnet mask must be assigned to both the Switch and the UR relay for correct operation. The Switch has been shipped with a default IP address of 192.168.1.2 and a subnet mask of 255.255.255.0. Consult your network administrator to determine if the default IP address, subnet mask or default gateway needs to be modified.
QS.4.5 Configuring the Switch IP Address and Subnet Mask using EnerVista UR Setup Software.
In our example configuration of both the Switch’s IP address and subnet mask must be changed to 3.94.247.229 and 255.255.252.0 respectively. The IP address, subnet mask and default gateway can be configured using either EnerVista UR Setup software, the Switch’s Secure Web Management (SWM), or through the console port using CLI.
In this example EnerVista UR setup software will be used.
ZFrom the Product setup menu select Communications > Ethernet Switch > Configure IP.
ZEnter the Switch’s MAC address (located on the module), IP address that you want to set in the switch, and Subnet Mask.
UR SWITCH MODULE – QUICKSTART GUIDE |
