Installation Instructions

STEP 1 REMOVE PACKAGING

CAUTION: Product is much heavier

at the top than at the bottom – be careful when moving. When using a hand truck, handle from side only.

PRUDENCE: Le produit est beaucoup plus lourd en haut qu’en bas. Il faut être prudent lors des déplacements. Si un diable est utilisé, il faut soulever le réfrigérateur sur le côté seulement.

Carefully cut banding at the top and bottom, remove outer carton.

Slide out back corner posts (2).

Slide carton off top of cabinet.

NOTE: IT IS NOT NECESSARY TO LAY CABINET DOWN IN ORDER TO REMOVE SKID!

CAUTION: DO NOT lay this unit on its back. PRUDENCE: NE PAS mettre cet appareil

ménager sur son dos.

CAUTION:

DO NOT ATTEMPT TO ROLL

UNIT OFF SKID.

PRUDENCE:

IL NE FAUT PAS ESSAYER DE

FAIRE ROULER L’ APPAREIL

MÉNAGER POUR L'ENLEVER

DE LAY PALETTE.

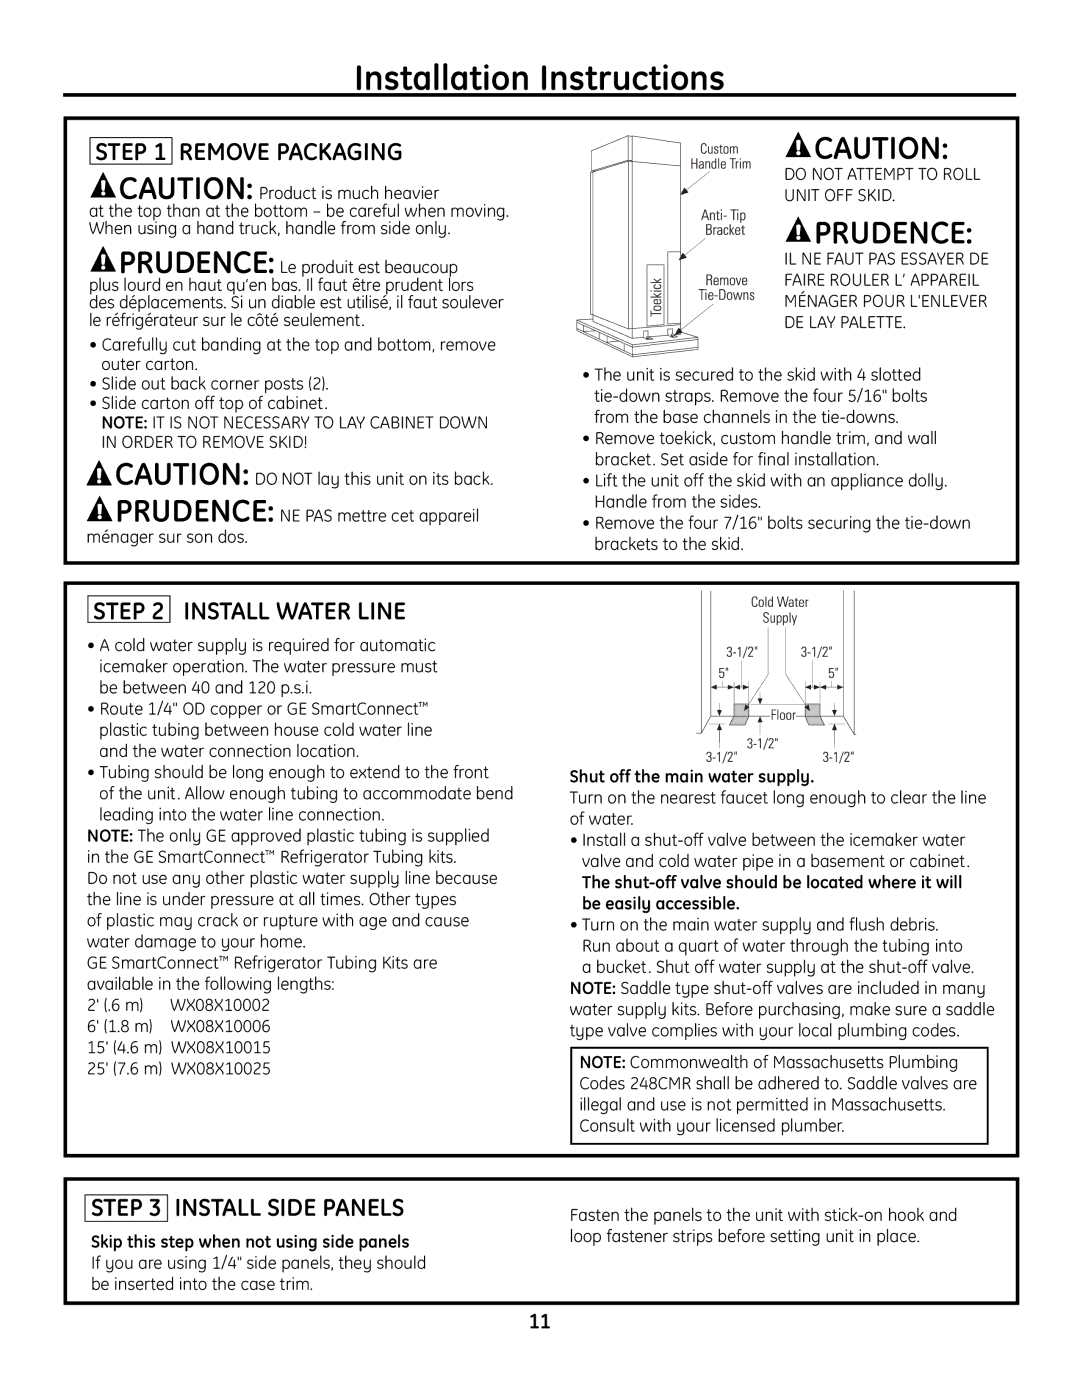
The unit is secured to the skid with 4 slotted tie-down straps. Remove the four 5/16" bolts from the base channels in the tie-downs.

Remove toekick, custom handle trim, and wall bracket. Set aside for final installation.

Lift the unit off the skid with an appliance dolly. Handle from the sides.

Remove the four 7/16" bolts securing the tie-down brackets to the skid.

STEP 2 INSTALL WATER LINE

A cold water supply is required for automatic icemaker operation. The water pressure must be between 40 and 120 p.s.i.

Route 1/4" OD copper or GE SmartConnectplastic tubing between house cold water line and the water connection location.

Tubing should be long enough to extend to the front

of the unit. Allow enough tubing to accommodate bend leading into the water line connection.

NOTE: The only GE approved plastic tubing is supplied in the GE SmartConnectRefrigerator Tubing kits.

Do not use any other plastic water supply line because the line is under pressure at all times. Other types

of plastic may crack or rupture with age and cause water damage to your home.

GE SmartConnectRefrigerator Tubing Kits are available in the following lengths:

2' (.6 m) WX08X10002 6' (1.8 m) WX08X10006 15' (4.6 m) WX08X10015 25' (7.6 m) WX08X10025

Shut off the main water supply.

Turn on the nearest faucet long enough to clear the line of water.

Install a shut-off valve between the icemaker water valve and cold water pipe in a basement or cabinet.

The shut-off valve should be located where it will be easily accessible.

Turn on the main water supply and flush debris. Run about a quart of water through the tubing into a bucket. Shut off water supply at the shut-off valve.

NOTE: Saddle type shut-off valves are included in many water supply kits. Before purchasing, make sure a saddle type valve complies with your local plumbing codes.

NOTE: Commonwealth of Massachusetts Plumbing Codes 248CMR shall be adhered to. Saddle valves are illegal and use is not permitted in Massachusetts. Consult with your licensed plumber.

STEP 3 INSTALL SIDE PANELS

Skip this step when not using side panels If you are using 1/4" side panels, they should be inserted into the case trim.

Fasten the panels to the unit with stick-on hook and loop fastener strips before setting unit in place.

11

Page 11
Image 11
GE Monogram Built-In All-Refrigerator/Freezer Remove Packaging, Install Water Line, Install Side Panels

Built-In All-Refrigerator/Freezer specifications

The GE Monogram Built-In All-Refrigerator/Freezer is a premium appliance designed to meet the needs of discerning home chefs and those who appreciate top-tier kitchen technology. With a focus on luxury, innovation, and efficiency, this model stands tall in the world of built-in refrigeration.

One of the standout features of the GE Monogram refrigerator/freezer is its spacious interior. With a generous capacity, it provides ample space for all your fresh and frozen ingredients. The adjustable shelving allows for customization to accommodate everything from tall bottles to bulk items, making organization simple and efficient. Additionally, its counter-depth design ensures a seamless integration into your kitchen cabinetry, offering a sleek, built-in look.

This appliance is equipped with the advanced Twin Chill™ evaporators, which create separate climates in the fresh food and freezer sections. This technology helps to maintain optimal humidity levels in the refrigerator while keeping the freezer dry, reducing the risk of freezer burn and preserving the freshness of frozen food.

The GE Monogram Built-In All-Refrigerator/Freezer also features advanced temperature management systems. With electronic controls, users can easily set and monitor temperatures for both compartments, ensuring that food is stored safely and at its ideal conditions. The integrated ice and water dispenser delivers refreshing water and ice at the touch of a button, enhancing convenience without sacrificing space.

Moreover, the unit includes a sophisticated filtration system that ensures clean, crisp water and ice, free from impurities. The LED lighting illuminates the interior beautifully, allowing for easy visibility of all contents, even in low-light environments.

Energy efficiency is also a hallmark of the GE Monogram model, with Energy Star® certification reflecting its commitment to reducing energy usage without compromising performance. This not only helps save on utility bills but is also environmentally friendly.

In terms of design, the Monogram refrigerator/freezer is available in a variety of finishes, including stainless steel, which lends a modern touch to any kitchen décor. The customizable panels allow homeowners to match the appliance with their existing cabinetry for a harmonious look.

With a thoughtful combination of features, cutting-edge technology, and a focus on user convenience, the GE Monogram Built-In All-Refrigerator/Freezer stands as an excellent choice for those looking to elevate their kitchen experience. It brings together luxury and practicality, making it the ultimate investment for any home.