Remove
Installation
G as Downdraf t Cooktop
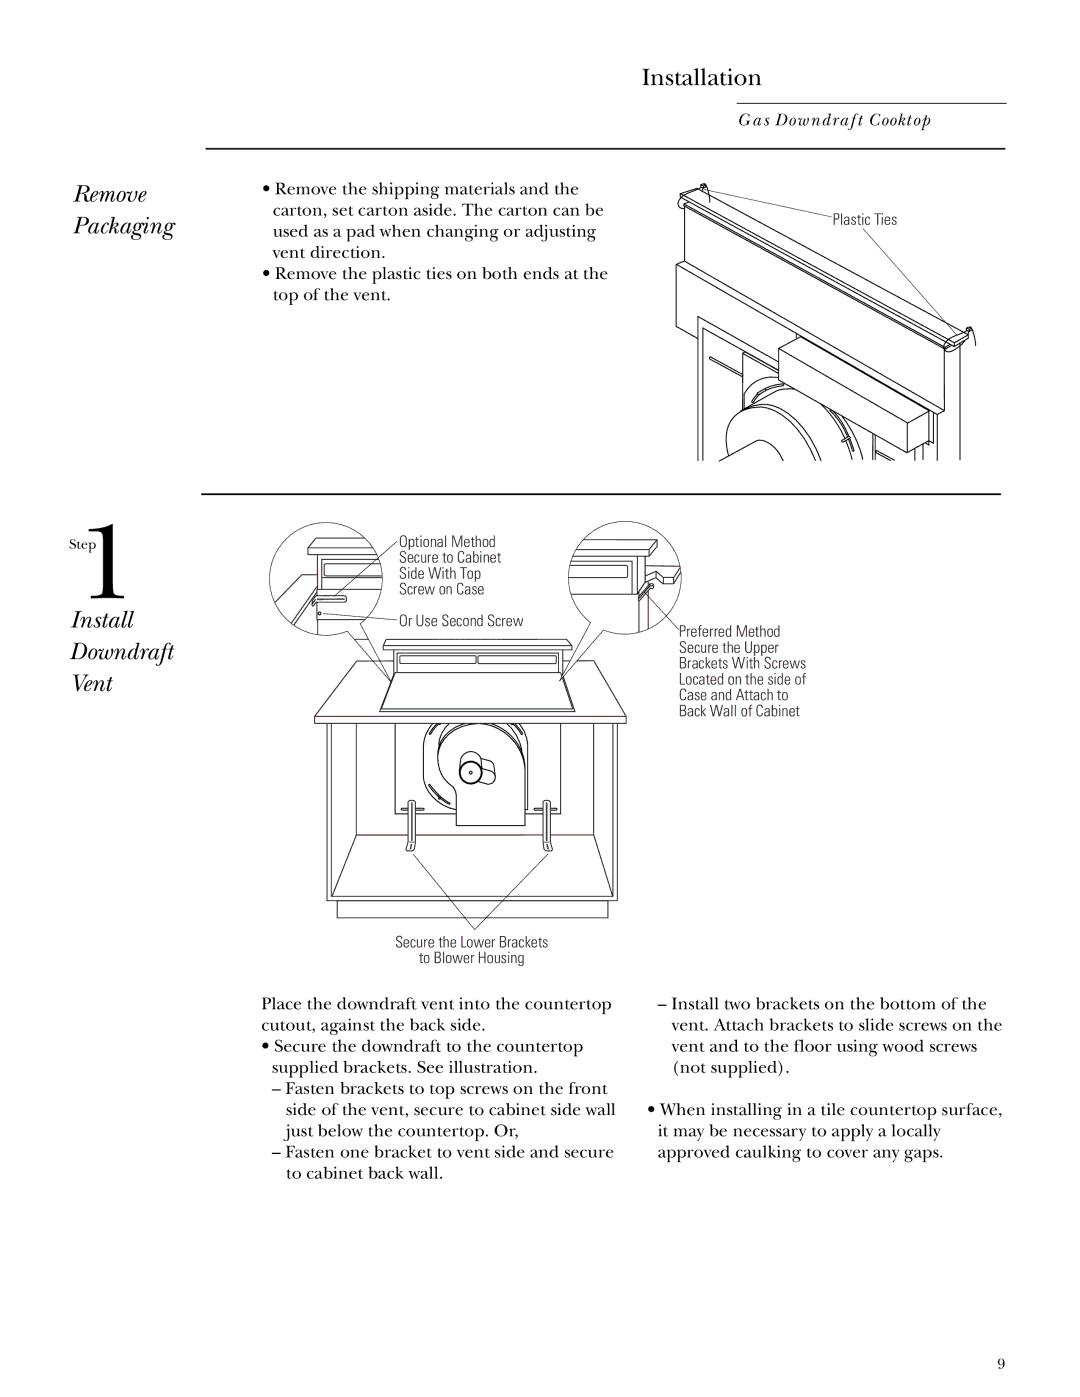
• Remove the shipping materials and the carton, set carton aside. The carton can be
Packaging
used as a pad when changing or adjusting vent direction.
Plastic Ties
Step1
Install
Downdraft
Vent
•Remove the plastic ties on both ends at the top of the vent.
Optional Method
Secure to Cabinet
Side With Top
Screw on Case
![]() Or Use Second Screw
Or Use Second Screw
Preferred Method
Secure the Upper Brackets With Screws Located on the side of Case and Attach to Back Wall of Cabinet
Secure the Lower Brackets
to Blower Housing
Place the downdraft vent into the countertop cutout, against the back side.
•Secure the downdraft to the countertop supplied brackets. See illustration.
–Fasten brackets to top screws on the front side of the vent, secure to cabinet side wall just below the countertop. Or,
–Fasten one bracket to vent side and secure to cabinet back wall.
–Install two brackets on the bottom of the vent. Attach brackets to slide screws on the vent and to the floor using wood screws (not supplied).
•When installing in a tile countertop surface, it may be necessary to apply a locally approved caulking to cover any gaps.
9
